Posted on 1 Comment

A Fun Card with Silhouette

Have you been joining in on the Silhouette and Michael’s free Zoom classes?

I have and I am loving them!

Blog post written in Silhouette Studio v4.3.372
Affiliate links may be present in the following blog post and as an Amazon Associate I earn from qualifying purchases.

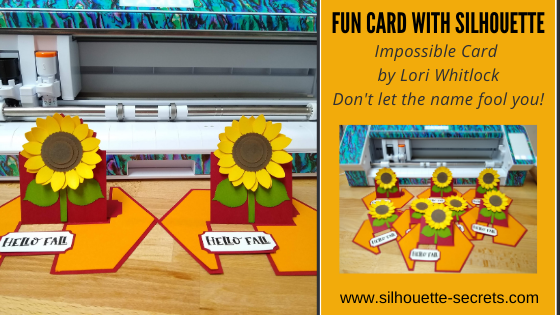
This weeks class was with Lori Whitlock and she showed how to cut and assemble the Impossible Card SunflowerDesign #330051.
Don’t let the name trip you up! They are pretty easy to assemble!

I thought I’d share a few tips that I like to do when I’m working with cards or projects like this.

Tips

Cut multiples of the Design

When I’m working with something like this, especially cards that have multiple pieces to cut, if I can fit more than one of the main card piece on a sheet of 12″ x 12″ cardstock, I’ll cut multiples out.

Since I am already cutting one out, it is not much more effort to cut a couple extras. Whether I assemble them all at the same time or set them aside for later, I will have the cutting part done.

Cut material down to the size needed.

By cutting the material down to the size I need, I can fit multiple colors onto the cutting mat to cut it all at one time and it can save the adhesive on the cutting mat as well.

How does this save the adhesive on the cutting mat?
Yes, there is still cardstock covering most of the cutting mat.
However, by cutting it down to the size I need in each color, I am only placing it on the mat one time versus putting 3 full sheets of cardstock on the cutting mat and removing it after each cut.
That right there will add a bit more life to your cutting mat.

For more tips on getting the most out of your cutting mats click HERE.

How do you know where to line up the colors?

I use the Transparency slider on the Page Setup Panel to reveal the grid of my cutting mat so I can line up the design and see where I need to place the cardstock on the cutting mat.

If you are using a Silhouette cutting mat, the grid on the cutting mat lines up with the cutting grid on the Silhouette software if the cutting mat is loaded properly.

Use the Textured Cardstock setting

I use the Textured Cardstock Setting to cut almost all cardstock. However, I do prefer to cut smooth cardstock as textured can be more of a headache to cut because of that textured surface. That does not mean you cannot cut textured cardstock, however, it may not always give you the clean cut you want.

Now, not all cardstock is the same so the best thing you can do is a Test Cut. My go to cardstock is Recollections brand from Michaels or Close to My Heart cardstock.

Test cut, Test cut, Test cut!!!

Why did I say it 3 times? It is one of the most important habits that you can get into when cutting on the Silhouette. This will save you a lot of time and wasted materials if you start with a test cut anytime you are using a new material or changing materials.

You can use the Test Cut feature in the software that is located at the bottom right corner of the Send tab.

Or my preferred method is to type out a capital B and move that around on my design mat as needed.

Why a B?
There is nothing magic about a capital B and it doesn’t have to be a specific font, the default font is fine. A capital B has straight lines, corners, and curves. This makes it perfect for seeing how the settings and your blade will work for the material you are cutting.

Keep a dedicated cardstock blade

Keeping separate blades for each materials can help the blades last longer. Different materials dull the blade at a different rate. It is just like having separate scissors for fabric vs paper.

Add designs for future projects to a print and cut page

If there is a print and cut aspect to the project, add more designs onto the page to fill it up. Set those extras aside for when you get a chance to cut out the pieces for those cards.

I cut 8 of the Impossible Card Sunflower design but still had extra space on the print and cut page so I looked in my library for future cards I might make and had 2 more of the Impossible cards. I opened each file and then copied the sentiment from the file to my print and cut page. I cut several of each to fill up my page. Now my print and cut portion is done for those future projects. Make sure to keep them some place safe that you remember for later.

For more tips on print and cut check out these two posts:
Print and Cut Basics
More Print and Cut Tips

and my final tip for the day….

Take advantage of these free Zoom classes hosted by Silhouette and Michaels.
When you join the call, come to pick up the tips and tricks from the instructor.
Watch the video and soak up the creative energy and then later create the project!
I wouldn’t recommend trying to create at the same time as the class. They are typically quick, 1 hour classes and it is hard to keep track of it all at once.
Don’t forget that you can come back and watch the replay after it’s posted.

Check out this video on Michaels YouTube channel HERE.

I am loving these Zoom classes to connect with other Silhouette users and spark that creative energy again. This has been an interesting year and at least this is one good that has come out of it – more online classes.

Find Lori Whitlock’s designs in the Silhouette Design Store or on her website HERE.
She is an amazing graphic designer and has some awesome cut files!
And you will find that she has a wide selection of tutorials to go along with those cut files HERE.

I hope these tips have helped give you some ideas on how you can be more productive with your Silhouette machines.

What are you creating with your Silhouette? I’d love to hear!
Feel free to post photos or questions on my Facebook group at 
Silhouette Secrets with EllyMae.

Save this for future reference by pinning the image below.

Enjoy!

SS Logo snip it
**This post may contain affiliate links. What that means is that I may receive compensation if you purchase through the links I have provided. The price you pay for the product or service is not higher but I may get compensated for sharing.

Posted on Leave a comment

Layered Mandala Paper Decor

Just a quick post to share what I had to create this week.

Affiliate links may be present in the following blog post and as an Amazon Associate I earn from qualifying purchases.

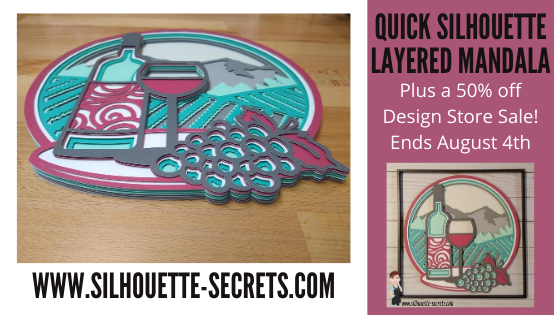
This Wine Scene Vineyard Multi Layer Mandala design by Doesjie , jumped in my cart.
It can be found at Design Bundles or Creative Fabrica,
When my youngest came downstairs to see what I was doing, she said “That is so you!”.
They know me so well!

This layered mandala is cut from 8 pieces of cardstock and is 11″ wide.

I used 3-D foam tape to stick the layers together to give it dimension.

I was so glad that I ordered some new 3-D foam tape to try as this was a large design and took a bit. Here is the pile of backing off the tape after I finished.

So far I am loving this Double Sided Foam Tape I bought in bulk – find it HERE on Amazon. There are several sizes available but I think it works great for large projects like this that require a lot of dimension.

For more tips on cutting and assembling layered mandalas check out this post HERE.

Now I’m off to find the perfect background paper for this design to place it in a shadow box.

For more 3D Designs by Doesjie check out their store at:
Design Bundles
Creative Fabrica

Save this for future reference by pinning the image below.

Enjoy!

SS Logo snip it
**This post may contain affiliate links. What that means is that I may receive compensation if you purchase through the links I have provided. The price you pay for the product or service is not higher but I may get compensated for sharing.
Posted on 1 Comment

Let’s Explore – 3-D designs with Silhouette

I love creating 3-D design with Silhouette!
However, taking a 2 dimensional cut file and then assembling it into a 3-D project can be a bit intimidating. And I’ll tell you that for anyone, even experienced users, not all projects work the same each time. But, I’ll show you a few tips on how I assemble a design today.

Affiliate links may be present in the following blog post and as an Amazon Associate I earn from qualifying purchases.

First, let’s start with the design. I needed a small pinecone for a project, so I chose this Pinecone 3D Miniature file by Snapdragon Snippets – Design #279267.

The first thing I do is look to see if the designer has included a link to instructions for the file. Not all designers do, but in this case, there is an instructions button to click on.
Find those instructions HERE.
The link includes instructions for several of the 3D files that can be combined to make up a whole decor project. Today, I am just using the pinecone, so I scrolled down to those instructions.

I assembled the original pinecone exactly as those instructions showed.

But, I need my pinecone to be a LOT smaller. At first, I was feeling bummed that it wasn’t going to work for my project. Even though this design turned out exactly as it was supposed to, it didn’t work for my purpose. I just wasn’t sure that I could make it smaller and still get it assembled properly.

What did it take to change my mind? A quick discussion with my husband, 1 comment from a member of my Facebook group, and a nights sleep – where all I did was think about this project. By the next morning, I was itching to try it again.

One of the great features of the Silhouette software is the possibilities are pretty much endless! Want a smaller design, no problem!

Using the Scale option, I can take the original design and decrease the size. I knew I needed small scale, so I tried 33% of the original size. This is found under the Transform Panel – Scale Tab or at the top of the software in the Quick Access Toolbar.

For the “baby” miniature pinecones, the center stem and the spacers were not going to work or be needed at that size. I right clicked on the design and ungrouped it, then deleted the pieces I did not need to cut.
Make sure to delete the numbers and text that is not needing to be cut.

With all the numbers and text removed, I moved the pieces around on the cutting mat to cut out of cardstock.

Then I cut this out of a brown cardstock using the Cardstock Textured setting. I find this works well for me on almost all cardstock. I do prefer to cut smooth cardstock as textured can be a bit of a headache.

Check out this video on cutting and then assembly of the pinecone at 33% of the original size.
Note the video speed has been increased for cutting and assembly.
More tips following the video.

Tips for cutting & assembly

Cut the cardstock down to size.
I use a paper trimmer to cut all my materials down to size, so then I am only using the adhesive under the area of my design and not peeling a full sheet of material from the cutting mat. I find that this saves my adhesive on the cutting mat and makes my mats last longer.
More tips to getting the most out of your cutting mats HERE.

Adhesive
The right adhesive can make all the difference!
For the original 3-D Pinecone Miniature Design, I used a clear, liquid glue called Liquid Glass.
But, for the file reduced to 33% of the original size, I used hot glue. This helped for both adding a little bit of space between the layers to give the “baby” pinecone dimension as well as gluing it together.
When using the hot glue, thread the piece onto the wire first before applying the glue or it can cool before you get it in place.
I bought this fine tipped SureBonder hot glue gun and love it.

This fine tip glue gun made the “baby” pinecones achievable.

Sticky cutting mat
If your finding that cuts are not connecting or pieces are peeling up, you might want to try a new cutting mat after desticking it a bit.
You will notice in the video above, that I had 2 spacers that did not cut right and it was because my mat was very well used and the cardstock did not stay stuck down.
I find that this can be a big issue when cutting lots of cardstock.
While my mat may “feel” sticky to me, it may not be good enough to hold down all the pieces of the cardstock while it’s being cut, in order to connect the cuts.
If that cardstock moves at all, it may lead to a mis-cut.

Recut pieces as needed
To follow the sticky mat, you may need to re-cut a piece or two here and there. That is not a bad thing. I just copied what I needed and moved it to a new area on my cutting mat and re-cut it. I did cut a couple extra… just in case!

Don’t give up!
If you have never done a 3-D design before – try it out!
If you have tried one and it didn’t work out – try again!
I will fully admit that the first one I made, turned out great, but it was too large for what I needed. It took a little advice & rethinking to reduce the size and alter the design for my purpose.

Here are the babies.
This is the original 3-D Miniature Pinecone file reduced to 33% of the original size.

3-D Miniature Pinecone by Snapdragon Snippets
Evergreen Sprigs by Snapdragon Snippets

And here is the original 3-D Pinecone design along with the “babies”.

I have a very special project for this coming up and cannot wait to show you.
Stay tuned for that!

The Silhouette Design Store has an entire section dedicated to 3-D designs. Keep in mind, just like any site you get files from, some are more complex than others.
There are some that even as an experienced paper crafter, I have yet to tackle.
One of these days I will conquer this LowPoly Paperman, but for now, he will stay on my future to-do list. The biggest thing that these designs take is … time.

Want a few suggestions to get started on 3-D files?

Try a rolled flower such as Design #225639 by Lori Whitlock.

Check out this tutorial on Lori Whitlock’s site for tips on assembly HERE.
I find the first time you do this, you may not think you like it, but the more you do it, the better it gets.

Another flower type is one that the petal layers are stacked on each other, like this
Poppy Flower by Echo Park – Design #249937.

A Favor Box by Lori Whitlock – Design #237376.

Or a layered card like this Dragonflies Shadow Box Card by Carina Gardner –
Design #320338.

Whatever you choose to get started, just get started!
And I would love to see what you create.
Feel free to post photos or questions on my Facebook group at 
Silhouette Secrets with EllyMae.

Save this for future reference by pinning the image below.

Enjoy!

SS Logo snip it
**This post may contain affiliate links. What that means is that I may receive compensation if you purchase through the links I have provided. The price you pay for the product or service is not higher but I may get compensated for sharing.
Posted on 10 Comments

Layered Mandala files in Silhouette

Have you seen the layered mandala files that have started circulating?

They are becoming extremely popular and I’m hooked!
Coming into the Silhouette world, I was a papercrafter. What am I saying? I still am a papercrafter, but now I have so many other materials I use as well.

These layered mandalas are pretty simple to cut and assemble.
Of course, that is designer dependent.

While I was browsing Pinterest one night, I pinned this to my future Silhouette projects and it came up in my Facebook group this past week.
So that means it was time to grab these files and create!

This is a free layered mandala alphabet svg file by Special Heart Studio.

Now, there are 2 things I want you to do.
1. Click HERE to go to Pinterest & pin this file so you don’t lose it.
2. Go grab these FREE svg files directly on the Special Heart Studio website.

Now, that you have the files. Let’s take a look at how to use them in the Silhouette software.
Like I said above, it’s pretty easy with these files the way they are created.

Make sure to download the files HERE and then open the svg file.
Don’t know how to open the svg file?
Click HERE for the detailed instructions on how to unzip and open downloaded svg files.

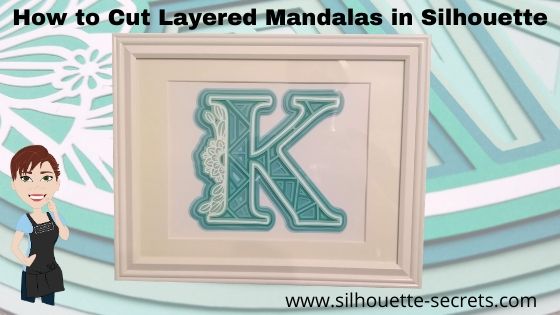
Letter K Mandala file by Special Heart Studio

When the file opens, all of the layers are ungrouped.
Select the entire design and you will see the selection box around each of the layers.

If the file is grouped together, right click on it and then choose Ungroup to separate the layers.

Draw a rectangle on the left side of the cutting mat in the gray holding area.
I am working with a frame that is for a 8″ x 10″ photo.
Using the Transform Panel – Scale Tab, change the dimensions to 8″ wide by 10″ high.

I am using this 8″ x 10″ rectangle to size my design so I know it will fit in the space I have in my frame.

Next, select all the of the layers of the design.
Left click in the top left above the design, hold the left mouse button down, and drag it across the entire design to the bottom right.
This will select any object that the mouse cursor touches.

Move the design into the drawn rectangle on the left side. With the entire design still selected, use the corner bounding box to scale the design down to fit inside the rectangle as you chose.

Once you have the size you want, you are ready to start cutting the layers.

I started with the bottom layer and worked my way up.
Grab the layer you want to cut and move it to the top left corner of the cutting mat.

I use the Transparency (reveal) option on the Page Setup Panel to see the grid lines of my cutting mat so I know how much material that I need for the design.

I grabbed some Recollections Paper packs from Michaels that work great for these projects and the different shades of color for the mandalas. Great quality cardstock and takes the guessing game out of me trying to match colors up.

Then I cut my material down using my paper trimmer to the size I need. I find that this helps to save the adhesive on my cutting mat, which makes it last longer and gives me scraps of material that are even sizes for future projects.
More tips on getting the most out of the cutting mats HERE.

Load the cutting mat into the Silhouette machine.

Click on the Send tab in the top right corner.

Choose Cardstock Textured as the material. I use this setting for cutting almost all cardstock and it works well. While the Silhouette can cut textured cardstock, I prefer to cut smooth as it is much less of a headache. Depending on the textured nature, it can be a bit more finicky to get clean cuts on.

Click Send in the bottom right corner and watch it work.
After the cut is complete, unload the cutting mat, flip it over and peel the cutting mat from the cardstock. This will help it to release from the adhesive.

Click back on the Design tab.
Move the first layer off to the right side and grab the next layer to cut and place in the top left corner of the design mat.

Click back on the Send tab and verify that the Material has not changed.
Place the next color cardstock on the cutting mat and load it into the machine.
Then click on the Send button in the bottom right corner of the Send tab.

Repeat this process until all layers have been cut.

*Note: as you cut a lot of cardstock, you may find that your not getting as clean of cuts. This can be due to the blade getting duller. As the blade dulls, you can increase the blade depth or force if necessary to get a clean cut. I have used this blade to cut lots of cardstock and during these cuts, I did increase the blade depth by 1 to get a cleaner cut.

When you get to the top layer. Notice that it is a bit more intricate of a design. I turned on the Overcut feature to help with this.
To learn more about what the overcut feature does click HERE.

I found that this gave it a bit cleaner cut on the corners for the top layer of this design.
With the top white layer, be gentle with it getting it off the cutting mat and take the time to carefully remove the cut pieces from the design. I promise it will be worth it.

Once all the pieces are cut, you are ready to assemble.
Since the top layer was rather intricate, I used a Broad Tip Glue pen from Close to My Heart to add adhesive to the backside. Then I glued it down to the first color.

Then I used foam tape to add dimension between the layers.
I used the Thin 3-D Foam Tape by Close to My Heart since I was putting it in a regular frame, I didn’t want to add too much thickness to it, but I still wanted it to have some dimension.

And then sometimes, even when you think you have the right size and you use a rectangle to draw out the size of space you have, don’t always assume the frame/mat is the size it says.
Turns out that my K was just a bit too wide. I should have measured to double check and after cutting the first layer, looked to see if it would fit.

But, I turned it and it fit perfectly the other direction in this frame. If it had not, it wouldn’t have been a lost cause. I would have just reassessed the game plan.

I love the dimension on this!

Once you start, it is hard to stop. I grabbed another layered file from Special Heart Studio for a layered floral heart mandala and started cutting using the same steps as above.

I am loving all the detail and dimension on these layered mandalas.

These layered mandala designs are picking up in popularity and I am seeing them all over Pinterest and Facebook group. Grab one and play today!

If this is a little too much to get you started with cardstock, check out the free card cut file I shared last week on the blog HEREFancy Fold Flip Card.

I would love to see your Silhouette projects!
Feel free to post photos or questions on my Facebook group at 
Silhouette Secrets with EllyMae.

Save this for future reference by pinning the image below.

Enjoy!

SS Logo snip it
**This post may contain affiliate links. What that means is that I may receive compensation if you purchase through the links I have provided. The price you pay for the product or service is not higher but I may get compensated for sharing.
Posted on 7 Comments

Creating cards with your Silhouette

 I started my Silhouette journey as a paper crafter and that still has a big part of my heart. I love to play with paper and creating all kinds of projects with it. There is so much that can be done with the Silhouette but I feel that’s it’s just hard to do it all. And just like anyone else, I get a bug and have to go back to my roots.

I am also a Close to My Heart consultant and have been since right before we moved to Virginia 4 years ago. Gosh, I can’t believe it’s been that long. But I love to be able to combine the two. Close to My Heart has a great quality card stock and I love stamping as well.

So this year, I saw a card kit in the catalog and I just “had to have it”. Why? Who knows? But, it spoke to me and all the supplies to create it jumped in my cart.
That doesn’t happen to anyone else, right?

CTMH card kit.JPG

So this card kit has no Silhouette cuts in it. I didn’t use the software. I actually used the metal die Thin Cuts that come with the card kit and ran them through my Cuttlebug (although an svg file would be much easier if it were available).
So why am I writing about it?

IMG_20191205_105929398 copy

Well, even though I did nothing with my Silhouette for these cards, it gave me some creative inspiration. To be honest, I had hit a little bit of a slump.
I was testing & things weren’t going peachy, which can be frustrating.
So, I got busy doing, got busy creating, just followed the directions, and went with the flow. My kit arrived 2 days earlier than I expected and I dropped everything (including household chores) and started cutting, stamping, and assembling.

It took me longer than I thought to assemble the kit, but that was also because I thought it would be a great idea to make doubles. If I could make 15 cards, I might as well do 30 to send out. It always sounds like a good idea at the the beginning.

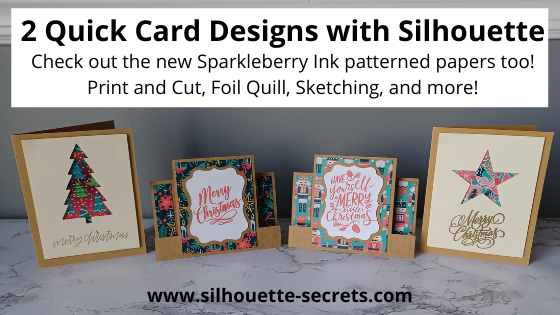
But one thing I do know, while I was working I was getting ideas of how to use these papers with my Silhouette and create a fold card design in the software. This was a design I had cut by hand a few years back when I was making card kits for my CTMH customers. I wasn’t focused on trying to come up with the ideas from scratch, they were just coming to me. All of a sudden it was “What about if I use these papers with my Z fold card design & stamp the images for the card?” or “What if I use a print and cut image on the front of the card?” and then “What if I created the file to give away?”
And it was back… that creative spark!

IMG_20191205_105313795 copy

And then one thing leads to another, the creative spark lights a fire. I remembered I had this little guy I had been saving to do Christmas Cards with for a long time.

I used the Print & Cut feature to cut out several Moose in Sleigh Christmas designs that would fit right on the front of the card.

Print & Cut Moose copy

This is Moose In Sleigh Christmas Print and Cut by Stinkin Cute Paper Piecings – Design #50960. And I have to admit, I have found him “stinkin’ cute”.

My new Cameo 4 registered and cut this design out beautifully.

IMG_20191204_141554050 copy

Adding it on to the front of this Z-fold card worked great!

IMG_20191205_105329983 copy

But maybe you don’t have time to create Christmas cards this year. That’s ok grab this FREE cut file below and create cards for all occasions throughout the year.

IMG_20191205_105338514 copy

I used Happy Birthday Layered by Deborah Stine – Design #57087 and turned the cut lines off, changed the color to match my patterned paper, set it up as a print & cut with the center front rectangle around it.

For more information on setting up a Print & Cut project check out Print & Cut – Part 1, Part 2 – Text, and Part 3 – Images.

Now, if you are still with me. Let’s get down to it – the FREE cut file. I hope this gets you excited to create your own cards.

Grab the FREE Z-fold cut file for this card HERE.

When you open the card file all of the pieces are stacked on top of each other so you can see where the pieces will be adhered after cutting. Move the pieces off and position them on the design cutting mat to cut each piece out. When I am cutting cards or layered designs, I like to cut several at a time and then I can sit and assemble them later while watching tv or when I just need a break.

Zfold card photo copy

Once all your pieces are cut, check out this video with tips to assemble the card.

This free z-fold card file was created by me completely in the Silhouette Studio software. I measured, drew rectangles, added score lines, and drew more rectangles to create the design. This is available to you for your own personal use and I hope that you enjoy creating with it.

I think we all hit a “creative block” sometimes and it is just good to stop and just create. Do something you love. Make something you’ve had on your list for awhile. Especially as we all go into this busy time of year, we can feel overwhelmed. Whether it’s because you just came out of an event, have continuous events going on, are filling orders, or just creating gifts for friends and family – stop and take a few moments for you today too! Whether that involves using your Silhouette or starting a project without it.
You never know when a creative idea will hit!

Now, off to get these addressed and mailed out for this year.

I would love to see what you create with this Z-fold cut file or any of your Silhouette projects that are bringing you joy today!

Feel free to post on my Facebook group at Silhouette Secrets with EllyMae.

Enjoy!

SS_Signature copySS Logo snip it

**This post may contain affiliate links. What that means is that I may receive compensation if you purchase through the links I have provided. The price you pay for the product or service is not higher but I may get compensated for sharing.

Posted on 3 Comments

Cutting Cards with the Silhouette

I started my Silhouette journey as a paper crafter and it has expanded from there. But, I always still love getting paper out and playing with it.

I love being able to make custom cards and unique items with my Silhouette machines.

It was my husband’s birthday last month, so I needed a card.

This year, while I was shopping for the perfect card idea, he was upstairs playing on the xbox and this one popped into my view – Happy Birthday Circuitry by Snapdragon Snippets – Design #78049.

Design file

When you open this file, here is how it looks.

File open

The first thing I do is ungroup the file and then use the Fill Color Panel to add color to the design to make it easier to work with.

Color fill.JPG

Now, I place one color on my mat, move the pieces of the design onto the virtual design mat and cut that color. Then I move those pieces off the virtual design mat and move another color on to cut, until I have all the pieces of my card cut out for assembly.

Normally, I don’t use a spray adhesive but this time, I thought it would be perfect since the card front had so many twists and turns.

IMG_6289

A quick spray and it was ready to smooth down on the card base.

It was the perfect time to test my new Portrait 2 out.

IMG_6290

I used Close to My Heart Cardstock, a Scrapbook Adhesive by 3L tape runner, spray adhesive and a silver brad to complete this card.

IMG_6291

There are so many projects you can complete using your Silhouette machines! I hope you try something new today!

I would love to see what projects you create! Feel free to post on my Facebook group at Silhouette Secrets with EllyMae.

Enjoy!

SS_Signature copySS Logo snip it

**This post may contain affiliate links. What that means is that I may receive compensation if you purchase through the links I have provided. The price you pay for the product or service is not higher but I may get compensated for sharing.

Posted on 1 Comment

Creating a shadow box with Silhouette

Everyone starts out with one material or another, mine was paper. I started with my Silhouette as a paper-crafter and it has grown from there.

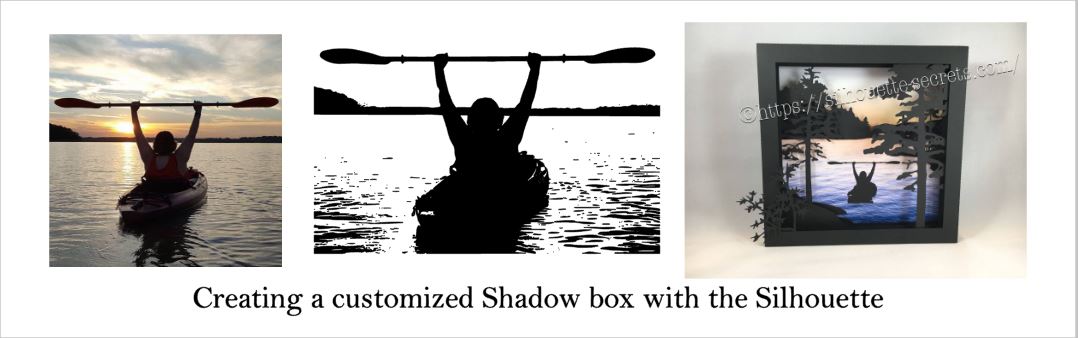
A while back I was visiting friends in Kansas and playing with the Silhouette and my friend asked if I could trace a photo for her that a friend took. Now, photo tracing can be tricky. Each photo can yield different results tracing in the Silhouette Studio and you just never know until you try to see what will happen.

In this case, it was a great photo to trace.

Bobbi's photo

Here is how the trace came out. I used Basic Trace panel to achieve this. Check out the Trace Panel HERE.

Photo trace

Then I released the compound path and deleted the water areas and used the point editing and deleting points to clean up edges and take out the skyline.

Cleaned up

Now, like I said above, each photo is going to vary in how it traces and this one turned out to be pretty simple with a little time for editing.

Then when I saw this Canoe at Sunrise shadow box in the Silhouette Design Store, I knew it was perfect for a gift that I could incorporate this trace into.

Design Store file

Instead of adding the canoe, I cut and added my traced image of my friend on her kayak. It was perfect!

Shadow box

I am one of those people who has to do a project pretty much exactly like the demo, at least the first time. So I did go to the designer’s website and purchase the file again – yes, sounds crazy – but I wanted the backgrounds for this particular project. However, you can use any background that you want and add it to your project.

What are you creating today? Feel free to post your project photos & questions on my Facebook group at Silhouette Secrets+ with EllyMae.

Shadow box

Enjoy !

THANK YOU for your support! How can you help? Click HERE & buy a coffee. Every little bit helps with the cost of running the site.

Looking for more in-depth, step-by-step classes, check out all of my online Silhouette classes on my Teachable site HERE.

SS Logo snip it

**This post may contain affiliate links. What that means is that I may receive compensation if you purchase through the links I have provided. The price you pay for the product or service is not higher but I may get compensated for sharing.

Posted on Leave a comment

Ornament boxes with Silhouette

Today I took down the ornaments on our Christmas tree and as I was packing away some of the ones my children had made in school, I had a thought to use a file I purchased in the Silhouette Design store called an ornament box. So as soon as the rest of the ornaments were packed up, I headed into the Studio to create these boxes.

Now, I will say these were probably designed with the idea of using them as a gift box and not to be used as a secure storage container. However, for my purpose I think they will be great…..

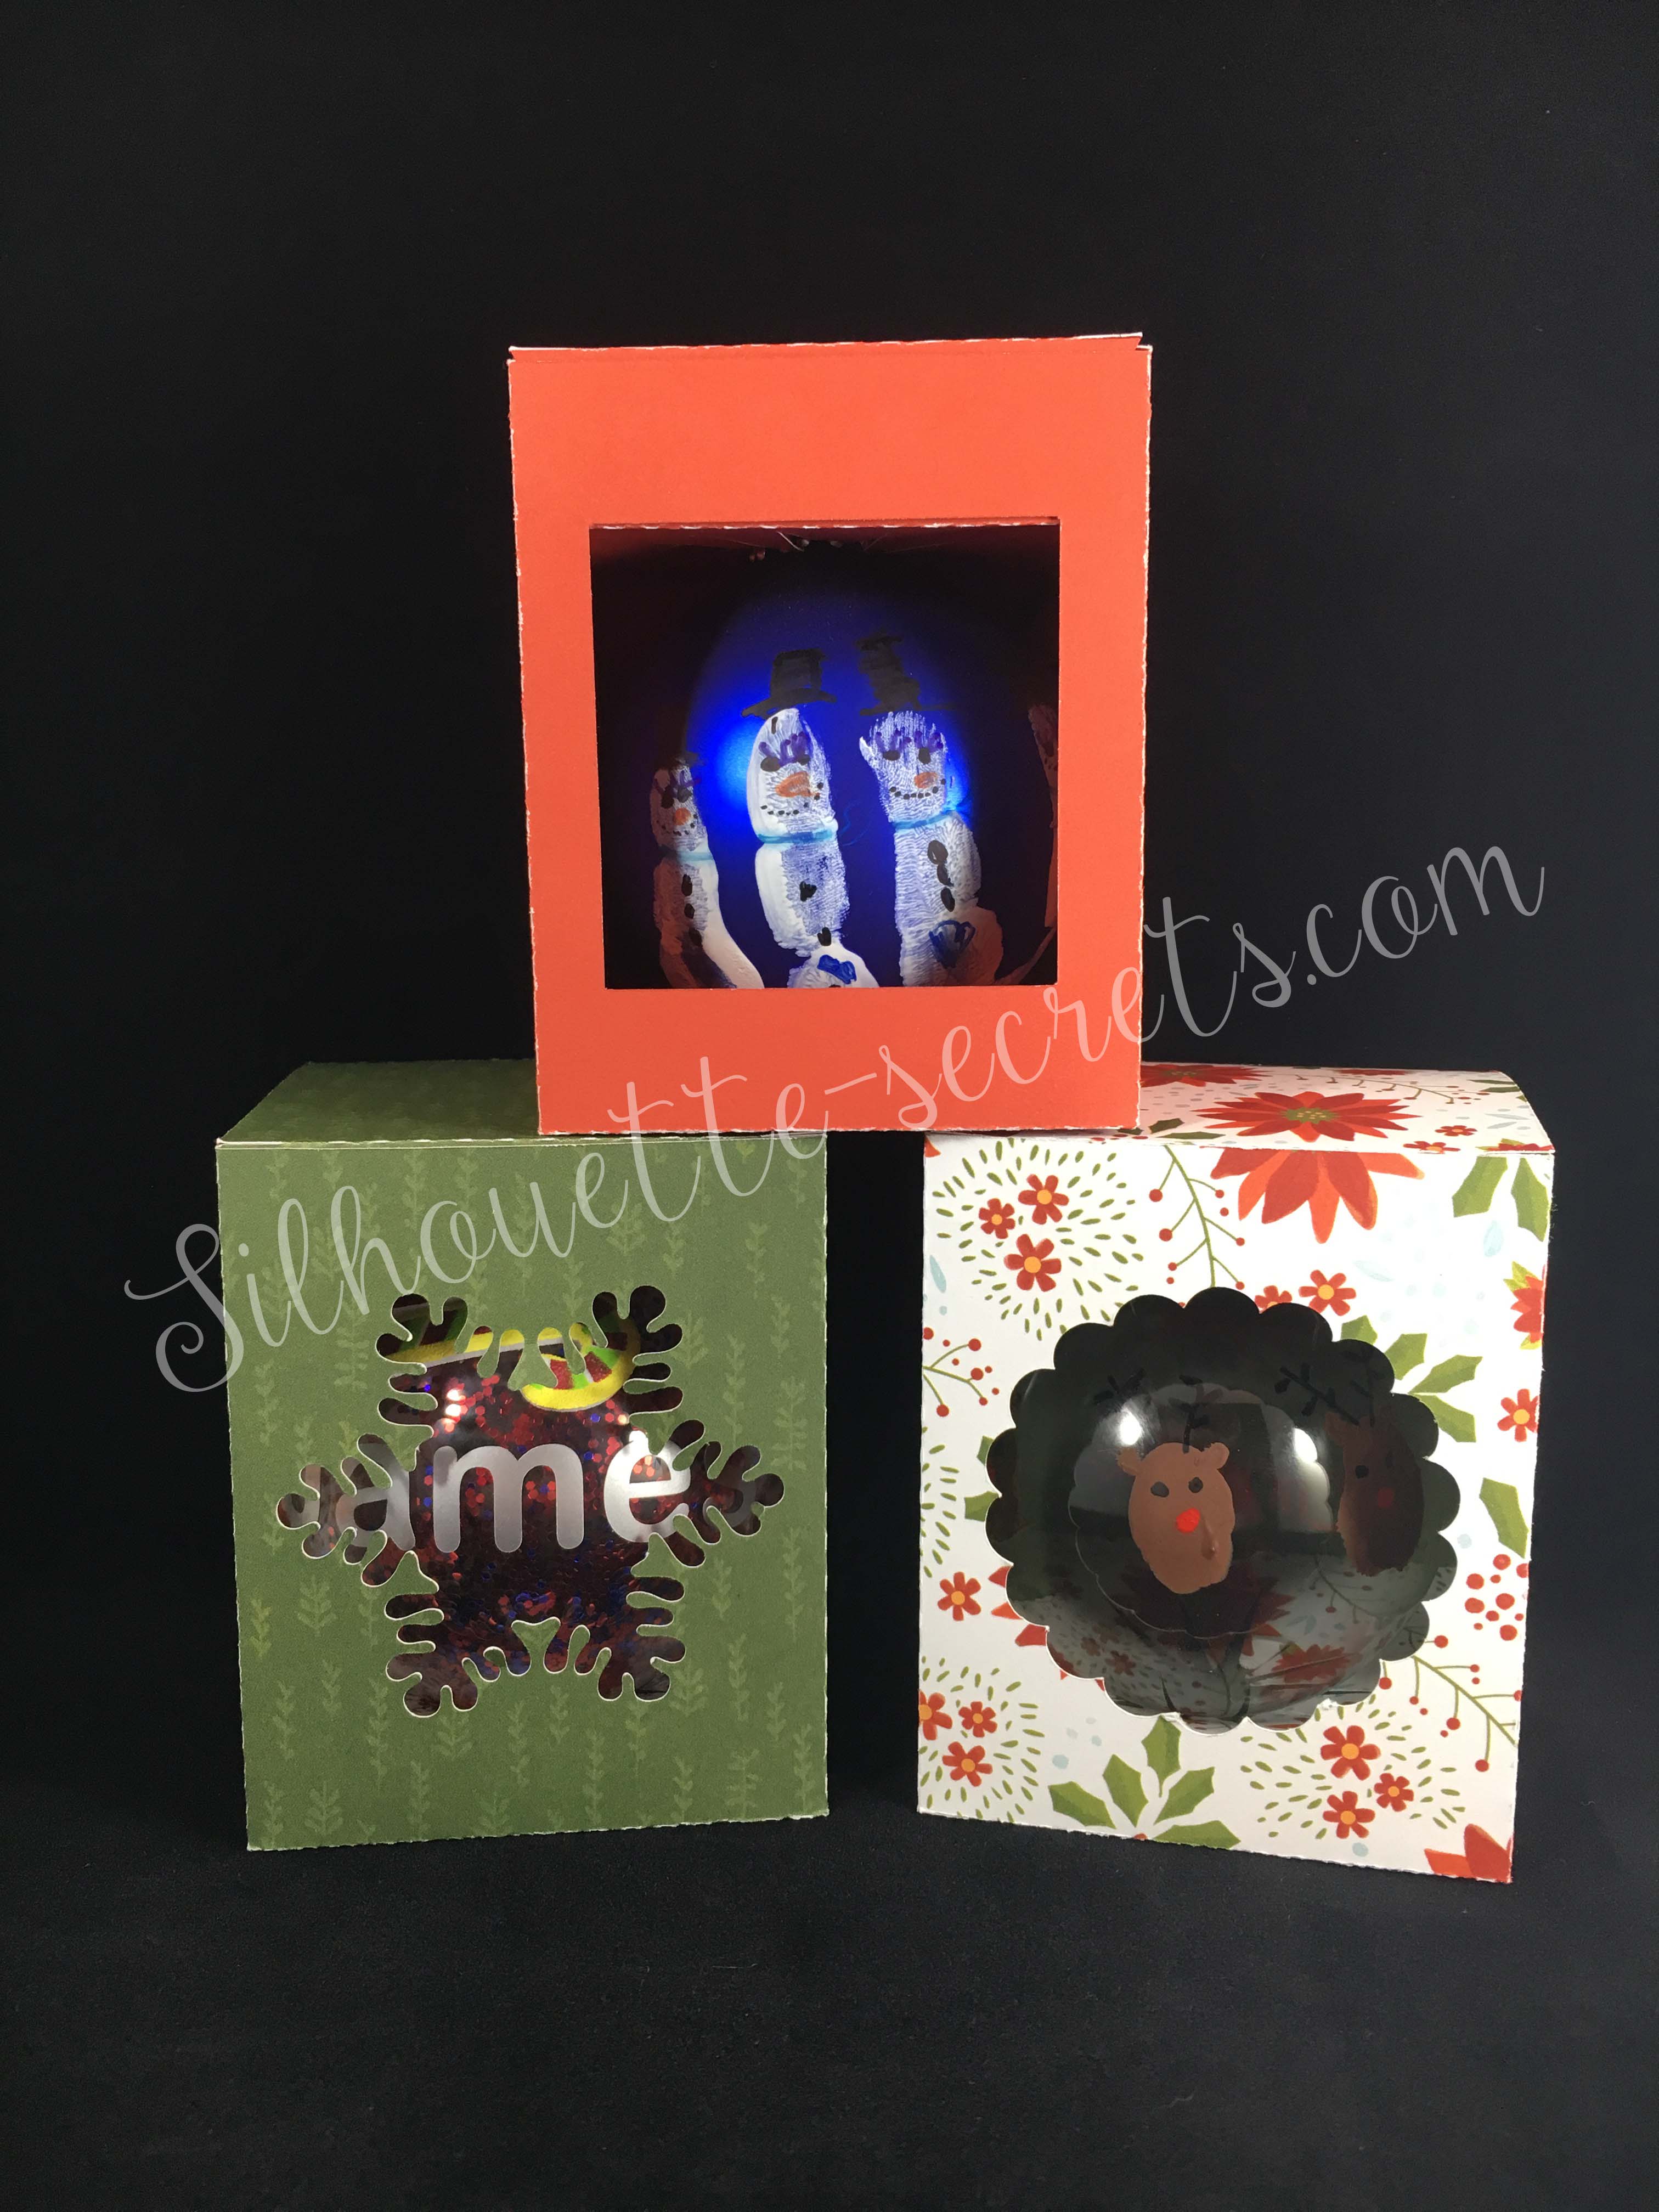
Scalloped ornament box

Above is the Scallop Ornament box by Samantha Walker. The Silhouette Design Store has many different styles of ornament boxes – find more HERE.

Now, what did I do….. I moved my design up a bit on my page & then go to my Send tab panel and select my Cut settings. That’s it – so simple!!!

Scalloped ornament box-cut settings

I chose Textured cardstock as my material (I cut almost all cardstock on this setting with great results), set my blade depth and click Test Cut. Yes, Test Cut!…. this cuts a small square with a triangle out of the center of it and let me tell you, it will save you so much material!!! If it doesn’t cut correctly, you can make adjustments to your settings or blade depth before you cut the entire design.

IMG_1358

After you have cut your design out, flip your mat over and peel your mat away from your material. This is a good practice to get in to for many reasons. I find that it helps my paper not to curl as bad and it also helps keep the adhesive on the mat longer. If you pull your paper or vinyl off the mat, it can bring up some of that adhesive with it.

Cutting comparison copy

On my second box, shown on the left, I noticed that my blade was not getting a crisp cut. Normally, I would recut this, but since I’m cutting for the purpose of my own storage box, I left it. However, I knew exactly how to fix it. A new cutting mat! Yes, as easy as that. The mat I was using with the one on the left (green) was well used and even though it felt sticky enough, if that cardstock moves even just a little bit, it can make your blade tear the cardstock. So when I went to cut my 3rd box, I pulled out a new mat and look at the difference on the right side (red). I changed nothing else, except using a new mat and it made such a better crisp cut. If you are having cutting issues and your mat is well used, even if you think it’s sticky enough, just try it – get a new mat out and see what the difference is. I do de-stick my mat a bit when I first open it by applying it to a clean cotton t-shirt a time or two before I stick my cardstock down on it.

If you are looking for a new mat or other Silhouette supplies, check out the prices at Swing Design – I always price check there first and they usually have the best prices. Plus, free shipping on orders over $35.

IMG_1359

Above are all the pieces of this box….. 3 – yes 3! And do you know what is even better? There is only 1 tab that needs to be glued together. It’s so simple and a great project for a beginner.

IMG_1361

I am a big fan of this liquid adhesive called Liquid Glass for any 3-D project. It is made by a company called Close to My Heart who is a papercraft & stamping company. I find just a little amount of the glue goes a long way and then I hold it together for the count of 10 and it’s stuck pretty good. You can find it HERE on my website.

Now, I purchased both the Scalloped box and the Snowflake box and here are my completed boxes cut with the same double sided paper. I used the Beary Christmas paper from the Close to My Heart Holiday Expressions catalog. This expired tonight at midnight, so grab it quick – available while supplies last!

Ornament box altered -cut settings

And then I needed a 3rd box, so I decided to ungroup the original design, draw a rectangle that was the same dimensions as the snowflake and put that in for my 3rd box. This could be done with any shape that you would like to use. You can mix and match designs to your liking, but do keep in mind that it is the original creators file that you have used as your base.

And there you have it….. 1 cut, 1 tab glued and fold the box together. So simple!

There is a big sale going on in the Silhouette Design store right now, so pop on other there to grab this and so many others for 50% off.

IMG_1381_wm copy

I hope you enjoy your last evening in 2017 and I look forward to bringing you lots of new things in 2018!

Enjoy !

THANK YOU for your support! How can you help? Click HERE & buy a coffee. Every little bit helps with the cost of running the site.

Looking for more in-depth, step-by-step classes, check out all of my online Silhouette classes on my Teachable site HERE.

SS Logo snip it

**This post may contain affiliate links. What that means is that I may receive compensation if you purchase through the links I have provided. The price you pay for the product or service is not higher but I may get compensated for sharing.

Posted on 1 Comment

3D Lantern

As we are all thinking of packing away that Christmas decor, I thought I would share a 3-D project I made to add to my Christmas decor this year. I love working with paper crafts and 3-D items.

Affiliate links may be present in the following blog post and as an Amazon Associate I earn from qualifying purchases.

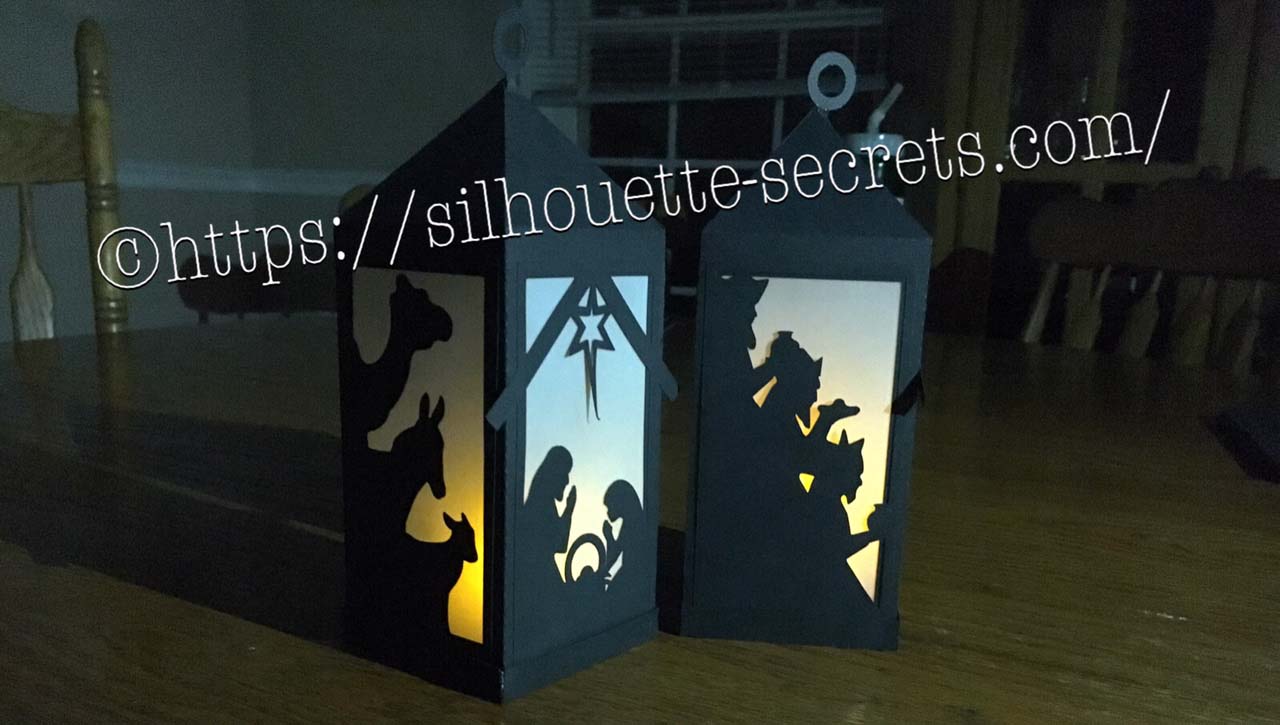
This 3-D Nativity Scene Lantern is from the Silhouette design store.

I have to say this file was pretty easy to work with. When you first open this or any layered design up, it may look a bit intimidating but I promise the more you play with them, the easier it becomes to turn it into a masterpiece.

Nativity Lantern copy

This design has 2 colors – the black for the entire 3-D box and the vellum papers for the “glass” of the lantern, so very easy to cut. First, you right click on the entire design and ungroup. This will separate all your pieces of the lantern out and you can move them around. Then, I will select the like items and group them back together. In this design, I grouped the bottom 3 rectangles back together because they will all be cut from the vellum.  Then I move my other parts around on my 12 x 12 design mat to get as many to fit in the space as I can. In this case, you can move the circle hangers to the middle of your cutout, as shown below, to get a little more use out of your cardstock or position where ever you want on the mat. It is really a personal preference how much you move them around to cut. I like to get as much on one page as possible to send it through the Cameo one time.

Nativity Lantern 2 copy

I then choose the Textured Cardstock setting and Send to cut on my Cameo. After it’s cut, I flip my mat over and peel it away from the cardstock. This helps with the paper not curling as much, keeps the adhesive on your mat and helps it release a bit better. Your Silhouette cutting mat is very flexible and can be rolled back quite a ways. That doesn’t mean they won’t crack, because they can – yep I’ve done that… but it’s was an old mat too…. so it had a lot of miles on it.

In the Silhouette Studio, I move the pieces I’ve cut off my Design mat and then move the other pieces on to the mat to cut them. Or you can copy and paste the designs that are off the Design mat to a new Design mat and cut that way. Either way works and I use both methods depending on what I’m cutting.

Now comes the assembly. These are all scored where you need to fold and then you glue into place. I use a liquid glue called Liquid Glass by Close to My Heart for most of my 3-D projects. You place a small amount along the length of where you are gluing and then I hold for 10 seconds. As long as you didn’t use too much glue, it has a pretty good hold after that 10 seconds. And then you want to allow the entire project to dry completely before using. You work you way around the design until it is all assembled together.

The designer, Jennifer Rush, has also included a link to assembly instructions in the description of the design. You can find those instructions HERE as well.

And now, here are a couple images of the finished project….

IMG_9953_cropped

There are so many cool projects and so little time to make them.

I encourage you to take a design for a spin. Try it out, play and learn as you go.

Now, these neat decorations will get packed away in a shoe box for safe keeping when the Christmas decor comes down this week.

I hope you enjoyed this project! Let me know what you have created below in the comments.

Enjoy !

THANK YOU for your support! How can you help? Click HERE & buy a coffee. Every little bit helps with the cost of running the site.

Looking for more in-depth, step-by-step classes, check out all of my online Silhouette classes on my Teachable site HERE.
SS Logo snip it

**This post may contain affiliate links. What that means is that I may receive compensation if you purchase through the links I have provided. The price you pay for the product or service is not higher but I may get compensated for sharing.

Posted on Leave a comment

Classroom decor

One thing I love about having my Silhouette Cameo is being able to help out my kid’s teacher’s with bulletin boards and other projects they have in the classroom.

I feel out teacher’s could use all the help they can get in the classroom and since I have little ones at home, I am unable to be in the classroom and volunteer, so I want to offer my help in other ways.

This year I have made a few things for my son’s Pre-K classroom including these decorations for the Dad’s Sports Night.

My love for the Silhouette started with paper crafts and has expanded to so much more, but I have not let the paper crafting go. I recommend having a separate blade for each type of medium you cut, such as vinyl, card stock, fabric, etc. I start my blade when it’s brand new as a vinyl blade and when it gets to where it’s not cutting as crisp, I graduate it into a card stock blade and just rotate it to a new job. When it gets to the point it’s not cutting well at all, then it’s time for a new one.

img_6101-1

Affiliate links may be present in the following blog post and as an Amazon Associate I earn from qualifying purchases.

I found a couple sports related images in the Silhouette Design store and just click buy and start cutting.

One thing that helps when cutting paper is having the right adhesive to glue things down. I love this Dual Action Glue Pen from Close to My Heart when I’m working with small detailed images.

img_6102

When working will really small details such as the baseball stitches I love the Xyron sticker maker. As you can see I don’t even use the little “X” part of the machine any longer… I just stick my object in the adhesive roll and pull it out the other end and use scissors to cut it off.

img_6103

For all the larger paper areas my favorite adhesive is this tape runner by Scrapbook Adhesive 3L.  It has been my go to for as long as I can remember and I’ve found a great online store to stock up on this as I go through it quickly when making cards. I highly recommend Scrapbookpal.com and order from them when I need to replenish my supplies. They even have free shipping over $25 and it’s quick.

img_6104

Here is the titles I made for the classroom door.

I typed out my title and then created an offset around it and welded that offset, so I would be able to cut the outline in black.

img_6108 img_6109

Owning a Silhouette Cameo allows me to be creative and help out in so many ways and I enjoy every minute of it.

What are our working on today?

Enjoy !

THANK YOU for your support! How can you help? Click HERE & buy a coffee. Every little bit helps with the cost of running the site.

Looking for more in-depth, step-by-step classes, check out all of my online Silhouette classes on my Teachable site HERE.

SS Logo snip it

**This post may contain affiliate links. What that means is that I may receive compensation if you purchase through the links I have provided. The price you pay for the product or service is not higher but I may get compensated for sharing.