Posted on 8 Comments

Ultimate Guide to Cutting Small Fonts and Detailed Designs with Silhouette

Cutting small fonts and intricate designs with your Silhouette can be a game-changer for creating professional-looking projects, but it also comes with unique challenges. From selecting the right materials to fine-tuning your machine settings, every detail matters when working with tiny text or delicate patterns. In this ultimate guide, we’ll share proven tips, tricks, and techniques to help you achieve clean, precise cuts every time. Whether you’re crafting personalized gifts, labels, or detailed decorations, these strategies will take your Silhouette skills to the next level. Keep reading to unlock the secrets to cutting small fonts and detailed designs like a pro!

Affiliate links may be present in the following blog post and as an Amazon Associate, I earn from qualifying purchases.

Have you ever tried to cut something small and it just did NOT work? You may have ended up with a mess of whatever material you were cutting. Well, you are not alone! It happens and I have some tips to help!

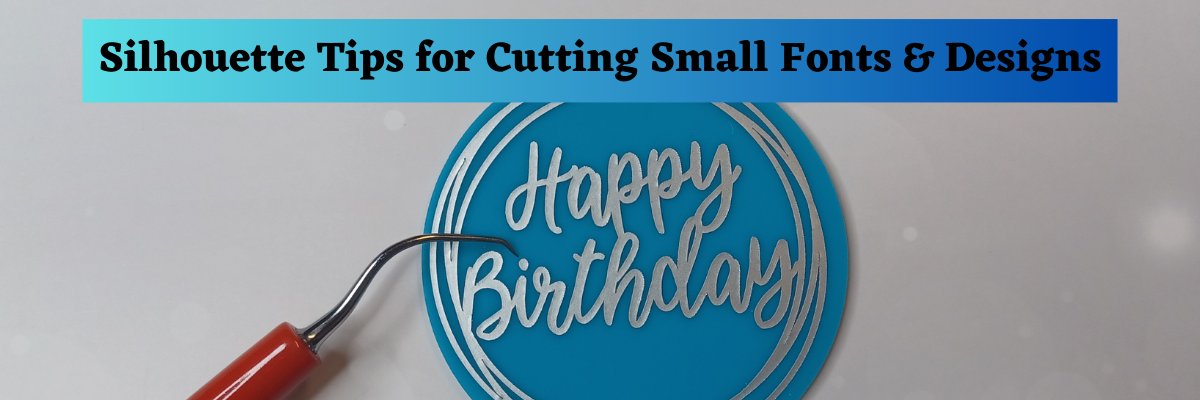
Silhouette “Secrets” – Tips to Cutting Small Fonts & Designs

Tip #1 – Font Style Matters

  • Not all font styles are good for cutting small.

An example is distressed fonts – all of those little bits and areas that show up in red will need to be cut. When you make it smaller, it just makes those areas smaller too!

Distressed Font example - BFC Game Distressed Font - Not good for cutting small fonts

Example – BFC Game Distressed Font – Design #402770

  • I do not recommend cutting distressed fonts unless you are ready to test, test, test and have extra vinyl to use.

Tip #2 – Look at Edit Points

  • Look at the Edit Points of a design/font.
    Fonts may need to be ungrouped in order for edit points to show up.

Make a copy of your original text before ungrouping to look at edit points.

Edit points are the data points that the machine uses to cut the file.

Right click Ungroup the text. Double click on the text selected and the Edit Points = gray dots show up. All of those dots are what the machine uses to complete the cut. It has to connect the dots.

Lots of Edit Points are not good for cutting small fonts

If you scale the design down, it does not decrease the number of edit points, it just squishes them into a smaller space. Which can make cutting small or intricate designs even more difficult as the blade is moving to connect those dots in a smaller location.

When the Edit Points are activated, it should open the Edit Points Panel. If not, click on the Edit Points Panel on the left side tool bar.

Cutting Small Fonts - Edit Points Example

Simplifying the Edit Points can help to make it cut smoother.

However, you want to compare the original to the simplified version and see if there is any noticeable change in the design itself.

Comparison of Edit Points when cutting small fonts

Make a copy of the text before simplifying and then compare the before and after.

Click off of it to deselect it and compare the designs without the edit points active.

Did it change it enough? Did it change it too much?

Comparison of small text when cutting small fonts after edit points reduced

Some designs/fonts you will see a drastic change and others you may not notice it at all, but it will help in cutting quality.

Here is another example – Giraffe Zentangle Mandala by Wispy Willow Designs is an awesome design. If you have ever worked with a zentangle style design before, you know they can be intricate. This design opens at 12″ tall and here is a look at the edit points that make up this design. They are a necessary part of the design due to the detail of it.

Zentangle Design with lots of Edit Points

If you scale that design down to 3″ tall, all of those edit points are then squished together.

Zentangle Design Scaled Down with Lots of Edit Points

This is not a design that will not cut well at a small scale. That’s just not how it was designed because of it’s intricate detail. Zentangles are detailed and intricate designs.

In this case, simplifying the edit points probably still won’t yield good results. It was not designed to be cut small, but is amazing at a large size.

Want to learn even more about Edit Points? Check out this tutorial HERE.

Tip #3 – Use a Sharp blade

  • A sharp blade is going to cut much cleaner than a dull blade.
  • Having extra blades and cutting mats on hand will save you time, frustration, and money in the long run.
  • Keep separate blades for different materials. Just like having separate fabric and paper scissors! Different materials dull the blade at a different rate. This can also increase the lifespan on your blades.
  • Do not try to sharpen the blade. It is a myth that stabbing tin foil sharpens a blade. Metal cutting metal or stabbing metal does not sharpen a blade. That is like cutting a soda can with a kitchen knife, it only dulls it farther. If it does anything at all, it may clean adhesive off the blade or in a lot of cases we see, it can break the tip of your blade off and you end up with more troubles than you started with.
  • A brand-new blade is a great thing!

I always recommend having extra blades and cutting mats on hand! Grab some extras at CrafterCuts and use my code SECRETS to save 10% HERE.
Free shipping with orders of $35 or more at CrafterCuts!
Or grab some extras from Silhouette America HERE and use code SECRETS to save 5%.

Tip #4 – Test Cut, Test Cut, Test Cut!!!

  • When cutting small fonts, use that font as your test cut.
  • Type out a capital B to use as your test cut. It has straight lines, corners, and curves and you can see how it will be cut.
  • See more on test cuts HERE

Tip #5 – Use High Quality Adhesive Vinyl

  • Using high quality products can make all the difference! Having issues, try a new brand or a new piece.
  • Vinyl does have a shelf life and it can depend on how it’s stored. I’ve had some vinyl that I’ve used 7 years later, but others that didn’t last 3 years.
  • Usually, the way I know it’s no longer good is it is very difficult to release from the backing and I am having to work harder at it than I should.

Check out the Recommended Retailers header HERE for vinyl suppliers.

Tip #6 – Weeding Lines

  • Add weeding lines to your design to weed the adhesive vinyl in smaller portions.
  • Use the Line Drawing Tools to draw around small sections to work with it.
    This doesn’t look pretty but it can help so much!
Silhouette Studio Line Drawing Tool for Weeding Lines

Check out more on Weeding Lines HERE.

Tip #7 – Cut Extra Pieces

  • Small dots or periods are famous for getting lost. Simply make copies and cut a line of dots to add to your project as needed.
Make copies of small pieces that might be easily lost like dots of letters

  • If one letter gets messed up, simply re-cut one letter to add to the project. No need to recut the entire design.

Discover even more with the step-by-step class on the Silhouette Secrets+ Teachable site, where I guide you through creating the designs featured above. Check out the Easily Create Custom Gift Tags & Keepsake Ornaments in Silhouette class to bring your creativity to life!
View all of the classes available HERE.

Tip #8 – Reverse Weeding

  • After cutting, weed the large areas
Reverse Weeding can help with small designs and cutting small fonts

Then place the transfer tape onto the entire design.

Reverse Weeding for Cutting Small Fonts Demo

Weed it from the transfer tape.

Reverse Weeding From Transfer Tape

Now, this method takes practice. I hated it the first time I tried it because I did not like that the transfer tape stuck to my hand while weeding. However, it has come in handy with some projects I’ve done and that was the only way I could get it to transfer properly.

I hope those tips help you be successful with future cuts when working with small details and fonts!

These tips are also available as a printable for the Creative Community with EllyMae Forum members in the February 2026 Creative Vault.

Save this for future reference by pinning the image below.

Ultimate Guide to Cutting Small Fonts and Detailed Designs with Silhouette Pinterest

Enjoy !

THANK YOU for your support! How can you help? Click HERE & buy a coffee.
Every little bit helps with the cost of running the site.

Silhouette Classes

Never stop learning! Let me help you take the anxiety out of learning with Silhouette and get to creating faster! My Silhouette classes are heavily focused on software, so you can take the skills & techniques taught and apply them to many future projects!

Silhouette step-by-step Classes by Silhouette Secrets+

**This post may contain affiliate links. What that means is that I may receive compensation if you purchase through the links I have provided. The price you pay for the product or service is not higher but I may get compensated for sharing.
Posted on Leave a comment

Custom Hand Towels with Artesprix

Take your custom wine-themed kitchen towels to the next level with the perfect finishing touches! Whether you’re crafting these towels as gifts or to enhance your own kitchen décor, adding one final touch can transform your DIY project into a efficient tool.

Affiliate links may be present in the following blog post and as an Amazon Associate, I earn from qualifying purchases.

Do you have projects sitting around that just need that finishing touch? Raising my hand over here.

These wine themed kitchen towels have been hanging out in my studio since I created them in June for the Artesprix YouTube video found HERE.

I found an idea on Pinterest and wanted to add to it. It was so simple and I don’t know why I didn’t get it done sooner.

I picked up some black pot holders and then pinned it to the middle of the hand towel.

Then simply sewed a line right down the middle and added a button on the backside for the loop to hook onto.

Ta-da! Done! Hanging in my kitchen and so handy on my oven door.

Project done! Wahoo! Crossing things off the list… not near as fast as I add them to the list, but I’m going to chalk this up as a win! It’s done.

Check out all the details on what I used to create these custom hand towels HERE.

Save this for future reference by pinning the image below.

Artesprix Sublimation Inks on Custom Hand Towels

Enjoy !

THANK YOU for your support! How can you help? Click HERE & buy a coffee.
Every little bit helps with the cost of running the site.

Silhouette Classes

Never stop learning! Let me help you take the anxiety out of learning with Silhouette and get to creating faster! My Silhouette classes are heavily focused on software, so you can take the skills & techniques taught and apply them to many future projects!

Silhouette step-by-step Classes by Silhouette Secrets+

**This post may contain affiliate links. What that means is that I may receive compensation if you purchase through the links I have provided. The price you pay for the product or service is not higher but I may get compensated for sharing.

Posted on 4 Comments

Silhouette Cameo 5, Curio 2 & Portrait 4 – Care, Maintenance, and Storage Tips

Affiliate links may be present in the following blog post and as an Amazon Associate, I earn from qualifying purchases.

With the release of these new models of Silhouette machines – the Silhouette Cameo 5, Curio 2, and Portrait 4 – along with the new Electrostatic (ES) Beds – care and maintenance is going to be very important in the success and lifespan on your machines!

We troubleshoot with thousands of users each week and we have seen some very dirty machines. This will affect the lifespan and usage of your Silhouette machines! There is no way to sugar coat that! Especially now with the new technology released.

I’m sharing tips to the care, maintenance, and storage for the new Silhouette machines and accessories in this video – Silhouette Cameo 5, Curio 2, Portrait 4 – Care, Maintenance, and Storage Tips video on the Silhouette Secrets+ YouTube channel found HERE.

Care, Maintenance, and Storage Tips

The #1 biggest thing is to keep your machines clean and free of debris. Especially with the new powered tool housing and power plug on the Cameo 5, Curio 2, and Portrait 4. Any dirt or debris in that power housing plug and it can affect your results and success!

I recommend keeping the lid on your machine for the Silhouette Cameo 5 and Portrait 4 closed when it’s not in use.

A Silhouette machine dust cover is a great idea too, especially if you have a workspace that has a lot of particles in the air. The Cameo 4 dust covers fit nicely over the Cameo 5 machines. They are pretty similar in size, just a few differences in the design.

With the Silhouette Curio 2, keep it free and clear of debris and materials in the way of the housing and channels on the machine. Any dirt, debris, or materials in the channels can interfere with the Curio 2 function and housing moving freely during use.

I do not recommend storing anything on top of the Silhouette Curio 2 or it could affect the machine function.

A can of compressed air or a keyboard air duster may be handy to have around to help keep debris off the machine as well.

For my Curio 2 with acrylic etching/engraving, I’ve been using a handheld vacuum to help with the clean up after the etch.

Silhouette Electrostatic (ES) Bed

The Silhouette Electrostatic (ES) Bed is new! It’s awesome! Keep the boxes if you have not already thrown those away. The Electrostatic Bed should be stored completely flat and I do not recommend storing things on top of it.

The Silhouette Electrostatic (ES) Bed is very specific in that it needs to be completely flat in order to function properly and maintain the charge. Any warping of the bed due to improper storage or materials placed on it over time, can affect the success of using it.

Keep the boxes and packing materials for storage on the Silhouette Electrostatic (ES) Bed. This will be the best protection that you can use and you know it is stored safely when it’s placed back in the box with the packaging foam.

Any damage to the Silhouette Electrostatic (ES) Bed and you will need to replace it. Improper storage of the bed is not a machine fault, but is the responsibility of the user.

For information on how to install the Silhouette Electrostatic (ES) Bed with a Silhouette Cameo 5 click HERE.

Silhouette Electrostatic (ES) Protective Sheets

The Electrostatic (ES) Protective Sheets are a very important part of the ES bed as well! The Electrostatic (ES) Protective Sheets need to be store completely flat and kept flat for proper usage on the Electrostatic (ES) Bed. If they are not completely flat, the charge may not be able to build up properly and be maintained during the cut.

I found 2 options for storing the Electrostatic (ES) Protective Sheets. Both are 12″ x 12″ scrapbook cases and fit the 12″ x 12″ Protective Sheets very well.

Silhouette Power Tool Storage

The new Silhouette Power Tools are a bigger tool housing than previous Silhouette tools. This means that they may not fit in the previous tool storage that a user had.

The storage of these new power tools will be very important because you not only have to protect the Auto Tool Detection metal plate on the backside of the tool, but you also have a Power Plug on the backside of the tool that needs to be protected as well.

I found a couple options for storage for the tools and they are customizable for what each user might need.

The Options Grab-n-Go Storage worked great for the Silhouette 3″ foil rolls, the print and emboss squares & fasteners for the Silhouette embossing mat, and holding multiple tools. This is an “Option” that can grow with you.

Look around your house and see if there is something you can repurpose for tool storage. You may already have an option that works for the tools you have!

Non-power Silhouette Tool Storage Options

This is the tool holder that I’ve been using for several years with the non-power Silhouette tools such as the Autoblade, Rotary blade, and Kraft blades. As you can see, I have gathered a selection of tools over the years as I’m writing tutorials and teaching classes.

This tool holder has worked for me so far with the smaller blade housings.

Additional Care Tips

Keep the rollers clean of adhesive. The rollers of the Cameo 5 and Portrait 4 should not be rolling on the adhesive of the cutting mat or it can pick up adhesive residue and affect your future cut projects.

All of these tips are 100% the user’s responsibility. You have invested in these machines and with proper care, use, and storage the Silhouette machines, tools, and accessories should work well for you.

Find the new Silhouette model machines and accessories at CrafterCuts or SilhouetteAmerica.

Save this for future reference by pinning the image below.

Enjoy !

THANK YOU for your support! How can you help? Click HERE & buy a coffee.
Every little bit helps with the cost of running the site.

Silhouette Classes

Never stop learning! Let me help you take the anxiety out of learning with Silhouette and get to creating faster! My Silhouette classes are heavily focused on software, so you can take the skills & techniques taught and apply them to many future projects!

Silhouette step-by-step Classes by Silhouette Secrets+

**This post may contain affiliate links. What that means is that I may receive compensation if you purchase through the links I have provided. The price you pay for the product or service is not higher but I may get compensated for sharing.
Posted on 4 Comments

Silhouette Electrostatic Bed Installation & Tips – Cameo 5

Affiliate links may be present in the following blog post and as an Amazon Associate, I earn from qualifying purchases.

Silhouette Electrostatic Bed Installation & Tips

New equipment is always fun to get to know and play around with. I will admit that when I opened the box for the Silhouette Electrostatic Bed, I had a bit of a questionable moment as I saw something in the box I didn’t know about.

I had no idea what the “guard tape” was. There is an instruction sheet in the box. Make sure to keep the instructions, your box, and this guard tape for future use.

I shared more information in the Silhouette Electrostatic Bed Installation & Tips – Cameo 5 video on the Silhouette Secrets+ YouTube channel found HERE.

In this video I am using the following supplies:

Find additional tips on using the Silhouette Electrostatic Bed HERE in the Tips for Success with the New Electrostatic (ES) Bed – Cameo 5, Curio 2, and Portrait 4 video on the YouTube channel.

The Electrostatic Bed is awesome! I have loved creating with some delicate materials using it and can’t wait to share more!

If you are a Silhouette Curio 2 owner, the Electrostatic Bed comes with the machine. Check out additional information on the Silhouette Curio 2 HERE.

Save this for future reference by pinning the image below.

Enjoy !

THANK YOU for your support! How can you help? Click HERE & buy a coffee.
Every little bit helps with the cost of running the site.

Silhouette Classes

Never stop learning! Let me help you take the anxiety out of learning with Silhouette and get to creating faster! My Silhouette classes are heavily focused on software, so you can take the skills & techniques taught and apply them to many future projects!

Silhouette step-by-step Classes by Silhouette Secrets+

**This post may contain affiliate links. What that means is that I may receive compensation if you purchase through the links I have provided. The price you pay for the product or service is not higher but I may get compensated for sharing.
Posted on Leave a comment

Silhouette “Secrets” – EllyMae’s Craft Supplies

Affiliate links may be present in the following blog post and as an Amazon Associate, I earn from qualifying purchases.

I think every project I start seems small at the beginning, but seems to grow bigger than I originally thought. It is no different with this list of supplies I use in my projects and have in my studio.

I am asked all the time what I recommend and use, so I have added a header on the website with a list of supplies that I have in my studio and use.

Check out “EllyMae’s Craft Supplies” header HERE.

I am a big fan of use what you have, so if you have your favorite tools, use them! I have found new favorites over the years of project creation and thought I’d share. Do you have to use the same exact tools as me? NO! Use what you have, what you love, and what works best for you! I am simply sharing what I use and will add to this list as I find new favorites!

I’d love to hear what are some of your favorite tools! Comment below and let me know!

Save this for future reference by pinning the image below.

Enjoy !

THANK YOU for your support! How can you help? Click HERE & buy a coffee.
Every little bit helps with the cost of running the site.

Silhouette Classes

Never stop learning! Let me help you take the anxiety out of learning with Silhouette and get to creating faster! My Silhouette classes are heavily focused on software, so you can take the skills & techniques taught and apply them to many future projects!

Silhouette step-by-step Classes by Silhouette Secrets+

**This post may contain affiliate links. What that means is that I may receive compensation if you purchase through the links I have provided. The price you pay for the product or service is not higher but I may get compensated for sharing.
Posted on Leave a comment

Sketch by Color with the Silhouette Cameo 5

Affiliate links may be present in the following blog post and as an Amazon Associate I earn from qualifying purchases.

Have you sketched with your Silhouette machine?
Sketching with the Silhouette machines is so much fun! I love it!

Today I have a quick video tutorial on how I set up 2 designs to sketch with the Artesprix sublimation markers and how I let my Silhouette Cameo 5 do the work for me.

Check out the latest video on the Silhouette Secrets+ YouTube channel HERE.

Supplies Used in This Project

Silhouette Cameo 5
– Silhouette Type B Pen Holder – Bundle HERE or separate HERE
Mom of Monsters by Sweet Afton – Design #225585
Little Monster by Sophie Gallo – Design #278113
Artesprix Sublimation Markers
Artesprix Sublimation Shirt
Artesprix Protective Mat
Artesprix Protective Paper
Artesprix Heat Tape
Siser 9″ x 12″ Heat Press
– Other supplies: copy paper, pencil, scissors

Want more tips on sketching with your Silhouette machines?
Click HERE

Check out the Artesprix video tutorial on the Artesprix YouTube channel here too!

Save this for future reference by pinning the image below.

Grab some Artesprix sublimation products and get to creating today!

Enjoy !

THANK YOU for your support! How can you help? Click HERE & buy a coffee.
Every little bit helps with the cost of running the site.

Silhouette Classes

Never stop learning! Let me help you take the anxiety out of learning with Silhouette and get to creating faster! My Silhouette classes are heavily focused on software, so you can take the skills & techniques taught and apply them to many future projects!

Silhouette step-by-step Classes by Silhouette Secrets+

SS Logo snip it
**This post may contain affiliate links. What that means is that I may receive compensation if you purchase through the links I have provided. The price you pay for the product or service is not higher but I may get compensated for sharing.
Posted on Leave a comment

Beginner Acrylic Engrave/Etch with the Silhouette Curio 2

Affiliate links may be present in the following blog post and as an Amazon Associate I earn from qualifying purchases.

The Silhouette Curio 2 is a unique machine that I am enjoying so much! Just like it’s predecessor, it functions a bit differently than the Silhouette Cameo and Portrait model machines. I am not sure it really should have been called a curio, but it is what it is and I don’t control that. What I can control is me and what I’m creating.

I am having a blast learning it and I do think that anyone can use it and learn it if they are willing to take the time to! That is why I’ve created classes to help Silhouette Curio 2 users get started faster and take the guess work out of it. Less anxiety in learning a new machine! I’ve made the mistakes and I am showing step-by-step how you can be successful with your Curio 2 in my classes.

I am so excited to announce this class – Curio 2 – Beginner Engraving/Etching on Acrylic class using the Silhouette Power Engrave Tool!!

Here is a look at a few of the designs that I have been creating on acrylic rounds.

In this class you will learn how to:

  • setup a template for exact placement for projects
  • recognize “no compatible cut setting” errors and why you see it
  • set up the Silhouette Curio 2 Debris tray for cutting & engraving/etching
  • set up to cut with the Silhouette Curio 2 to create the template
  • use the Auto height detection & how it works
  • use the Layers Panel in Silhouette Studio
  • set up an engrave/etch for the Silhouette Power Engrave Tool
  • create a custom setting for acrylic etching/engrave
  • do a manual height detection and why I love it!
  • and more! Bonus tips & demos included as well!

Silhouette Curio 2 –
Beginner Acrylic Engrave Class

Step-by-step class for setting up the Curio 2 for exact placement on blanks, creating a template, creating a custom setting for the Acrylic Engrave, auto & manual height detection and why you would use either, engrave tips, and more!

Supplies Used for Beginner Curio 2 Engrave Class:

Design used in class:

Additional bonus designs shown in testing:

Optional:

  • Handheld vacuum or wet wipes – do not inhale or get the acrylic dust in your eyes
  • Small paint brush to clean off engraving tool

Save this for future reference by pinning the image below.

Silhouette Curio 2 Engrave Etch

Enjoy !

THANK YOU for your support! How can you help? Click HERE & buy a coffee.
Every little bit helps with the cost of running the site.

Silhouette Classes

Never stop learning! Let me help you take the anxiety out of learning with Silhouette and get to creating faster! My Silhouette classes are heavily focused on software, so you can take the skills & techniques taught and apply them to many future projects!

Silhouette step-by-step Classes by Silhouette Secrets+

**This post may contain affiliate links. What that means is that I may receive compensation if you purchase through the links I have provided. The price you pay for the product or service is not higher but I may get compensated for sharing.
Posted on Leave a comment

Halloween Sign Decor with Silhouette

Affiliate links may be present in the following blog post and as an Amazon Associate, I earn from qualifying purchases.

Just popping in to share a couple Halloween signs I finished up this week. I mean, there is nothing like decorating 2 days before Halloween right?

I have been collecting round door hangers designs by Diva Watts Designs for a long time and finally just told myself to stop everything else and get it done! She has so many different design styles available, make sure you go check out her store HERE. I’ve already got a list started for Fall and Christmas.

Here are the first 3 I made.

Supply list

I started by painting the boards. I painted both sides and let it dry overnight.

While the boards were drying, I cut all of the Oracal adhesive vinyl for each sign with the Silhouette Cameo 5 and organized them into piles. This way it was ready for when the boards were completely dry.

And then I started adding each piece to transfer tape and applying to each sign. It went pretty quick, since I had it all cut and organized by sign.

I thought this one was appropriate for my son’s room.

I just loved the look of this one with the eyeballs.

But this one I think is my favorite. I think it just may be because it has so many pieces to puzzle together and it wasn’t that hard.

And this one was just dying to come out….

Hinge Method

Have you ever used the hinge method?

This allows you to apply a small section of the design and get it placed without committing everything at once.

I removed all of the backing off of the vinyl and then cut the backing into sections.
Then removed only the top section and lined it up.

This allowed for easier positioning and I didn’t have to commit the entire design all at one time.

Then I removed each section and smoothed it down to the wood round.

So fun! Can’t wait to make more! I may need to buy another package of wood rounds as I keep seeing more doors in my house that need a sign.

Save this for future reference by pinning the image below.

Enjoy !

THANK YOU for your support! How can you help? Click HERE & buy a coffee.
Every little bit helps with the cost of running the site.

Silhouette Classes

Never stop learning! Let me help you take the anxiety out of learning with Silhouette and get to creating faster! My Silhouette classes are heavily focused on software, so you can take the skills & techniques taught and apply them to many future projects!

Silhouette step-by-step Classes by Silhouette Secrets+

**This post may contain affiliate links. What that means is that I may receive compensation if you purchase through the links I have provided. The price you pay for the product or service is not higher but I may get compensated for sharing.
Posted on 5 Comments

New! Silhouette Heat Pen Setup & Foiling

The Silhouette Heat Pen is compatible with the new Cameo 5, Curio 2, and Portrait 4 (with adapter included with machine).

Affiliate links may be present in the following blog post and as an Amazon Associate, I earn from qualifying purchases.

I’ve been testing out the new heat pen and wanted to share how to set it up in the Silhouette software. I will be demonstrating on the Curio 2, but the setup process is the same in the Silhouette software no matter which machine you are using that is compatible.

This written tutorial will be photo heavy.
I also have a video tutorial on the Silhouette Secrets+ YouTube channel HERE
and a printable PDF available as a free download exclusively for confirmed newsletter subscribers.

Join the Newsletter

Subscribe to get our latest content by email.
    We respect your privacy. Unsubscribe at any time.

    Supplies Used in This Tutorial

    Optional supplies:

    How to Set Up the Silhouette Heat Pen for Foiling

    Step 1 – Set up cutting mat by placing cardstock on the cutting mat.

    For Curio 2 users only – tape Silhouette cutting mat to debris tray securely.
    It is NOT recommended to use the heat pen on top of the electrostatic bed. You do not want to damage the electrostatic bed or it will not function properly and will need to be replaced.

    Silhouette Heat Pen Setup Curio 2

    Step 2 – Unpack the Silhouette Heat Pen set and select the items you want to use.

    Silhouette Heat Pen Unpacking

    The Silhouette Heat Pen set includes a 1 mm heat pen, 2.5 mm heat pen, roll of Silhouette masking tape, roll of gold foil, and roll of silver foil. 0.5 mm, 1 mm, and 2.5 mm heat pen, roll of Silhouette masking tape, roll of gold foil, and a roll of silver foil.

    I used the 2.5 mm heat pen and the gold foil for this tutorial.

    Step 3 – Install the Silhouette heat pen in the Tool 2 carriage and a Silhouette blade in the Tool 1 carriage of the machine.

    Silhouette Heat Pen Installation

    The Portrait 4 only has 1 tool housing and will need the power adapter installed prior to installing the Silhouette heat pen (power adapter is included with the Portrait 4 – do not throw it away or lose it). Check out the Portrait 4 unboxing HERE for more information.

    Do not worry if the light does not turn on immediately on the front of the Heat Pen. It will come on as the project is set up.

    Step 4 – Set up design in the Silhouette software to foil & then cut.
    You do not want to cut the foil. Silhouette makes it easy for us to set it up for one action and then the other.

    First, set up the Page Setup Panel for the machine you are using, the cardstock size and orientation.

    Silhouette Studio Heat Pen Setup

    I selected the design I wanted – Hi by Diva Watts DesignDesign #399489 and drew a rounded rectangle around the design with the Drawing Tools on the left side.
    Then with both the design and the rectangle selected, I used the Center Align tool in the top Quick Access Toolbar (QAT).

    Placing the design at the bottom of the sheet of material can make it easier to set up the foiling process and you don’t have to work around the housing. With the Cameo and Portrait machines, it will also make it easier to remove the foil as you do not want to unload the mat between the foiling and cut process.

    Silhouette Studio Hot Foil Design Setup

    Select the design and open the Specialty Tools Panel in the top right corner, directly below the Page Setup Panel. Choose the Heat Pen Panel and choose your fill pattern and spacing. I used the cross-hatched pattern and the default fill which showed as 0.016″.

    Then I changed the line color of my foiling design to blue using the QAT Line Color option in the top left corner. This is going to allow us to use the Send by Line Color option and set up the design for foiling first and the cut second.

    Click the Send button in the top right corner.

    Silhouette Send by Line Color

    Choose the Line option at the top right of the Send tab. Uncheck the red color. Keep the blue color checked and select the “2” option for Tool 2.

    *Tip – I do not use the pause option between foiling and cutting as pause does not always work properly.

    When the Silhouette Heat Pen is recognized in the software, a pop up will come up and ask if you want to start heating the Heat Pen.

    Silhouette Heat Pen Message

    There is no default material setting for the Silhouette Heat Pen currently in the software, but that is no problem. We can create one simply by clicking on the More button in the bottom right of the Send tab. This opens up the Advanced Material Settings and we can set up a material for our foiling.

    Silhouette Custom Setting Setup

    Click the plus sign on the right side to create a new material. Name the new material to designate what you want. Choose the machine model when asked and then select Carriage 2.

    Silhouette Custom Setting Setup Foil Action

    Next, select the larger + sign and select Add Foil Action.

    Silhouette Foil Action Setup

    With Carriage 2 still selected, click on the Sketch Action and choose Remove Action.

    Silhouette Custom Setting Save

    Adjust the settings for the foil, choose Save, and click the X in the top right corner.

    I started with a Force of 10. The only way to know what will work for your material, foil, design, and heat pen is to test it. Start with a small design and test, test, test!

    Silhouette Heat Pen Test

    Next, select the new material you created. The setting will be at the bottom of the materials list as a user defined setting.

    Verify that the correct color is the one you are changing and that the blue is the color that will be sent to foil.

    Step 5 – While the pen is heating, add foil on top of the cardstock in the exact location of the design.

    Start by taping the diagonal corners and pulling it as smooth as possible.

    Silhouette Foil Setup

    Then tape the other 2 corners. Adjust as needed until it is securely held and as smooth as possible. Any movement in the foil can cause the heat pen to catch and the project to be lost.

    Silhouette Foil Setup Cardstock

    Step 6 – When the Silhouette Heat Pen shows as Ready, click the Send button to send the job to foil.

    If using the Silhouette Curio 2, you will need to do the manual height detection. The height detection does not work accurately on clear or shiny surfaces, so you want to follow the directions to manually detect the height in the software. Check out the video tutorial for a visual on how I do this HERE.

    With the Heat Pen set up properly, the auto height detection is automatically disabled to allow for you to set the height manually. This is important to get an accurate reading of the thickness of the material with the Curio 2.

    Silhouette Foil Check

    Peek at foiling job when complete. Sometimes if it didn’t foil properly, you could send again if you don’t move the foil too much.

    Silhouette Heat pen Foil

    If it’s successful, remove the tape, save and reuse it.

    If using a Silhouette Cameo 5 or Portrait 4 , do NOT unload the cutting mat.

    Step 7 – Send the job to cut.

    Silhouette Heat Pen Cut

    Uncheck the blue cut line and check the red cut line. The blue lines will turn off and the bold red cut line should turn on. Select the appropriate cut setting for your material. Then click Send.

    Step 8 – Carefully remove the cut piece.

    Silhouette Heat Pen Project

    Keep in mind that if you have the force too high, it can cement the cardstock down to the cutting mat. Be careful removing it and a Silhouette spatula works nicely to help lift it without damaging it.

    Silhouette Heat Pen Project Removal with Spatula

    I also tested with Spellbinders hot foil and We R Makers Foil Quill Foil and both worked well.

    Silhouette Hot Foil Testing

    If cardstock does stick to the cutting mat, carefully remove it with a scraper, but don’t press too hard and remove the adhesive on the mat.

    Silhouette cleaning mat with scraper

    Just be careful and do not dig into the cutting mat with it.

    Silhouette clean mat

    Ta-da! Clean mat!

    This little scraper tool is also amazing at removing little bits of a cut design quickly and easily. Check out this video where I show that HERE.

    Silhouette Heat Pen Projects and Testing

    Have fun and just play!!!

    Check out the video tutorial on the Silhouette Secrets+ YouTube channel HERE
    and grab the printable PDF available when you confirm the newsletter subscription HERE.

    Save this for future reference by pinning the image below.

    Silhouette Heat Pen Pinterest

    Enjoy !

    THANK YOU for your support! How can you help? Click HERE & buy a coffee.
    Every little bit helps with the cost of running the site.

    Silhouette Classes

    Never stop learning! Let me help you take the anxiety out of learning with Silhouette and get to creating faster! My Silhouette classes are heavily focused on software, so you can take the skills & techniques taught and apply them to many future projects!

    Silhouette step-by-step Classes by Silhouette Secrets+

    **This post may contain affiliate links. What that means is that I may receive compensation if you purchase through the links I have provided. The price you pay for the product or service is not higher but I may get compensated for sharing.
    Posted on 2 Comments

    Silhouette Cameo 5 Unboxing & Setup

    Affiliate links may be present in the following blog post and as an Amazon Associate I earn from qualifying purchases.

    This video – whew! If it was going to go wrong, it was going to happen on video! Not just the video but in the editing process too! I had to edit this one twice because my editing software deleted the beginning and I didn’t notice until I was at the end.

    Some weeks go smoothly and others not so much – but I got there in the end!

    And I’ve been successfully using my Silhouette Cameo 5 since this video was recorded. I have cut more Siser Glow HTV and even used it to sketch out some Halloween shirts in an Artesprix Sublimation Marker video I did this month! It worked beautifully!

    Check out the new Silhouette Cameo 5 Unboxing video on the
    Silhouette Secrets+ YouTube channel HERE.

    Here is a look at my successful cut – the 2nd go around. I decided to keep it all in the video and show you the reality of what happens. It does not always go 100% perfect all the time! I mess up, my machine doesn’t cut right, firmware doesn’t update by Bluetooth – everything that happens to users that we troubleshoot, we encounter too!

    The new Silhouette Cameo 5 has some new features:
    – newly designed roller bar
    – new rollers
    – new places the rollers can be locked in place
    – repeat job (highly requested!!!)
    – quieter operation
    – new powered housing in Tool 2 new tools!
    – front crosscutter option (more on that in the future)
    – emergency stop (which I’ve already used several times on all my new machines)
    and more!!!
    I cannot wait to share more!!!

    Another new thing that Silhouette has been working on is that the firmware updates for the Cameo 5, Portrait 4, and Curio 2 will be able to update through the Bluetooth connection. On previous Silhouette model machines, it had to be done through a USB connection and was the only way it would update. An internet connection is required to complete a firmware update.

    This is great news!
    However, I do want to note as you’ll see in the video, the current version of the software is not always successful in this and we have reported that. I did have to connect by USB cable in order to complete that. But, it is great that it will be an option moving forward.

    The Silhouette Cameo 5 black is available for shipping now – HERE.

    Make sure to follow along on the Silhouette Secrets+ YouTube channel HERE. Like, subscribe, and click that bell for notifications of future content.

    Save this for future reference by pinning the image below.

    Enjoy !

    THANK YOU for your support! How can you help? Click HERE & buy a coffee.
    Every little bit helps with the cost of running the site.

    Silhouette Classes

    Never stop learning! Let me help you take the anxiety out of learning with Silhouette and get to creating faster! My Silhouette classes are heavily focused on software, so you can take the skills & techniques taught and apply them to many future projects!

    Silhouette step-by-step Classes by Silhouette Secrets+

    **This post may contain affiliate links. What that means is that I may receive compensation if you purchase through the links I have provided. The price you pay for the product or service is not higher but I may get compensated for sharing.