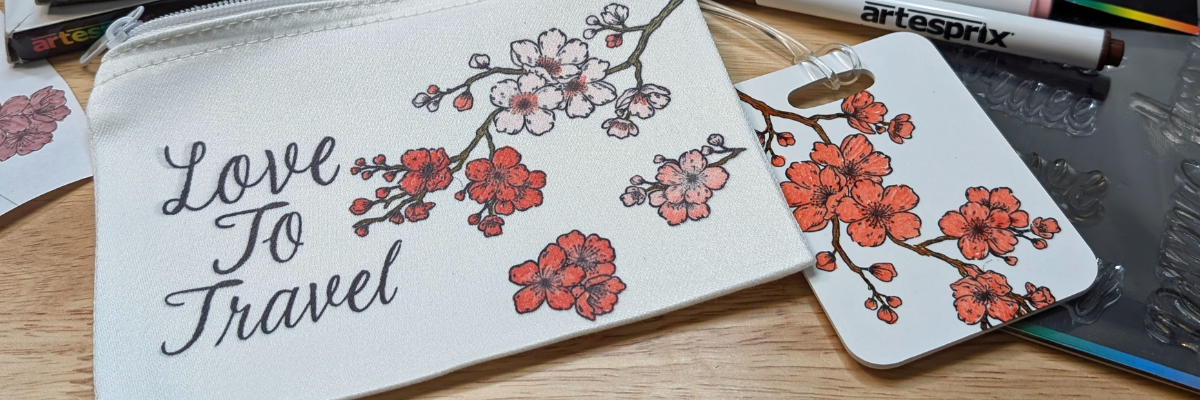
Want to learn a few stamping techniques that can be fun in creating custom designs? I’m sharing several tips in the latest Artesprix YouTube video tutorial that can work whether you are making cards, using sublimation supplies, or other stamping projects.
Affiliate links may be present in the following blog post and as an Amazon Associate I earn from qualifying purchases.
I did not have a stamp to make up the word “To”, so I shared some tips in using a stamping technique called “masking” in order to make up the word I needed with the stamps I did have. I wanted the text to match. Find out what went right and what did not along the way in the new video tutorial. I’ve included a list of the supplies I used below.
Check out additional ideas created with the Artesprix Canvas Zipper Bag HERE.
I absolutely love working with Artesprix products—they always spark my creativity and leave me inspired with even more ideas for future projects. Find more projects I’ve created using the Artesprix sublimation products HERE.
THANK YOU for your support! How can you help? Click HERE & buy a coffee. Every little bit helps with the cost of running the site.
Silhouette Classes
Never stop learning! Let me help you take the anxiety out of learning with Silhouette and get to creating faster! My Silhouette classes are heavily focused on software, so you can take the skills & techniques taught and apply them to many future projects!
**This post may contain affiliate links. What that means is that I may receive compensation if you purchase through the links I have provided. The price you pay for the product or service is not higher but I may get compensated for sharing.
Have you ever had a tool in your craft studio that helps you save time and be more creative? I am sure there are a few you utilize if you stop to think about it. The Color Cubes by Sarah Renae Clark have helped me. I am terrible at picking coordinating colors for projects and often will spend hours going back and forth on colors. Now there is no more guessing and I have a great resource at my finger tips.
In this blog post, I’m excited to share some creative ways Color Cubes by Sarah Renae Clark have helped me in my recent Silhouette projects.
Affiliate links may be present in the following blog post and as an Amazon Associate, I earn from qualifying purchases.
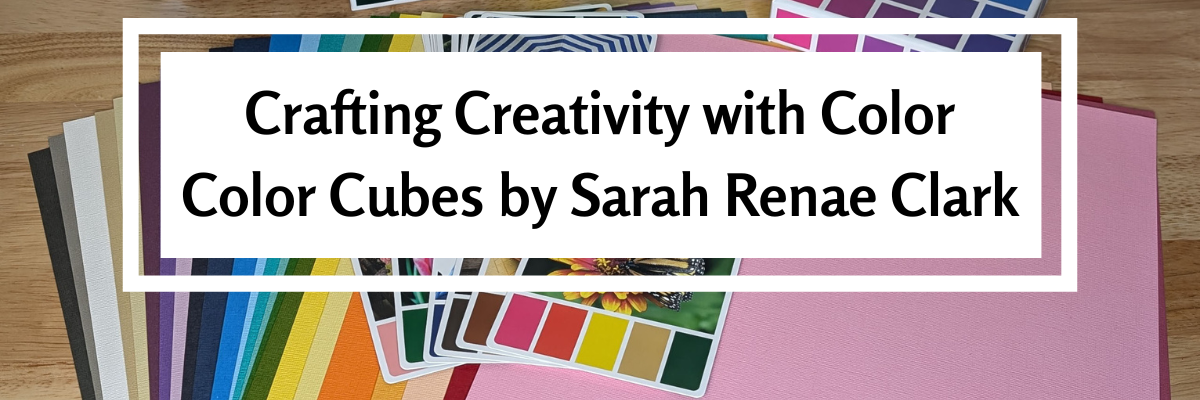
Crafting Creativity with Color Cubes by Sarah Renae Clark
Creating Custom Color Palettes in Silhouette StudioUsing Color Cubes
Did you know you can add your own custom color palettes to the Silhouette software Fill Panel?
With the Color Cube cards it makes it so easy because it has the HEX code for the colors on the backside of the card. Simply pick the color card of your choice.
Then add a new palette to the Fill Color Panel in the Silhouette Studio software by clicking on the + to add a palette and then entering the HEX code at the bottom of the Fill Color Palette.
I also did a live tutorial sharing even more on colors in Silhouette Studio. Check it out HERE.
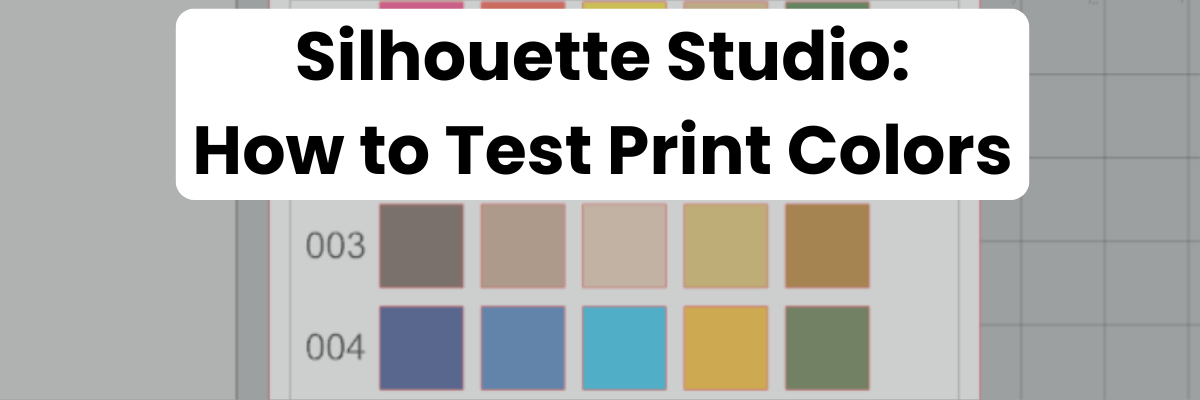
How to Test Print Colors in Silhouette Studio
We often see users ask why the colors that printed do not match the colors they see on the screen? One way you can find out what colors will print and compare those to what you see on the computer screen is to do a test print.
For this test, I used the Color Cube cards 001-009 and added the colors in using the HEX code to fill in squares and then did a test print out to see what the outcome would be.
This can be a big help in seeing what colors might print out for a project you are working on. I share even more details in the blog post Silhouette Studio: How to Test Print Colors HERE. Using the Color Cubes I was able to add a variety of colors to the test print page to see how they would turn out. There are many other factors that can affect your print colors and I share those too in the post linked above.
Selecting Cardstock Colors for a Project
Do you ever get stumped trying to pick out colors for a project? The Color Cube cards can help! Or need a little bit of inspiration on getting started with a project? Grab a color card and match your cardstock to the card colors. Even if the colors are off by just a bit, it can help you get started in the selection process and visualize how different color combinations look together.
Color Selection for Other Projects
It does not have to be limited to projects with your cutting machines either. Grab a Color Cube card for matching bead color combinations for bracelets, earrings, and more!
I have recently gotten into beading and find it so relaxing to string beads, however, it doesn’t matter what project I’m working on, picking colors can take me the longest time. I grabbed a few Color Cube cards and opened my Tool Box where I am storing some of my beads that are just waiting to be made into a project and started matching up the colors to see what I had that was close.
—–
You never know when you might pick up inspiration! This new beading hobby started with me purchasing a book written by a friend, Juliana C. Avelar. I bought the Jewel Loom Inspirations book to do a bit of research as I was writing my own eBook and I fell in love with the projects. For a few months, I just drooled over the pages because I didn’t have the supplies and kept telling myself I didn’t need a new hobby. But one bracelet featured in the book kept calling my name. Then I attended an in-person crafting weekend in Texas and we used the Eileen Hull Jewel Loom and I was hooked!
I am not even a chunky jewelry type of person, but I just had to make one and wanted to have it for my trip to Hawaii for the Silhouette Summit. I am sharing because it was not hard at all and sometimes we need a little inspiration outside of our normal arenas.
I tried to get some photos in Hawaii, but nothing really captured the bracelet well.
Here is another look at my first bracelet (in front) and the next one that is on my loom. Both of these have a very similar color scheme. I started with the Eileen Hull Jewel Loom and of course, one thing led to another and now I have a few more looms like the Beadalon Jewel Loom pictured below.
I need to add findings to the bracelet to finish it up and then my next bracelet will be with colors found using the Color Cubes for inspiration. I can’t wait!
Whatever your hobbies include, whether that’s crafts with cutting machines, collecting craft supplies, cardmaking, scrapbooking, beading, fabrics, or something else – keep on creating!
If you are looking for inspiration, check out the other options on the Sarah Renae Clark website too! She has journals, notebooks, stickers, planners, adult coloring pages, printables, and more!
And follow along on social media too for more crafty, colorful inspiration too!
Save this for future reference by pinning the image below.
Enjoy !
THANK YOU for your support! How can you help? Click HERE & buy a coffee. Every little bit helps with the cost of running the site.
Silhouette Classes
Never stop learning! Let me help you take the anxiety out of learning with Silhouette and get to creating faster! My Silhouette classes are heavily focused on software, so you can take the skills & techniques taught and apply them to many future projects!
**This post may contain affiliate links. What that means is that I may receive compensation if you purchase through the links I have provided. The price you pay for the product or service is not higher but I may get compensated for sharing.
Have you ever tried tracing an image in Silhouette Studio only to find the result wasn’t as clean or precise as you’d hoped? You’re not alone! Many users struggle with getting a smooth, accurate trace that leads to a successful cut file. We see questions about this all the time, and that’s why I’ve created an in-depth tutorial to help you master tracing and cleaning up your designs in Silhouette. Whether you’re working with complex images or simple shapes, these tips and techniques will help you put the tools in the Silhouette Studio software to work for you!
Find this FREE in-depth video tutorial on the Silhouette Secrets+ YouTube channel HERE.
Every single image that you trace can be different because each one is made up of different colors, gradients, shading, etc. In the video tutorial, I take you along for the journey and it is step-by-step exactly how I would work with a file that needs clean up. The only way to actually know if the file will be a successful cut file in the end is to cut it, so I included my tips after cutting and shared exactly what I would change after I finished the cut to make it even more successful for the final project.
The original traced image started with 24,528 edit nodes and through the clean up process, I was able to get that down to 1,848. That makes a huge difference in the cuttability of a file.
My goal through the entire process was to maintain as much of the character of the image as possible. This makes a great way to make unique projects & gift ideas.
Check out the full in-depth video to learn more about how you can make the tools in the Silhouette Studio software do what you want.
I hope you pick up a few tips to mastering tracing in Silhouette Studio and how to clean up a file for a cuttable design!
Silhouette Tutorial: In-Depth Guide to Tracing & Cleaning Up Detailed Images – Step-by-Step Video on the Silhouette Secrets+ YouTube channel HERE
For more in-depth tutorials and inspiring projects, explore our comprehensive A to Z of Silhouette section on the website HERE, where you’ll find years of creative resources to help you master your Silhouette skills!
Save this for future reference by pinning the image below.
Enjoy !
THANK YOU for your support! How can you help? Click HERE & buy a coffee. Every little bit helps with the cost of running the site.
Silhouette Classes
Never stop learning! Let me help you take the anxiety out of learning with Silhouette and get to creating faster! My Silhouette classes are heavily focused on software, so you can take the skills & techniques taught and apply them to many future projects!
**This post may contain affiliate links. What that means is that I may receive compensation if you purchase through the links I have provided. The price you pay for the product or service is not higher but I may get compensated for sharing.
I had so much fun playing with alcohol inks and the Grafix Dura-Bright White creating a background that I used for several different projects!
Affiliate links may be present in the following blog post and as an Amazon Associate, I earn from qualifying purchases.
This project took on a life of it’s own as I went. I started with the idea to create a card and a bookmark, but ended up letting the art talk to me and see where it went. I love it!!!!
Anyone can do this! I used alcohol ink and dropped it onto the Dura-Bright White and moved it around with an air blower. While the background was drying, I cut some designs out of Oracal 651 white adhesive vinyl. After the Dura-Bright was fully dry, I cut it up into several sizes for the projects, then added a laminate overlay on top to protect the alcohol ink design. Finished off the designs with the adhesive vinyl decal on top.
While creating the intended designs, another idea was born, and I just rolled with it. Now I have a framed piece of art for my desk. I love it!!!!
Save this for future reference by pinning the image below.
Enjoy !
THANK YOU for your support! How can you help? Click HERE & buy a coffee. Every little bit helps with the cost of running the site.
Silhouette Classes
Never stop learning! Let me help you take the anxiety out of learning with Silhouette and get to creating faster! My Silhouette classes are heavily focused on software, so you can take the skills & techniques taught and apply them to many future projects!
**This post may contain affiliate links. What that means is that I may receive compensation if you purchase through the links I have provided. The price you pay for the product or service is not higher but I may get compensated for sharing.
As a paper crafter I am loving the Silhouette Electrostatic (ES) Mat! This new technology is pretty darn cool and not having to remove the cut pieces from an adhesive cutting mat can save time. Especially when cutting for large projects! In this post, I’m sharing more tips on having successful results when using the Silhouette Electrostatic (ES) Mat.
Affiliate links may be present in the following blog post and as an Amazon Associate, I earn from qualifying purchases.
How Does the Silhouette Electrostatic Mat Work?
When the electrostatic mat is turned on, a static charge is built up between the electrostatic mat and the protective sheet. This holds the protective sheet in place and materials can be placed on top of it. The charge then builds between the protective sheet and the material, which holds it in place while it’s being cut. Once the design is cut simply break that charge by either lifting the protective sheet off the ES Mat or turning the ES mat off. The charge will dissipate and the material can easily be removed.
What materials does the Silhouette Electrostatic Mat Work With?
Materials that are smooth and completely flat are going to work best with the Silhouette ES Mat. The material has to be able to build up that electrostatic charge and be held in place the entire time it’s being cut. Textured materials, “breathable” materials such as fabric, or curled materials are not going to work well because it cannot build up a charge to hold it in place.
I have cut vellum, copy paper, sticker paper, 65 lb cardstock, 85 lb cardstock, 110 lb cardstock, adhesive vinyl, and I’m sure I’m probably forgetting a few others in the past year that I’ve been testing it.
I did try a thicker cardstock by Bazzill which was their smooth cardstock and it cut, but it was not as clean of a cut as I prefer. However, I have had the same results when using Bazzil on an adhesive cutting mat too. Some cardstocks are just a bit more difficult to cut cleanly with the Silhouette. I tend to stay away from those for cutting projects, but they work well when cut with a paper trimmer.
Tips for Successful Cuts with the Silhouette ES Mat
While cutting pieces for demo projects for an upcoming class, I knew I wanted to share the tips I’ve learned during testing to achieve successful cuts. The best way to learn what works and what doesn’t is often through the failures encountered along the way. And even though I’ve been using cutting machines for many years, there are still failures along the way.
Check out the new video on the Silhouette Secrets+ YouTube channel where I am sharing a look at the cutting process and sharing things that work and things that don’t work.
Don’t forget to like, subscribe, and click the bell for notifications on the Silhouette Secrets+ YouTube channel!
A Closer Look at the Final Cuts
It is so nice to just lift off the cardstock after the cut and see the pieces laying there.
You will start to see the pieces pile up on the right side of the photos as I share the progression.
These projects and cuts can also be successful on an adhesive cutting mat, but it was so nice to just be able to slide the finished cuts off and be ready for the next sheet of cardstock.
Especially when you have a million tiny pieces like on these film strips!
In the video, I also show how my first attempt at cutting these film strips was not successful. I had the design placed too close to the edge of the cardstock and a piece lifted during the cut and it pretty much ate my cardstock. I simply unloaded the ES Mat, cleaned all the bits up, reset the machine, and then moved my design down on the design mat a little bit and sent it again to cut. Perfect cuts!
Now, this design cut beautifully. The ring design is 2 pieces cut for a background. However, I did have to babysit it a little bit more as some of the cavities of the design would lift as it was being cut with the movement under the roller bar. I carefully removed the pieces as they were lifting during the cut and showed that in the video too.
All of these designs were created in the Silhouette Studio software from scratch for an upcoming class. The cutting process is a bit of the behind-the-scenes of that class creation. Watch the Upcoming Events tab or sign up for the Upcoming Craft Events emails and I’ll send an email direct to your inbox when new events open for registration.
Sometimes, the cut won’t stay in place when the excess is removed. This can happen with smaller designs as there is a smaller surface area to hold the electrostatic charge in place.
Master Perfect Silhouette Cuts: Top Tips for Electrostatic Mat
the ES Mat needs a secure connection that is completely flat to connect to the Silhouette Cameo 5 or Portrait 4 machine
materials need to be completely flat to maintain the charge
designs placed too close the edges can cause cut issues and/or lifting which can affect cut results
test cut, test cut, test cut!
make sure ES Mat is turned on and remains on during the entire cut
Save this for future reference by pinning the image below.
Enjoy !
THANK YOU for your support! How can you help? Click HERE & buy a coffee. Every little bit helps with the cost of running the site.
Silhouette Classes
Never stop learning! Let me help you take the anxiety out of learning with Silhouette and get to creating faster! My Silhouette classes are heavily focused on software, so you can take the skills & techniques taught and apply them to many future projects!
**This post may contain affiliate links. What that means is that I may receive compensation if you purchase through the links I have provided. The price you pay for the product or service is not higher but I may get compensated for sharing.
The Silhouette Cameo Pro MK II was announced for future release at the 2024 Silhouette Summit. I attended the Silhouette Summit and asked a lot of questions regarding this new machine model. In this blog post, I’ll be sharing details that we learned at Summit. We were able to see this new model in action on both the demo floor and also a close up look where we could ask specific questions in a classroom setting.
This blog post is part of series of my account at Silhouette Summit 2024 because it’s a lot of information on new products and information. Find more details on Silhouette Summit 2024 – Part 1 – cloChé Heat Press announcement HERE. And I’ll add additional links as I publish information too!
Affiliate links may be present in the following blog post and as an Amazon Associate, I earn from qualifying purchases.
The Silhouette Cameo Pro MK II is now available at Silhouette America HERE or at CrafterCuts HERE. *updated 12/12/24 Silhouette Stand released 3/26/25 – available HERE
Silhouette Cameo PRO MK II
Please note that the following information & photos are all directly from the Silhouette Summit 2024 and at the time of writing this the Cameo Pro MK II is not yet available for purchase. I will be updating the post when we receive more information.
First, this is NOT a Cameo 5 model. It is called a Cameo PRO MK II, which is a little bit to get used to saying as you’ll see me mention in the videos linked above.
Why is it not just called a Silhouette Cameo 5?
It is different and why it could not simply be called a 5. It is the Cameo Pro 4 body with all of the guts of the Cameo 5 model installed.
The Silhouette Cameo PRO MK II has:
Updated chassis system for improved carriage stability and new belt drive minimizes deviation and vibration
New design of the roller bar and rollers, which include the ability to move the right roller to more locations to be locked in securely
5 auxiliary rollers that are removable for additional support when cutting different widths of materials
Dual cross cut option – the user can choose to use the Auto cross cut or the rear cross cut option (more on the auto cross cut feature HERE)
Repeat Job now available – when a repeat job is enabled, the load button flashes. Press and hold the button for more than 3 seconds and it will repeat the last job sent.
Powered Carriage 2 tool housing for use with powered Silhouette accessories
NEW!!! 4 point registration mark for print and cut. There will now be registration marks on all 4 corners of a print and cut jobs. **This will be an addition to the Silhouette software in a future release.
Basically, the Silhouette Cameo 5 guts installed in the Cameo 4 Pro body. Some of the updates from the Cameo 5 12″ and 15″ Plus are now in the Cameo Pro MK II.
The Silhouette Cameo PRO MK II is NOT compatible with the Silhouette Electrostatic Bed accessory. It does not have the powered connection on the front of the machine to connect to an electrostatic bed.
So bottom line is, it is a Cameo 4 Pro body with the improved guts of the Silhouette Cameo 5 models installed inside.
We did see the Silhouette Cameo PRO MK II in action both in the Summit demo room and in smaller classroom settings where we were able to ask questions and get a closer look.
Here is a look at the machine in action cutting a large decal. There were 3 class session times and they demonstrated it for all who attended those sessions. In the above photo you can also see the demos from the previous sessions behind the machine against the wall.
In the classroom session, there were 4 Cameo PRO MK II machines all set up and providing a close up look at the machine. These are smaller breakout sessions where it was much easier to ask questions, touch and feel, and really see if it was doing what they said it was.
I did check the cut after it was completed and it was successfully cut and was able to be weeded. They did offer to let me keep one of the decals, but I had no easy way to get it home successfully on the airplane.
Now, let’s take a closer look at some of the specifics mentioned above.
Silhouette Cameo PRO MK II – Auxiliary Rollers
The Cameo PRO MK II now has 5 auxiliary rollers to help in keeping materials as flat as possible while it’s being cut. Each auxiliary roller can be moved left to right along the roller bar. For best results, space the auxiliar rollers out evenly across the width of a material.
The auxiliary rollers on the Cameo PRO MK II are removable. This is the only machine model that the rollers are removable. If the auxiliary roller is removed, make sure to keep it in a safe place so you can find it again. Or move it to the right side of the machine and install on the roller bar (I show this tip in the video HERE)
When cutting wider widths of materials, the material needs to be held securely and as flat as possible while it’s cut. Any bunching or bowing of materials between the left and right rollers can cause cut issues.
The auxiliary rollers of the Silhouette Cameo PRO MK II can be used on the Silhouette Cameo 5 models (12″ and Plus 15″) that have the redesigned roller bar. Note: the auxiliary rollers are NOT removable on the Silhouette Cameo 5 model machines.
NEW!!! 4 Point Registration Mark for Print and Cut
There will now be a 4th registration mark added to print and cut projects. This is designed for more accurate reading and to reduce the off-cuts in the bottom right corner.
Unfortunately, we did not get any really good photos of the examples shown on screen of this new feature and I only have the image from the media kit provided to me from Silhouette. It was not something that was demonstrated for us at Summit.
It will be something that is implemented into the Silhouette Studio software in a future release.
Silhouette Cameo PRO MK II Wrap Up
I am one of the original testers for the Silhouette Cameo 4 Pro model and have a lot of information out there on proper setup and usage (more details HERE). Most of the same information, tips, and recommendations will still apply to the Silhouette Cameo Pro MK II model.
I know there has been lots of users frustrated with the Cameo 4 Pro and the exact setup that it requires to function properly. I do feel the improvements to the Cameo Pro MK II will solve some of those user frustrations, however, it will still be very, very important to have the proper setup and space for a machine of this size to function properly. For all models of cutting machines, proper setup is important!
I did see many demonstrations of the Silhouette Cameo Pro MK II in action performing different functions and completing projects, but will not have real life experience with the machine until it is available for consumers. At the time of this publication we do not have a release date, but I will update with more information as I get it.
Save this for future reference by pinning the image below.
Enjoy !
THANK YOU for your support! How can you help? Click HERE & buy a coffee. Every little bit helps with the cost of running the site.
Silhouette Classes
Never stop learning! Let me help you take the anxiety out of learning with Silhouette and get to creating faster! My Silhouette classes are heavily focused on software, so you can take the skills & techniques taught and apply them to many future projects!
**This post may contain affiliate links. What that means is that I may receive compensation if you purchase through the links I have provided. The price you pay for the product or service is not higher but I may get compensated for sharing.
This month’s project with Artesprix is all about adding a personal touch with a custom sublimation door hanger! For this design, I decided to go the extra creative mile by hand-drawing the artwork, giving it a unique and personal feel. Using Artesprix sublimation markers and my own creativity, I transformed a simple blank door hanger into a vibrant, one-of-a-kind piece of home decor. From the initial sketch to the final heat press reveal, this project showcases just how versatile and fun sublimation crafting can be!
Affiliate links may be present in the following blog post and as an Amazon Associate I earn from qualifying purchases.
For this design I was experimenting a bit along the way and I already have ideas for another one too!
I used the Artesprix Sublimation Ink mixed with a bit of water for the background and painted that onto mixed media paper. In the future, I will add a little more water to the ink to make it a little bit lighter. With sublimation colors, you don’t see the final color until after it has been heat pressed. This turned out with a very vibrant, bright yellow.
Then I hand lettered the text using the Artesprix sublimation markers. The key about text with sublimation is that it has to be mirrored. I am not great at writing backwards, so I shared some tricks I used in the video below.
Next, I drew the leaves using a pencil. Pencil does not transfer to the sublimation blank so it’s great to draw around your blank for a template or sketch in designs. And then used more ink colors to color in the leaves and finished those off by outlining with the sublimation markers in several colors.
Anyone can do this and you do NOT have to be an artist to create with the Artesprix Sublimation products. You also do NOT need a sublimation printer, so it is a great way to dip your toe in the water to test sublimation before investing in a bunch of equipment.
Other supplies: pencil, scissors, paper towels, paint brush(es)
Watch how this all came together with the Artesprix Sublimation products in the new tutorial HERE on the Artesprix YouTube channel.
Check out additional ideas created with the Artesprix Door Hanger HERE.
I love creating with the Artesprix products and find it really stretches my creative soul often leaving me with more ideas for future projects. Find more projects I’ve created using the Artesprix sublimation products HERE.
THANK YOU for your support! How can you help? Click HERE & buy a coffee. Every little bit helps with the cost of running the site.
Silhouette Classes
Never stop learning! Let me help you take the anxiety out of learning with Silhouette and get to creating faster! My Silhouette classes are heavily focused on software, so you can take the skills & techniques taught and apply them to many future projects!
**This post may contain affiliate links. What that means is that I may receive compensation if you purchase through the links I have provided. The price you pay for the product or service is not higher but I may get compensated for sharing.
The Silhouette Studio software allows you to print directly from the program to any printer that is setup on your computer. This action can be performed easily by going to File > Print and selecting the printer you are using once the design is ready to print. However, the colors you see on the computer screen may not be the actual results that print out from your printer.
Affiliate links may be present in the following blog post and as an Amazon Associate, I earn from qualifying purchases.
Factors That Can Affect Printed Colors
A computer monitor is not calibrated to print colors. Each brand of computer monitor can vary in the visual representative that you see. If you were sitting next to someone else using the exact same Silhouette Studio software version, your colors may not appear the same on screen as that person next to you simply because you are using different computers.
Computer monitors display in RGB (Red Green Blue) versus printers that are CYMK (Cyan, Yellow, Magenta, black) – this can affect the actual printed results versus what is seen on the screen.
There are many different brands and models of printers out there on the market being used worldwide. Different brands and models of printers can yield different results.
Printer ink can vary by brand and yield different results.
The material being printed on can affect the colors. Different materials absorb the ink and the final color you see can vary depending on the material. For instance, plain cardstock will absorb more ink into the paper versus a glossy photo paper. This can make the color appear muted on the cardstock versus a more vibrant print on a shiny gloss of photo paper.
The printer settings selected when printing can affect color outcome. Each printer model has different settings it can print at and what you select for the print job sent can affect the final outcome of colors. For example, draft settings versus normal versus photo quality.
Printer drivers can affect the outcome of colors and other options available, such as print page size, etc. For best results, install the full printer drivers direct from the printer manufacturer’s website for your specific printer model. Simply plugging in a printer or connecting it to your computer does not usually install the full printer drivers. While it may print, it may not have all the options of the full print driver as it’s using a default driver that’s in the computer operating system to perform basic print functions.
Computer operating systems (OS) and updates. Print quality can vary by Windows versus MAC and also by the OS updates on those computer systems. We have seen print color output change overnight with a computer OS update.
Different software programs can have different print color results.
Now that we’ve covered a few things that can make the difference, how can you test what colors you see versus what colors you get when printing?
Silhouette Studio: Color Test Print
Draw out 1-inch squares (or larger if needed) and replicate to fill the page
Open the Fill Color Panel and fill each square with a color that you want to test print.
The full Fill Color Panel on the right side of the Silhouette software has several options for adding colors. Use the preset colors, add your own custom color, or add in colors by HEX, HSL, or RGB codes. Create your own custom color palettes too for easy access on future projects.
I used the Color Cubes by Sarah Renae Clark to fill in a page of color combinations that I want to test print. The color cards give 5 colors with the HEX code for each color and also have shades of that color shown on the card.
In the Silhouette Studio software, at the bottom of the Fill Color Panel, you can adjust the color to another shade easily by moving the custom color dot around on the color palette.
Once page is filled as desired, then select File > Print in top left corner.
Verify on the Print Preview that everything will be printed as desired. The print preview is where you can catch errors before you waste ink printing. For instance, if the design is not showing completely and is cut off, that can indicate the wrong printer is selected or the page size is incorrect. There is still time to make changes before you commit to printing and using ink. If you are doing a print and cut project, verify that all 3 registration marks show as printing completely on the page before you click print.
When ready, click Print. The printer menu will pop up and you can select what options you would like to print at and where to print from. I use the rear tray on my printer when printing any specialty materials or cardstock.
If you make any changes such as the actual printer being used or the page size, you will need to apply those changes and then cancel out to the main design screen to reset those settings completely.
Once printed, you can see how the colors will print on that particular material. It’s always best to test on the actual material you will be using to know for sure.
I printed this on higher quality copy paper using the regular print settings from my printer. I was also notified that one ink cartridge was low on ink, so I know that will affect the colors that are printed as well.
Additional Tips for Printing:
Objects or designs need to be filled with color to print.
Silhouette Studio is designed as a cutting software. That means the red lines you see on the design mat are cut lines for a Silhouette machine to follow. When a shape is drawn or text typed out, it is generally not filled with any color and the software sees it as empty. Which is exactly how it will print to a printer if sent. This is one great thing about utilizing print preview, you can catch issues before you’ve actually tried to print the project.
Cut lines do not print unless told to do so.
There are 2 options if you want the line of an object to print.
1 – Increase line thickness above 0. Any line thickness above 0 will print on the material.
Here is what the text above will show on the Print Preview when the top text line is set to 0 line width and the bottom is set to 1.75.
2 – Select the objects you want the lines to print on and check the Print Lines of Selected Shapes box on the bottom of the Line Style Panel.
Here is what the text above will show on the Print Preview when the top text has the print lines of selected shapes chosen.
There is also an italic note stating: This will display your 0 pt cut lines as 0.1 pt lines in prints and in SVG and PDF exports.
Sublimation prints need to be pressed to show true color.
If you are printing using sublimation inks, the true colors will not show until the design has been pressed. A sublimation print will always look dull or muted prior to pressing. For best results and the most accurate colors, press onto 100% polyester. This will show the final colors
New equipment may not function the same as old equipment.
Getting a new, updated printer model can be a great thing! However, users can be quickly frustrated when things do not work the same or the new printer doesn’t print the same colors the same as the old one did. It can take some getting used to for all new equipment.
Low ink of any cartridge or tank can affect the color outcome.
Most home printers have a set of color cartridges or tanks, for instance, my Canon TS9521C has 3 colors and 2 black cartridges. To make up the colors you are asking it to print, the printer combines those inks in order to make the color output. If a color cartridge or tank is low on ink, it may not yield the desired results.
The results that each user sees and has when printed can vary simply because we all have different equipment we are using.
Save this for future reference by pinning the image below.
Enjoy !
THANK YOU for your support! How can you help? Click HERE & buy a coffee. Every little bit helps with the cost of running the site.
Silhouette Classes
Never stop learning! Let me help you take the anxiety out of learning with Silhouette and get to creating faster! My Silhouette classes are heavily focused on software, so you can take the skills & techniques taught and apply them to many future projects!
**This post may contain affiliate links. What that means is that I may receive compensation if you purchase through the links I have provided. The price you pay for the product or service is not higher but I may get compensated for sharing.
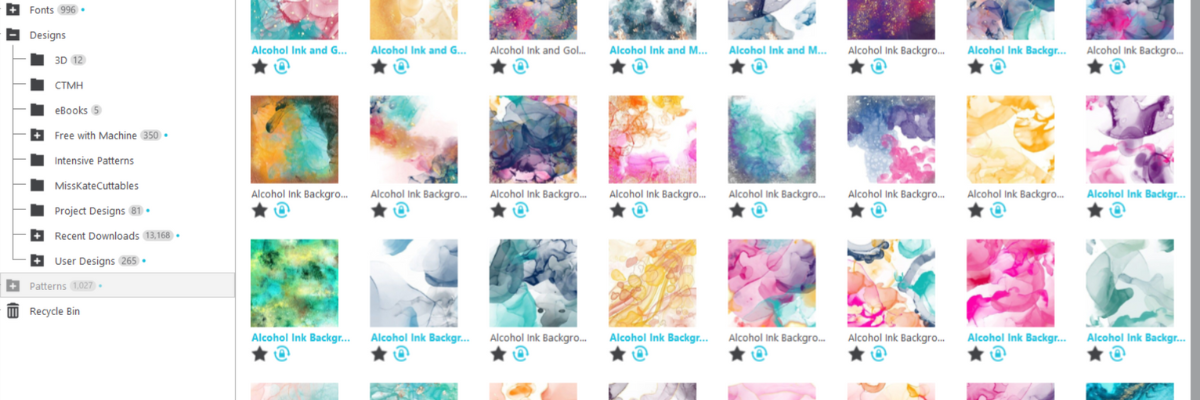
Using patterns in the Silhouette Studio software can give your projects a unique look. Whether you are doing a print and cut project or creating a digital graphic image. Digital patterns can be a great asset to your toolbox. As with many tools in the Silhouette Studio software, there can be multiple ways to do it. I’m sharing 4 ways that patterns can be opened in Silhouette Studio below, but first what is a pattern?
A digital pattern is a photo file. It is typically a JPEG, PNG, or TIFF file format. Before we get too far into it, one thing to note about digital patterns is that they can be quite large. A digital pattern, when designed properly should be 300 dpi for print quality. That means the file size is much greater than your average SVG file. Since every user has a different computer with different specifications, that also means that each user’s computer may handle data differently. When working with heavy data files, close any programs that are not necessary and any tabs within Silhouette that are not needed. I’d also recommend clearing out any Recovered Documents and keep that cleared out as well. This will help your computer and software run as smooth as it can.
4 Ways to Open Patterns in Silhouette Studio
1 – Open the pattern from the Silhouette Library Patterns Folder. If you want to open the full pattern on the design mat, double click on the pattern in the Silhouette Library Patterns folder. If you want to fill a particular shape, click on the shape to select it on the design mat. Then click on the Library Tab, Patterns folder and single click on the pattern. Click back on the Design tab and the shape will be filled with the pattern selected. If you double click with a shape selected, it will fill the shape and then also open the full pattern on top of that too.
2 – Select a pattern from the Fill Color Panel – Tab 3.
3 – Click on the Show/Hide Library icon in the bottom left corner of the design tab. This will open a split screen showing the library and the design tab. This can be much easier to see larger images of thumbnails and design with instead of having to swap back and forth between the Design and Library tabs. Select a pattern the same way as in #1.
4 – Drag and drop a pattern from a folder saved on your computer or storage device. When dragging and dropping, drag the pattern to the shape you want to fill and hold it until the pattern has filled the shape. If you move too fast and release the mouse button too quick a little white rectangle will appear and not go away. The only way to get it to disappear is to close and reopen the software.
I hope these tips have helped give you some ideas on how to work with patterns and create unique projects in Silhouette Studio. Check out the additional resources below to learn even more!
Save this for future reference by pinning the image below.
Enjoy !
THANK YOU for your support! How can you help? Click HERE & buy a coffee. Every little bit helps with the cost of running the site.
Silhouette Classes
Never stop learning! Let me help you take the anxiety out of learning with Silhouette and get to creating faster! My Silhouette classes are heavily focused on software, so you can take the skills & techniques taught and apply them to many future projects!
**This post may contain affiliate links. What that means is that I may receive compensation if you purchase through the links I have provided. The price you pay for the product or service is not higher but I may get compensated for sharing.
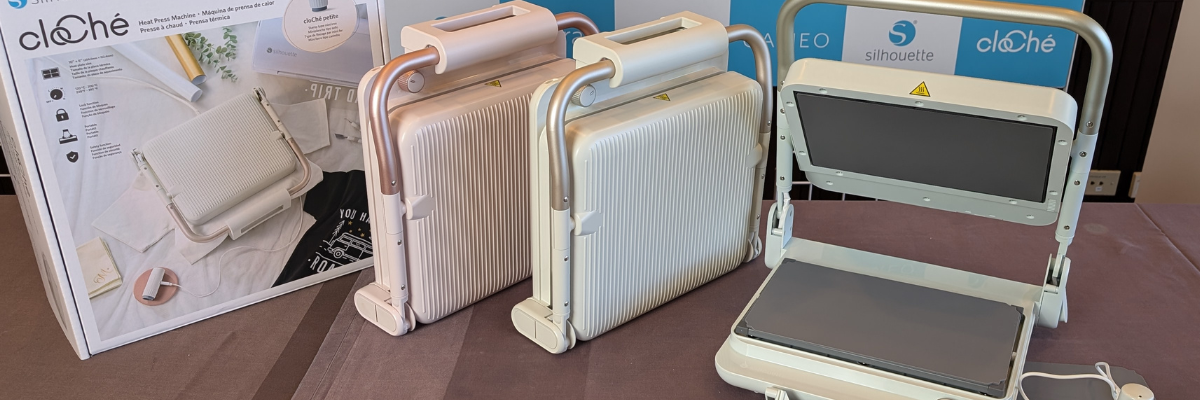
I’m back from the Silhouette Summit 2024 event and will be sharing more information that I learned in the demo room and classes at the Summit event. There is a lot of information so it will be a series of blog posts to share all the details. Part 1 will include details about the new Silhouette cloChé (clo-shay) Heat Press and cloChé Petite.
Affiliate links may be present in the following blog post and as an Amazon Associate, I earn from qualifying purchases.
It is cute, stylish, and has a slim line design that can be stored on a shelf when not in use. It is a heat press designed for the hobby crafter.
Silhouette cloChé Heat Press
It will be released in 3 colors – Milky White, Chiffon Pink, and Ice Green. Additional colors may become available if retailers choose to have an exclusive option in the 7 additional options.
You can get a glimpse of those colors in the live video I shared walking the Silhouette Summit demo floor found HERE.
L – M – H heat settings with options in between L – 250° F M – 320° F H – 400° F There is no digital display. In order to gauge the actual temperature, you would need a digital thermometer to read the temperature of the top platen.
45 second timer There is no digital display and the timer is not adjustable.
0.5 mm maximum thickness of materials pressed
Locking mechanism on the front
Voltage setting on backside of heat press
Silhouette cloChé Petite hand held press included with Silhouette cloChé Heat Press
Retail price $249.99 (price given at Summit ’24)
Release Date – Coming Soon
Here is a look at the temperature dial on the Silhouette cloChé heat press. It has a L, M, and H setting, but can also be set in between those as well. (L = 250° F, M = 320° F, H = 400° F)
Here is a look at the front locking mechanism. When the lid is closed, then it will fold up over top of the top platen handle and lock into place. Be gentle with the handle and do not force it closed or open. It will take some practice to get the hang of how it locks and unlocks.
Here is a view from the side of the Silhouette cloChé Heat Press. The maximum thickness for materials is 0.5 mm. I would not recommend using thicker materials than what is recommended in the press.
Recommended Usage of Heat Press
Heating
To turn machine on, open heat press and then turn the dial. The Silhouette cloChé heats up with the lid open and comes to temperature fairly quickly from what we saw in the Summit demo.
Pressing Time
In the demos shown at the Silhouette Summit, the Silhouette cloChé they pressed the garment with HTV for 45 seconds as the first press, then said to cold peel the carrier sheet, then add a parchment paper on top and press another 45 seconds for a finishing press.
We did question this length of time and why they are using 45 seconds when most HTV is 15 seconds on average. There was never really a definite answer except, that’s what worked for the Silhouette cloChé heat press. We did not see the product packaging for the HTV they were using.
If you are using other brands of HTV, please test your garments and I’d recommend starting with the recommended settings for the actual HTV you are using. Grab a timer and set it for the recommended setting of the HTV brand.
I’d also recommend getting a digital thermometer so you can check the heat platen for an accurate temperature reading.
Auto Shut Off
There is an auto shut off when the Silhouette cloChé heat press is not in use. If the lid is open, after 15 minutes it will auto shut off. If the lid is closed, it will shut off after 2 minutes.
Duration of Use
It was stated that the Silhouette cloChé heat press was designed with a use time of 1 hour and then it needs a 30 minutes cool down period.
Silhouette cloChé Petite Handheld Press
The Silhouette cloChé Petite shown on the right side of the photo above that is plugged into the heat press is a handheld press that has a heat platen approximately 1/2″ in diameter. It is designed for usage with small designs or rhinestones.
The Silhouette cloChé Petite is not sold separately at this time. We did recommend that it be considered as an option to sell separately.
The Silhouette cloChé Petite does have to be plugged when using. It can be plugged directly into the Silhouette cloChé Heat Press or other suitable power sources. Please read the instructions that come with the Silhouette cloChé Petite for specific instructions.
It comes with a USB C to USB C cord that also can be stored on the backside of the Silhouette cloChé Heat Press. The Silhouette cloChé Heat Press does not have to be turned on for the Silhouette cloChé Petite to be used, but the heat press does need to be plugged in to an electrical outlet.
Recommended Usage of the Silhouette cloChé Petite
The Silhouette cloChé Petite does include instructions in the box and I would recommend reading through those thoroughly before use.
For use with HTV, cover the HTV with a protective sheet such as parchment paper and then tap the cloChé Petite on the HTV until adhered. For use with rhinestones, cover the rhinestone with protection and press the Silhouette cloChé Petite down until rhinestone is adhered. It is recommended to use a silicone mat or heat safe surface to press on top of with the Silhouette cloChé Petite. The silicone mat that comes with the Silhouette heat press can be used or I would recommend the Artesprix Protective Mat as well. I use the protective mat for many different projects.
We did receive a Silhouette cloChé Petite at the Silhouette Summit.
Overall, the new Silhouette cloChé Heat Press is cute and light weight. I’ve had several group members already comment with ideas for how to use it in their hobby craft business. It is designed for the hobby crafter and I would not recommend it for commercial use.
I have also created a Silhouette Summit playlist on the Silhouette Secrets+ YouTube channel that can be found HERE. I have a couple more to add to the video playlist on YouTube once they are edited, so make sure to like, subscribe, and click that bell for notifications.
THANK YOU for your support! How can you help? Click HERE & buy a coffee. Every little bit helps with the cost of running the site.
Silhouette Classes
Never stop learning! Let me help you take the anxiety out of learning with Silhouette and get to creating faster! My Silhouette classes are heavily focused on software, so you can take the skills & techniques taught and apply them to many future projects!
**This post may contain affiliate links. What that means is that I may receive compensation if you purchase through the links I have provided. The price you pay for the product or service is not higher but I may get compensated for sharing.
THANK YOU for your support! How can you help? Click the link to buy a coffee. Every little bit helps in the cost of running the site.