Posted on 37 Comments

Mastering Edit Points in Silhouette Studio: A Guide

Silhouette Edit Points

Silhouette Secrets+ with EllyMae

Have you seen edit points pop up in Silhouette Studio before?
Do they intimidate you?
Well let’s see if we can change that.

Affiliate links may be present in the following blog post and as an Amazon Associate, I earn from qualifying purchases.

What are Edit points?

Edit points are basically the data points the Silhouette reads to make a particular shape of the object. Each edit point has qualities on how it is supposed to act such as straight line, corner, curved, etc. and this is how a shape is made up.

Edit Points copy

The edit points will come up on an object if you double click on the object or use the keyboard shortcut letter “A” with the object selected.

If you draw a circle, it is made up of 4 edit points.

Circle edit points copy

A square also has 4 edit points but the type of edit point are different than the above circle.

Square edit points copy

By clicking on an edit point, you can see what property it has in the Point Editing Panel.

Why Edit Points Might Not Show

In order for the edit points to appear, the object has to be a single object and an ungrouped object.

For instance, if I type out text, it is not treated as a design. So the edit points won’t appear.

If it is converted to a path, the edit points still will not appear because even though it’s acting as a design, it is still grouped together. If the design is ungrouped the edit points will appear because all the pieces are now separate.

Ungrouped copy

Or if the design is made into a Compound Path, then the edit points will appear.

Compound Path copy

Altering Edit Points

There are many ways to change the edit points.

By clicking on an existing point, it turns white, indicating that it is the point selected.

Selected point copy

It will tell you what kind of edit point it is. This one is a corner. Grab the blue squares on either end and this will adjust the outcome of this edit point.

Selected point moved copy

To select multiple edit points, hold down the Shift key & drag the selection box around all the points you would like to select. Then make changes to a group of edit points all at one time by moving or choosing a new property for those selected.

Select multiples copy

All edit points that are selected will show as white points.

Point Editing Panel

When the editing points are active, the Point Editing Panel should pop up or click on the Edit Points tool on the left side menu.

Point Edit Tool copy

This panel has many options for how you can alter an edit point(s). The name of each tells you exactly what behavior it will have.
Each design you work with will react differently to what is changed.

Edit Points Panel copy

Remember, edit points are the data points that your Silhouette software relays to your Silhouette machine to connect the cut.

The Cameo machine needs to hit every single one of those edit points in order to make the cut. Some files such as dxf files or traced images can have lots of edit points and this can make the Cameo sound odd when cutting. The Cameo is not broken, but has to connect each of those edit points to make the cut.

Simplifying Edit Points

Some files can have the edit points simplified without changing the look of the design.
For instance, this Leafy Mandala by Rhonna Farrer from the Silhouette Design Store has a lot of edit points when I first opened it.

Leafy Mandal edit points original copy

In the Edit Points Panel, select Simplify.

Simplify copy

You should notice less edit points in the design.

Leafy Mandal edit points simplified copy

In this case, the design did not change in the look at all, but the edit points are now much less.

Leafy Mandal comparison copy

The best way to learn how edit points act is to find a design and just play around with the different options.

While they can look intimidating when they pop up on the screen, once you understand their purpose and how they work, I think it makes it seems a lot less daunting when you see them.

Designs used in this post are from the Silhouette Design Store:
#MoreCoffee by Kolette Hall – Design #179647
Leafy Mandala by Rhonna Farrer – Design #215137

Feel free to post your comments and questions below or on my Facebook group at Silhouette Secrets with EllyMae.

Save this post for future reference by pinning the image below.

Enjoy !

THANK YOU for your support! How can you help? Click HERE & buy a coffee.
Every little bit helps with the cost of running the site.

Silhouette Classes

Never stop learning! Let me help you take the anxiety out of learning with Silhouette and get to creating faster! My Silhouette classes are heavily focused on software, so you can take the skills & techniques taught and apply them to many future projects!

Silhouette step-by-step Classes by Silhouette Secrets+

Silhouette Secrets+ with EllyMae
**This post may contain affiliate links. What that means is that I may receive compensation if you purchase through the links I have provided. The price you pay for the product or service is not higher but I may get compensated for sharing.
Posted on 9 Comments

Let’s Explore v4 – Warp Templates

The warp templates area new to the v4.2 software release. They are available with the Designer Edition upgrade or higher and a version higher than v4.2.279 of the Silhouette software.

To update the Silhouette software version, I would highly recommend going to the Silhouette website and downloading the update direct from there.

Before updating the software version, I would highly recommend making a backup of the library. You can find more details on the Silhouette library for versions before v4.2 in this post – Let’s Explore v4 – Silhouette Library Tips.

Warp Templates

The warp templates are found under the Warp Panel on the right side. Depending on your screen size, you may have a pop out menu or you may see the full list of panel icons on the right side.

Warp Panel copy

In the left photo, you will see the fly out menu for a smaller screen and on the right side, you will see the full panel list expanded. Again, this is dependent on screen size.

There are 6 different options for Warp Templates.

Here are the first 3 on the left side of the Warp Panel.

Warp first 3 shapes copy

And here are the 3 templates from the right side of the Panel.

Warp last 3 shapes copy

The templates can be used as is or you have even more options to customize the text.

Points copy

By grabbing and moving the points, you can edit the text even further.

Move points copy

Another tool that would come in handy here is the Snap to Grid feature. Most times when I use the software, I like the freedom to move my design freely and in small increments.
With the Snap to Grid option, it will move to the next grid space measurement that you have selected. This can help in aligning the points of a warped shape.
For instance, if you move the left bottom point and you want to make sure that you move the right bottom point so it’s perfectly aligned.

Snap to Grid option copy

Open the Page Setup Panel – top right icon. Click on the 2nd tab at the top to bring up the Grid Options.

Check the box next to Show Grid and Snap to Grid. Now, when the orange points are moved, they will snap to the grid spacing.

I love letting the software do the work for me!

At this point, the text can still be changed by double clicking in it to get the text cursor.

Change text copy

When you are satisfied with the changes to the text, then choose the Release Warp option and it will change it take it out of the Warp edit.

Release Warp copy

Notice that it separates each letter and you will need to group the design back together for it to move as one object.

If the changes are not what you had in mind, choose the Restore Original Shapes option and the text will revert back to the original design.

Restore original copy

And there is more!!!

Grab the slider on the right side of the panels and it reveals more Warp Template options.

Slider more options copy

So much fun to play with all the options available to you in the software.

Left side 2 copy

Right side 2 copy

Now, what are some ideas that you can think of to create Word Art with these Warp Templates?

Final copy

Feel free to post your comments and questions below or on my Facebook group at Silhouette Secrets with EllyMae.

Enjoy!

SS_Signature copySS Logo snip it

**This post may contain affiliate links. What that means is that I may receive compensation if you purchase through the links I have provided. The price you pay for the product or service is not higher but I may get compensated for sharing.

Posted on 21 Comments

Print and Cut – Part 1

Let’s Explore v4 – Print & Cut – Part 1

I love the print and cut option on the Silhouette software!

I’ve used it for many years and in this 2 part series I will share some tips with you for getting a successful print and cut.

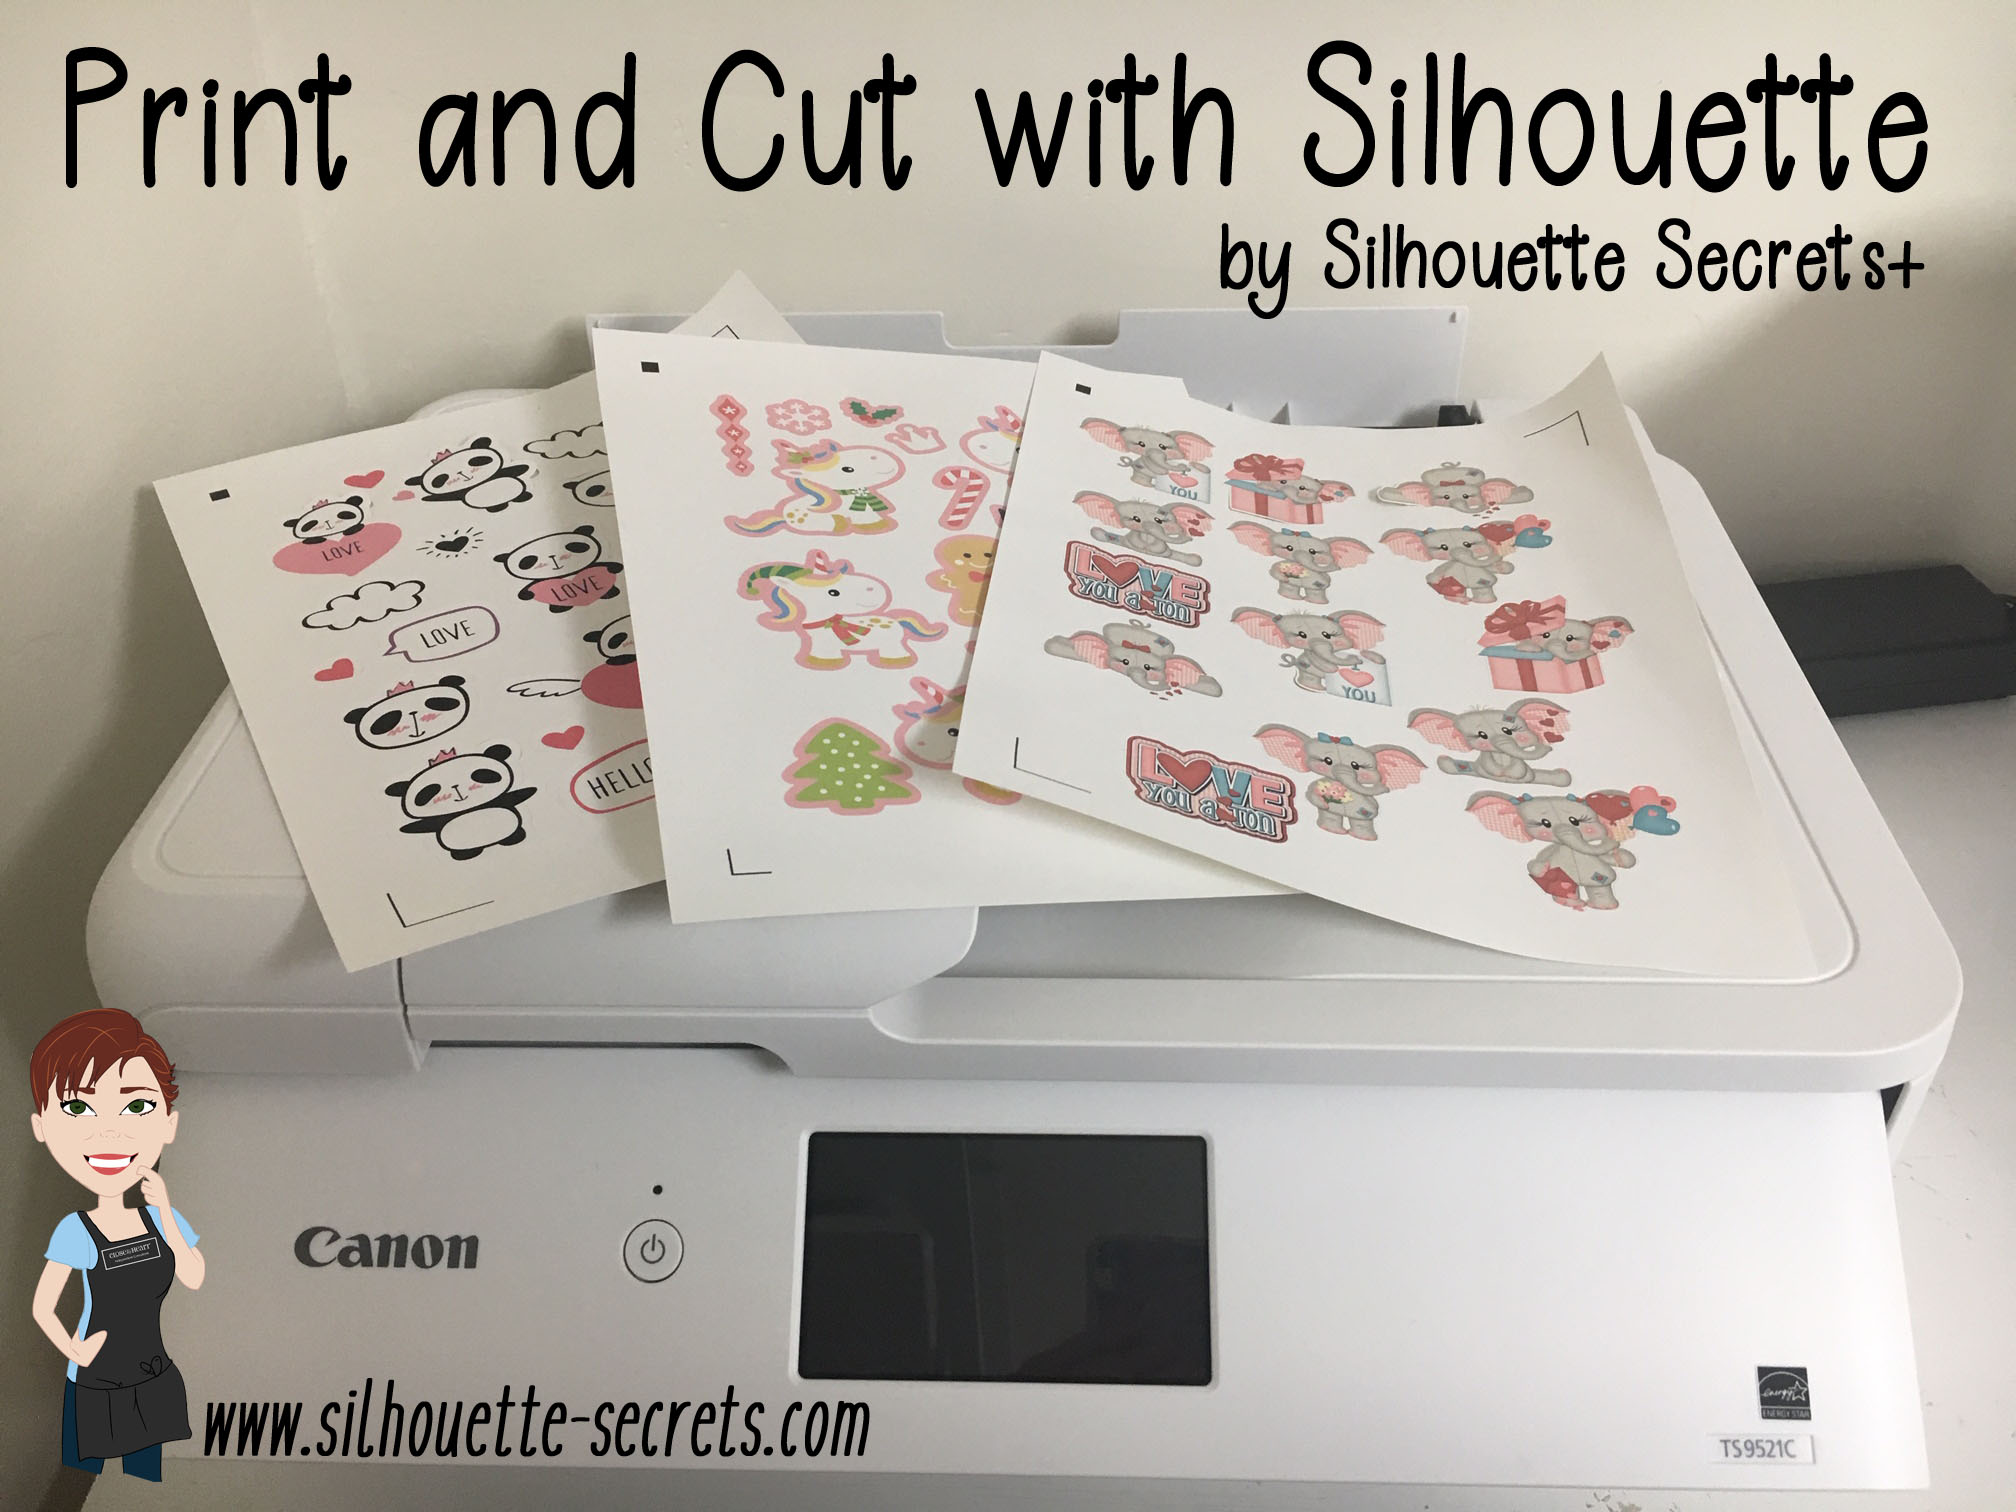
A few weeks back I made up special Chemo day gift bags for a friend of mine who is a Planner gal. I found a few print and cut files that I knew she would like on the Silhouette Design Store and then set up to print them all out in the Silhouette software, then I let the Cameo machine do it’s work and cut out around them. I will say that every single one turned out perfectly!

silhouettesecrets_pnc copy

I was asked so many questions, I thought I’d show you how I did it. I am going to break this up into 3 parts so you get the most out of it.
Part 1 – Setting up a pre-designed Print and Cut project
Part 2 – Print and Cut – Text
Part 3 – Print and Cut – Images

Pre-Designed Print and Cut Project

First, find a Print and Cut design that you like. I am using the ML Panda Love Stickers from the Silhouette Design Store (this file is no longer available in the store).
This can be used for any print and cut file available – click HERE to see more Print & Cut designs.
Search by file type and narrow the search down in the Filter on the left side.
For instance, in the photo below, I searched Print & Cut Design Type & Planner for the keyword.

Planner Sticker image

Open it in the Silhouette software.
Every file you open will be different in what it looks like when you open it and is based off how the Designer saved it.

open file

Next, on the Page Setup Panel, adjust the Page Size to Current Printer. Also, check the boxes next to the Show Print Border and Show Cut Border. These are guides that will help in lining things up so they print on the page and are not outside of the cut area.
With the Reveal set at 0% you will see a white page that is the size of the Page Size you have chosen.

page size copy

Now, in order for the Cameo to read where the design is on the printed page, we need to add Registration marks. Click on the Page Setup Panel – 3rd tab – Registration Marks.

registration marks panel copy

Then choose Type 1 Registration marks if you have a Cameo, Portrait or Curio.
If you have an older model machine before the Cameo 1, then you would use the Type 2 marks.

You will notice 3 marks appear on the Page. A square in the top left corner, a corner bracket in the top right corner and bottom left corner (this is with the Portrait Orientation – Page Setup chosen – this is the Orientation I recommend).

registration marks copy

Tip for a beginner or for print and cut issues.

  • Click on the Restore Defaults button. This will reset the Registration marks to the default and this is where I suggest you start from.
    While the registration marks can be moved, each printer will vary in how far they can be moved and still get an accurate cut. I suggest starting with the default registration marks and then you can test from there once you are familiar with the print and cut process.

Next, make sure that your Print and Cut design is inside of the Cut border. Notice that the Cut border has now moved in line with the 3 registration marks. Anything outside of that border will not cut and may interfere with the reading of the registration marks.

cut border copy

In the photo above, I need to move the design to the left because it is too close to the right cut line.

And the design cannot be in the cross hatched area of the print and cut. The optical eye of the Cameo needs this area to read those registration marks correctly. If the design is in the cross hatched areas, it can interfere with the optical eye reading and either give you an error or an inaccurate cut.

The cross hatched areas are across the top and the bottom left corner.

print and cut parts

As I mentioned above, each file you open will be different. With this file, there are 2 parts to the print and cut design. One part is the graphic of the pandas and the second is the cut lines. If the design needs to be moved, make sure to select & move both parts together.

print and cut to send

Once my design is moved away from the cut border and the cross hatched areas, it is ready to send to the printer.

There are 2 ways to do this.

Click on the Printer icon in the top left corner. This will send the print job directly to the printer that is set as the default printer connected to your computer.

Printer icon copy

In the top left corner, choose File > Print and you will get a pop up of Printer options. (Ctrl + P)

file print
The options vary by the printer you have connected to your computer.

Tip: If you have a Preferences button, click on that and look for a “Preview before Printing” option. This is a great feature to see if it is going to print how you want it to before actually committing to the print job.

print preferences copy

Check the Preview before Printing box.

preview before printing copy

Then click OK.

print copy

And choose Print.

A Printer menu will pop up and the design can be previewed before committing to printing.

print preview
Again, this will be dependent on the printer and what the printer setup settings are. Not every user will have this and it can vary, but never hurts to look for it.

Tip: Check to make sure that the bottom left registration mark will print completely. I see a lot of print and cut issues and one is the registration marks were outside the users printer margins and did not print. This means you will either get a registration error or it will cut inaccurately because it doesn’t have all the information to read it correctly.

Once you’ve verified the settings are correct, click on Print and it will send it to the current default printer.

silhouettesecrets_pnc_printer

Grab it off the printer.

Place it on the Silhouette cutting mat exactly as it shows on the virtual design screen, in the top left corner of the cutting mat.

silhouettesecrets_printed

Then load the cutting mat next to the line on the left that the arrows point to.

silhouettesecrets_arrow copy

Click on the Send tab in the top right corner of the Silhouette software.

send tab top right copy

Choose the Material type.
I am using the Staples brand Sticker Paper and the preset for Sticker Paper – White works well for me.

send tab copy

Tip: If cutting a new material, use the test cut feature to test that material before you send the entire project. This can save you lots of headache on mis-cuts.

Once you click on the Send button on the bottom of the screen, the Cameo will then read the registration marks and begin the cut.

silhouettesecrets_sticker2

Perfect print and cut!

Save this to Pinterest for future reference

Print & Cut 1

Troubleshooting Print and Cut

Did it not cut accurately or did you get a registration error? Here are a few things to check when you do run into an issue.

  1. Do you have the correct registration marks chosen? Type 1 should be used for the Cameo, Portrait or Curio machines.
  2. Did the registration marks print on the page? Make sure on the Page Setup Panel – 3rd tab – Registration marks that they are turned on.
  3. Did the registration marks print completely? I often see the bottom left registration mark did not print completely because it was outside of the printer margins. Check to make sure it printed completely and if not, then either move the registration mark slightly up or increase the Printer margins under the Printer Setup.
  4. Is the design in the cross-hatched areas of the print and cut? This will interfere with the optical eye and can either result in a registration error or inaccurate cut around the design. Move the design away from the cross hatched area and reprint on copy paper until you get an accurate cut.
  5. Did the registration marks get moved? Each printer will vary in how far out the registration marks can be moved and still read accurately. Click the Restore to Defaults and use those as a test to get an accurate cut. As you become more familiar with the process and your printer capabilities, you can move them out and test how far the limit is.
  6. Were changes made to the file after the design was printed? This will result in inaccurate cuts because the design is no longer in the same place it was when it was printed. Re-print and do not move the design after printing.
  7. Did the printer feed multiple pages through at a time? Or did you print more than one copy at a time? For best results, I suggest feeding one sheet of material in the printer at a time. Multiple copies printed can result in the paper being pulled in too quickly and then the print is off on the page and not accurate.
  8. Is the printer low on ink? Ink quality can interfere with the optical eye reading the registration marks accurately.
  9. Was it printed at high quality? Printing at a low quality can also affect how the optical eye reads the registration marks.
  10. Still getting a registration error? Start over on a new design mat and go through each step again. Then print a test print on copy paper.

I hope these tips help you have a successful print and cut experience.

Pin this image to Pinterest to save for future reference

Troubleshooting PNC

Want to know more on Print and Cut?
Check out Part 2 – Print and Cut – Text & Part 3 – Print and Cut – Images

I would love to see what you create – feel free to post on my Facebook group at
Silhouette Secrets+ with EllyMae.

Enjoy!

SS_Signature copySS Logo snip it

**This post may contain affiliate links. What that means is that I may receive compensation if you purchase through the links I have provided. The price you pay for the product or service is not higher but I may get compensated for sharing.

Posted on 2 Comments

Let’s Explore Silhouette v4 in 2018 & 2019

Wow! 2018 has sure gone by fast!

There has been so much that has happened – what a year!

I started the year with the goal to have a blog post every week and I only missed 1-2 weeks, so I’m counting that as a success! On to next year!

I started the year out with a series called Let’s Explore v4 and have learned so much going through the software in detail. There are some features that I had never used and I learned so much as I researched and played with it. This program is so powerful and it continues to amaze me all the time.

SS cover photo copy

This Let’s Explore v4 series has been so popular that I will continue it into 2019 and I’ve created a special section on the blog for it all. Find it HERE.

There is still so much more to explore and more new features coming with the v4.2 release.

In addition to the series, I added some projects in here and there that I used the tools in the Silhouette v4 software to complete.

Collage Projects 2019

Layered vinyl acrylic ornaments

Cutting cards with the Silhouette

Back to School bag tags

“Tank” top

SilhouetteShowcase

Vinyl, Glass etching, acrylic etching – oh my!

WM

Faux leather earrings with Silhouette Leatherette

Header photo

Custom Shadow box with the Silhouette

Copy of Collage projects 2018-2

Subtracting text to create word art

Using Multiple files to create a design

Pop up cards

Creating rhinestone designs

Cutting without a mat

Cutting without a mat

Copy of Copy of Collage projects 2018-3

Hot Mess with the Silhouette

Layering vinyl

Bus Driver Appreciation

Teacher gifts

What a year! My absolute favorite thing about the Silhouette is creating projects and being able to show others how to do it too!

Make sure to join my Facebook group – Silhouette Secrets+ with EllyMae and share your projects there – I love seeing what you are doing.

If you are looking for personal instruction – check out the Silhouette Instruction & Events tab at the top of the blog.

What coming in 2019?

Classes, workshops, TJC Hands on Silhouette Spring Retreat, Intermediate Curio Workshop at Craft Chameleon in St. Louis, All Things Silhouette Conferences in June & November, more Let’s Explore v4 and who knows what else will be added to the calendar.

Classes

Here are just a few that I held in 2018


Keep checking on the Silhouette Instruction & Events tab for future classes.

TJC Silhouette Spring Hands On Retreat

March 1-3, 2019
Woodbridge, VA
Staff & Instructor
Silhouette-Spring-Retreat
Find out more information and register HERE!

Intermediate Curio 1 day Workshop at Craft Chameleon

March 2019
St. Louis, MO
More details coming soon!

All Things Silhouette Conference 2019

June 8-9, 2019
Peachtree City, GA
Staff & Instructor

ATS-logo.slider.2019-1024x419

Find out more details & register HERE for the June All Things Silhouette Conference.
New this ATS – Pre-day hands on classes! The Ultimate ATS package!

Silhouette-Getaway_02-1024x597

Silhouette Getaway
September 6-8, 2019
Peachtree City, GA

ATS-logo-slider-11-2019-1024x419

All Things Silhouette Conference
November 9-10, 2019
Peachtree City, GA

I want to thank everyone for following Silhouette Secrets+ in 2018 and want to wish everyone a Happy New Year!

Looking forward to what 2019 brings!

Enjoy!

SS_Signature copySS Logo snip it

**This post may contain affiliate links. What that means is that I may receive compensation if you purchase through the links I have provided. The price you pay for the product or service is not higher but I may get compensated for sharing.

Posted on 2 Comments

Let’s Explore v4 – Warp Panel

Warp Panel in Silhouette Studio v4

I love that with the Silhouette software you can pretty much manipulate anything. I am one who likes to have control over my designs and files. And that is why I love the Silhouette software – I can do that!

The Basic Warp is a Designer Edition upgrade feature that gives you the ability to move Edit points in the design to manipulate or warp the image.

The Warp Panel can be found on the bottom right side of the Silhouette Studio v4 screen. The size of your computer screen will determine whether you have to click on an arrow to have the menu expand.

On a larger screen, you will find it here:

Warp Panel copy

On a smaller screen, you will see a little arrow pointing left at the bottom of the icons. Click on this arrow and a menu with more icons will pop out.

Warp Panel smaller screen copy.jpg

So let’s take a look at what each part of the Warp Panel means.

Warp detail copy

  1. Warp Selected Shapes – Select the object to warp and then click warp selected shapes and the design will change to points you can edit.Warp Selected Shapes

    I am using Spooky Font by Lori Whitlock found in the Silhouette Design Store.

  2. Restore Original Shapes – Selecting this will revert any changes made back to the original shape. This is very helpful if you want to play around with the design and change your mind.
  3. Release Warp – This option releases the design back to a vector format and the points are no longer editable and how to finish the design once the warp is complete.Release WarpKeep in mind that once the text is changed by welding, converting to path, releasing the warp, etc. it is no longer editable text and is now a vector image. For more information on this and the Text Style Panel see the Let’s Explore v4 Text Style Panel post.
  4. Divisions – Change how the warp is divided up. The default is 3 divisions and each option chosen will change the look of the warped object. Here is the default of 3:Happy Halloween warp

    And here is when there is 2 divisions chosen with the sides pulled down the same.

    Divisions 2

    The more divisions, the more points you have to edit and pull the direction of the design.

  5. Columns – Change the number of columns in the design that can be edited. The default is 1 and the photo below shows it increased to 4.Columns
  6. Rows – Change the number of rows in the design that can be edited. The default is 1 and the photo below shows 5.Rows

As you can see, there are many things in this small panel that can be changed and many ways you can created fabulous, unique designs.

When you are finished with the design, make sure to click the “Release Warp” option to finish the design.

The Warp feature does add a new complexity to the design, so you will notice that it can take more time for your computer to “think” and process the data that you are changing. This will vary by individual users computers and I would recommend saving the design file often, just in case.

Skeleton door sign
*Positionable Skeleton by Samantha Walker – Design #4828

Now I have a little bit of Halloween decor for my door. It may be there until January but it’s a step. I did use the great feature of cutting without a mat to complete this project – find out more about Cutting without a mat HERE.

Final warp
What have you used the Warp Tool for?
I would love to see what you create – feel free to post on my Facebook group at
Silhouette Secrets+ with EllyMae.

Enjoy!

SS_Signature copySS Logo snip it

**This post may contain affiliate links. What that means is that I may receive compensation if you purchase through the links I have provided. The price you pay for the product or service is not higher but I may get compensated for sharing.

Posted on Leave a comment

Let’s Explore v 4 Recap

We are half-way through 2018 – can you believe that?

So it’s the perfect time to recap what the “Let’s Explore v4” series has covered so far since January.

Let's Explore Recap final 2copy

Let’s Explore v 4 series

Page Setup Panel – Tab 1 – Page Size & Cutting Mat

Page Setup copy

Page Setup Panel – Tab 2 – Grid Options & Spacing

Page Setup Tab 2 copy

Page Setup Panel – Tab 3 – Registration Marks – Print & Cut

Registration marks panel copy

Fill Color Panel

Fill Color Panel copy

Line Style Panel

Line Style Panel copy

Trace Panel – Tab 1 – Basic Trace

Tracing Panel copy

Trace Panel – Tab 2 – Trace By Color (Designer Edition feature)

Trace Panel copy

Trace Panel – Tab 3 – Magnet Trace (Designer Edition feature)

Magnet Trace Panel copy

Pixscan Panel

Pixscan copy

Text Style Panel – Tab 1 – Text Style

Text Style Panel main copy

Text Style Panel – Glyphs and Spell check

Glyph

Transform Panel – Tab 1 – Align Tab

Transform Panel copy

Transform Panel – Tab 2 – Scale Tab

Scale tab copy

Transform Panel – Tab 3 – Rotate Tab

Rotate main copy

Transform Panel – Tab 4 – Move by Tab

4-25 Transform -Move copy

Transform Panel – Tab 5 – Shear (Designer Edition feature)

Shear Panel copy

Replicate Panel – Tab 1 & 2 – Replicate & Number of Copies

Replicate panel copy

Replicate Panel – Tab 3 – Object to Path

Replicate Object on Path copy

Modify Panel – Part 1

Modify Panel copy

Modify Panel – Part 2 – Compound Paths

Modify Panel details copy

Offset Panel

6-5 Offset Panel copy

Pop Up Panel (Designer Edition feature)

Pop Up Panel copy

Stipple Panel (Curio option only)

Stipple panel copy

Nesting Panel (Designer Edition feature)

Nesting feature copy

There are so many things that the Silhouette Studio program can do. It is really an amazing program and I hope that you have learned something throughout the series. There is still so much more to explore!

Please let me know what is one thing you have learned that you did not know before by leaving a comment here or on my Facebook group.

Enjoy !

THANK YOU for your support! How can you help? Click HERE & buy a coffee. Every little bit helps with the cost of running the site.

Looking for more in-depth, step-by-step classes, check out all of my online Silhouette classes on my Teachable site HERE.

SS Logo snip it

**This post may contain affiliate links. What that means is that I may receive compensation if you purchase through the links I have provided. The price you pay for the product or service is not higher but I may get compensated for sharing.

Posted on 6 Comments

Let’s Explore v4 – Stipple Panel

If you are Silhouette Cameo 3, Cameo 4, or Curio owner and have plugged your machine into your computer, you will have access to the Stipple Panel.

Stipple panel copy

With a Cameo 3 or 4, you can use a pen or marker to stipple a design. This means that the design is a series of dots. With this feature you can turn any design or photo into a stippled image.

With a Curio, the Stippling tool and the embossing mat can be used together to create the stippled design on other media types. With the Curio, it actually makes small indents in the material such as the Stippling metal sheets. The Stippling tool is designed to be used with the Curio machine.

Stipple detail copy

  1. Stipple Edge – This option will add Stippling dots around the edges of the design on the screen.Stipple Edge copy *Mama Needs Wine by Dawn Nicole Designs – Design #209918
  2. Spacing – Adjust the spacing between the dots on the Stipple edge by increasing or decreasing the inches here.Spacing Stipple Edge copy
  3. Stipple Fill – Choose from many fill options. The way it fills in with a stipple will vary with each design.Stipple Fill demo
  4. Grid Spacing – Increase or decrease the grid spacing of the design being stippled.Grid Spacing demoHere I have decreased the grid spacing on all the designs to 0.500 inches. This places more of the design and stipple into a smaller grid area on the original object.
  5. Stipple Spacing – Increase or decrease the spacing of the stipple dots to be closer or farther from each other. Something to note here is that with some Stipple fill patterns, options may be grayed out because they do not apply. As you can see in the first 2 of my example here.Stipple SpacingHere I increased the Stipple spacing to 0.100 inches.
  6. Scale Factor – Increase or decrease the scale of the points by a percentage.Scale factorHere I scaled all of them down to 50%. As you can see, with each option, the look of the design changes and you can hardly recognize which options that I filled each with.
  7. Angle – Change the angle of how the design fills the object.Angle demoAbove, the Angle is set for 135 degrees on all the designs.
  8. Offset – This controls how far the fill pattern starts from the edge of the original design.Offset demoAbove, I have changed the offset to 0.250 inches and you can see that on all of the hearts, it has started the fill pattern 0.250 inches from the edge of the design.
  9. Stipple Size – Change the size of the Stipple point.Stipple sizeThis option only changes the visual look of your design and does not change how big of a point the pen or tool will stipple.
  10. Print Stipple – By checking this, the design can be sent to the printer to print the stippled image.

Keep in mind that the more dots you add to your design, the more details that is for your Studio program and computer to process. What does that mean? That means the more details you have in your design, the more data you computer is processing. If you experience a lag, be patient, the computer is working and will catch up.

Now, another thing to note, if you missed it in the beginning, is that this Stipple feature is only available for Cameo 3 or Curio owners, otherwise, the panel will be grayed out.

There are so many fun options to explore in the Silhouette software – hope you have fun creating today! Feel free to post on my Facebook group at Silhouette Secrets+ with EllyMae.

Enjoy !

THANK YOU for your support! How can you help? Click HERE & buy a coffee. Every little bit helps with the cost of running the site.

Looking for more in-depth, step-by-step classes, check out all of my online Silhouette classes on my Teachable site HERE.

SS Logo snip it

**This post may contain affiliate links. What that means is that I may receive compensation if you purchase through the links I have provided. The price you pay for the product or service is not higher but I may get compensated for sharing.

Posted on 29 Comments

Let’s Explore v4 – Modify Panel – Part 1

The Modify Panel has lots of neat tools in it that perform a variety of functions. It can be found on the right side of the Silhouette Studio v4.

Modify Panel v4

Let’s take a look at all the tools in this panel.

Modify Panel details copy

  1. Weld – Joining two or more objects that are overlapping together to form 1 object. This is often used with text when you want it to cut as one solid design vs individual letters.Weld3You will notice that the top text, the red lines from the characters overlaps the letter next to it. If you sent it to cut like this, it will cut out the red lines exactly how they show, so your letters would have cuts through them.Weld - zoom copyBy choosing to weld the font first, you can join the letters together so it cuts as one smooth piece. After you have welded, any piece of the text that is not overlapping will now be a separate object – like the dots of the i, so you want to make sure to Group them together to keep the text moving as one design. When you weld text, it does change it from editable text to a vector image, so make sure to make a copy & pull it off to the side so you have the original in case you need to go back.
  2. Subtract – Takes the top layer and subtracts it out of the bottom layer under it.SubtractOn top is the original design. Mom is typed out and behind the names. When you select both designs and choose Subtract, it subtracts out the names (top layer) from the Mom design (bottom layer). This works well for things like layering HTV where you don’t want the bulk of layering on your shirt or if you are using glitter HTV that is not recommended to be layered. Tip: with this design, I would create an offset of the original names and then use the offset to subtract from the Mom design. It gives you a little more flexibility in placement when you apply it to the shirt. Offset copy I used a 0.20 offset on this design. Then moved the original name text away and used the Mom (bottom layer) and the offset (new top layer) to Subtract. Offset demo Since I used an offset, this will allow you to place your names text inside of the area when applying the HTV and you won’t have to worry as much about shrinkage and getting it perfect. Offset final Move the name text back on top of your Subtracted design to get an idea of how it looks. On the top design, you have to get the exact placement of the names lined up with the bottom layer. On the bottom design, you will notice there is a bit of white showing around the name text, this will be beneficial when you are applying HTV so you don’t have to worry as much as about the HTV shrinking when you press each color. temp_1 I used MF I love glitter font by Misti Fonts and Gulana font. Keep in mind if you plan to sell creations with these fonts, you will want to purchase the Commercial License for each. If you are using adhesive vinyl, it is not as much of an issue because there is no shrinkage. But, you will still need to get it lined up perfectly and layering marks can help with that – check out how to do that HERE.
  3. Subtract All – This option removes any part of an design that is behind another design. I always start my pulling off a copy of my design to the holding area off the mat, so I can go back to the original if needed.Subtract All So above I drew a heart and moved it behind my Mom and name layers. Make sure to align the design how you want and then I chose Subtract All and it cuts out the top 2 layers from the very bottom layer (heart). This works great for making designs that you don’t want to have the bulk of materials overlapping. Again you could use an offset to help with ease of getting it lined up and not worrying about shrinkage.
  4. Intersect – When 2 or more designs are overlapping, this will keep only the part of the design that is intersecting between the designs and the rest is deleted.Intersect
  5. Divide – When 2 or more designs are overlapping, this will divide any parts that are overlapping, but keeps all of the pieces on the design mat. Nothing is deleted.Divide
  6. Crop – This will allow you to crop a shape out of a pattern, design or in this case a photo.CropDraw a heart over the photo, select both the photo and circle, then choose Crop and it will take that shape out of the layer under it.

There are so many neat things you can accomplish with these tools under the Modify Panel. I encourage you to draw some shapes, pull in some patterns and just play around with them to see what they do.

Save this for future reference by pinning the image below.

Pin - Modify Panel - Part 1

Find Part 2 of the Modify Panel HERE – Compound Paths & Detach Lines

So far in the “Let’s Explore v4” series we have covered: – Page Setup Panel – Tab 1 – Page Size, Cutting Mat, Rotate View, Print & Cut Borders – Page Setup Panel – Tab 2 – Grid OptionsPage Setup Panel – Tab 3 – Registration MarksFill Color PanelLine Style PanelTrace Panel – Basic TraceTrace Panel – Trace by ColorTrace Panel – Magnet TracePixscan PanelText Style Panel – Tab 1Text Style Panel – Tab 2 & 3 – Glyphs & Spell CheckTransform Panel – Align TabTransform Panel – Scale TabTransform Panel – RotateTransform Panel – Move ByTransform Panel – Shear byReplicate Panel – Tab 1 & 2Replicate Panel – Object to Path Whew! We’ve covered a lot!

I truly believe that if you learn how to create in the software, the possibilities are endless! The software is the key! And it is such a powerful program that is available for anyone to use.

I would love to see what you are creating or learning with your Silhouette! Feel free to post photos or questions on my Facebook group at Silhouette Secrets with EllyMae.

Enjoy !

THANK YOU for your support! How can you help? Click HERE & buy a coffee. Every little bit helps with the cost of running the site.

Looking for more in-depth, step-by-step classes, check out all of my online Silhouette classes on my Teachable site HERE.

SS Logo snip it

**This post may contain affiliate links. What that means is that I may receive compensation if you purchase through the links I have provided. The price you pay for the product or service is not higher but I may get compensated for sharing.

Posted on 4 Comments

Let’s Explore – Transform – Shear

Today we are on the final tab of the Transform Panel – the Shear tab. This Panel is available if you have the Designer Edition upgrade to the software.

This is another tool that is often overlooked. Why would you use it?

You can change the look of a basic shape, design or even font to give it a new look.

The Shear tab is found on the rights side of the Silhouette Studio v4 under the Transform Panel.

Shear Panel copy

Below I have a few examples of how you can use this tool to change the look for a font or design.

Shear examples

Let’s check it out and see some examples.

Shear Panel detail copy

  1. Horizontal Shear Preset- Shear or skew by preset degrees on a horizontal line – choose between -30, -15, 0, 15, or 30 degrees.Horizontal Preset shear
  2. Horizontal Custom – Shear or skew by typing in a custom number and it will shear to that degree on the horizontal line.Custome Horizontal shear
  3. Vertical Shear Preset – Shear or skew by preset degrees on a vertical line – choose between -30, -15, 0, 15, or 30 degrees.Vertical Shear Presets
  4. Vertical Shear Custom – Shear or skew by typing in a customer number and it will shear to the degree on the vertical line.Vertical Shear Custom
  5. Show Shear Handles – Check the box to show the Shear Handles that you can grab and skew your design manually instead of putting in a certain degree designation.Show Shear Handles copy

This can make the designs or shape you have in your library go a lot further when you know that you can manipulate and change them.

For instance, I took 2 basic shapes and created this rough sun design.

Sun demo

By cutting a circle in half, I created the main sun part. Then I took a rectangle and used the Shear Handles to manipulate each copy of the streaks.

Want to give your signature a more realistic slant to how it would be written?

Signature shear

Do you have a font that does not have the Italic option? Then create your own.

Italic demo

Whether you are creating your own designs or just want to play around, the Shear tool is definitely something to play around with.

Enjoy !

THANK YOU for your support! How can you help? Click HERE & buy a coffee. Every little bit helps with the cost of running the site.

Looking for more in-depth, step-by-step classes, check out all of my online Silhouette classes on my Teachable site HERE.

SS Logo snip it

**This post may contain affiliate links. What that means is that I may receive compensation if you purchase through the links I have provided. The price you pay for the product or service is not higher but I may get compensated for sharing.

Posted on 7 Comments

Let’s Explore v4 – Transform = Move

Did you know that you can Move objects on your Silhouette Design mat specifically into place?

Pretty neat when you start to look at it.

Under the Transform Panel on the right side, then the 4th tab at the top of the Panel is the “Move By” tab.

4-25 Transform -Move copy

This allows you to move an object to an exact location on the Design mat.

4-25 Transform -Move detail copy

  1. Directional arrows – Move left, move right, move up, move down – choose which direction you want to move your design.
  2. Distance – Set the exact distance you want your design to move.
    Here is the original design placed on my design mat:
    Distance before
    *Running Out Wine Cardio design #222003 by Megan Hardy Design

    Now see how it moved exactly 3.25″ when I select the design and click on the Move right directional arrow.

    Distance after

  3. X and Y coordinates – Set the exact X and Y location of your design on your mat.
    If you look in my above photo, when I moved it 3.25″ to the right, it also added in the X and Y coordinates. This means that I can also move something by changing those numbers. Here I entered my X as 5, so it moved it 5″ from the left side and my Y as 3″, so it moved it 3″ down from the top.X and Y

    You can also choose how it applies the X and Y coordinates by selecting the position on the square that you want it to apply from.
    My photo above has it applied in the top left corner.X Y position copy
    But you can choose what position works best for you, whether it’s the Center of the design or another location as well.

  4. Apply – Click here to apply the Move or hit Enter.

And that is how you can move things on your design screen to the exact location you want.
Can you move it manually? Yes, you sure can!
Drag and move it where you want.
Or you can use the Move tools and place it exactly.
Just like so many other functions in the Silhouette software – there are multiple ways to do things!

Enjoy !

THANK YOU for your support! How can you help? Click HERE & buy a coffee. Every little bit helps with the cost of running the site.

Looking for more in-depth, step-by-step classes, check out all of my online Silhouette classes on my Teachable site HERE.

SS Logo snip it
**This post may contain affiliate links. What that means is that I may receive compensation if you purchase through the links I have provided. The price you pay for the product or service is not higher but I may get compensated for sharing.