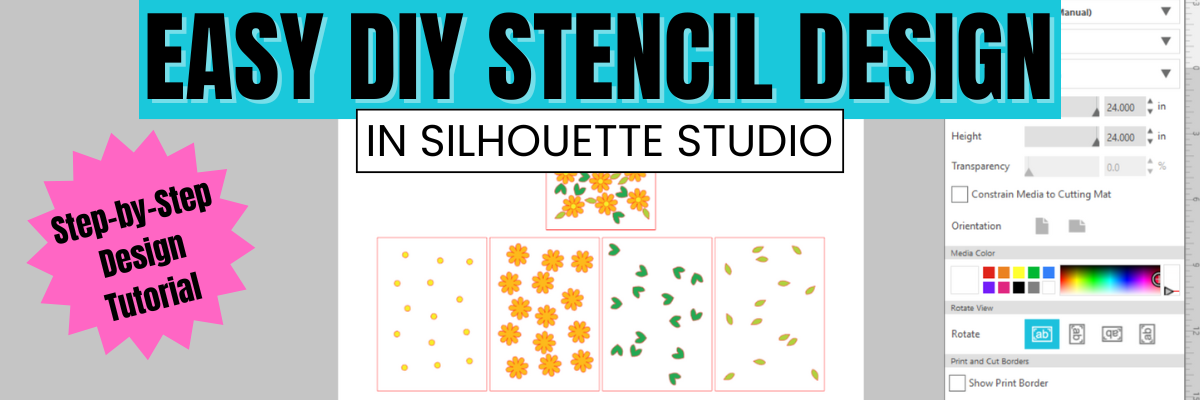
Did you miss this video tutorial? Don’t worry — I’ve got you covered! In this step-by-step tutorial from the Silhouette Secrets+ YouTube channel, I walk you through exactly how to create a layered stencil design in Silhouette Studio. Whether you’re a beginner or just looking to level up your stencil projects, this video will show you how to break a design into layers, align them perfectly, and prep each one for cutting. Layered stencils are perfect for multi-color painting, mixed media, and more — and with these tips, you’ll be designing your own in no time! Watch the full video and start crafting with confidence.
Affiliate links may be present in the following blog post and as an Amazon Associate, I earn from qualifying purchases.
What would you use stencils for? Let us know in the comments below.
Save this for future reference by pinning the image below.
Enjoy !
THANK YOU for your support! How can you help? Click HERE & buy a coffee. Every little bit helps with the cost of running the site.
Silhouette Classes
Never stop learning! Let me help you take the anxiety out of learning with Silhouette and get to creating faster! My Silhouette classes are heavily focused on software, so you can take the skills & techniques taught and apply them to many future projects!
**This post may contain affiliate links. What that means is that I may receive compensation if you purchase through the links I have provided. The price you pay for the product or service is not higher but I may get compensated for sharing.
If you’re anything like me, finding the right tools for your creative space can make all the difference—and I just added a new one to my studio: the Magnetic Glass Craft Mat. I am loving it! From its sleek, sturdy surface to the strong magnets that keep materials perfectly in place, this mat has quickly become one of my absolute favorite tools. Whether you’re a paper crafter, vinyl user, or mixed media enthusiast, this is one studio upgrade you may find useful too!
Affiliate links may be present in the following blog post and as an Amazon Associate, I earn from qualifying purchases.
I have seen these craft mats advertised previously, but I got an in-person look at them at the 2025 Creativation in Seatle. I’ll be honest, I am usually anti-glass in my studio because you just never know what I will stumble across or drop. But I took a chance, and I bought this, and I love it!
This post is not sponsored by Glassboard Crafts or an advertisement for them. I am sharing a new tool I invested in and added to my craft space. I am asked often about tools I use and after requests by followers created a page on the website for “EllyMae’s Craft Supplies” – Find it at the top of the Silhouette Secrets+ website or click HERE.
In full disclosure, I am now an affiliate with Glassboard Crafts, and I do have a coupon code that can save you 15% on your order. Bonus for you if you decide to add this to your tools.
Use code SILHOUETTESECRETS to save 15% on your order HERE.
I knew I wanted a solid color because I record videos and a design can be distracting in the videos and white makes my camera go crazy trying to auto focus, so I chose a solid that I thought would be good. But I am drooling over all the patterns, and they just keep coming out with more.
One thing I didn’t think about until I tried to take photos to share is the reflection. Reflections always get the better of me. The surface reflects very, very well as you can see with my recording lights.
But I’ll work around that and adapt.
How I’ve Used My Magnetic Glass Craft Mat
Does everyone need this? Probably not, but I am loving it for 2 reasons – the heavy-duty magnets and the ease of cleaning up.
Lately I seem to be creating with more products that can be messy such as mixed media gel sticks, paints, paint markers, watercolors, and more. I am expanding my wheelhouse and loving the experimentation. But that can be messy too! At least for me.
Here are a few ways I’ve used it so far in the month since I received it.
This was for a video tutorial on creating a layered stencil in Silhouette (find that HERE). The magnets worked to hold the mixed media paper in place while working with the stencils. It could also be used to hold the stencils in place too; it would just depend on the thickness of your stencils and what magnets you have available to use. I ordered a 6″ magnetic ruler and have 4 of the mini pawn magnets.
I also used it as a palette to test some different techniques. I just scribbled the mixed media gel sticks on the glass surface, added a bit of water, and then used a paint brush to pick up the color. When my images didn’t turn out quite how I wanted, I simply used a paper towel to wipe up the water & remaining color.
I was using a combination of Posca Paint Markers and acrylic paint on this sign. The smaller pieces were easily colored with the markers, while larger pieces were a bit messier and needed more coverage.
I used the glass mat as my paint palette and to catch my mess when painting the larger pieces.
I love how this sign turned out. The tiki is a bit dark in the photos but shows up better in person.
And one project leads to another. While the sign was drying, I was already on to cutting the pieces of a larger tiki on the left side. No paint needed with this one, just two types of wood. And he quickly disappeared after being glued together as my husband claimed it for his office at work.
Next up was more paint markers – this time Sharpie Creative Markers on glass. This is the messy side of things. I applied adhesive vinyl to the backside of a glass frame, then colored in sections of the design with the Sharpie Creative Markers.
I could have used the magnets to hold the glass in place, which is completely an after thought. Instead, I was using the magnets to hold the rest of my markers from escaping, which you can’t see in this photo.
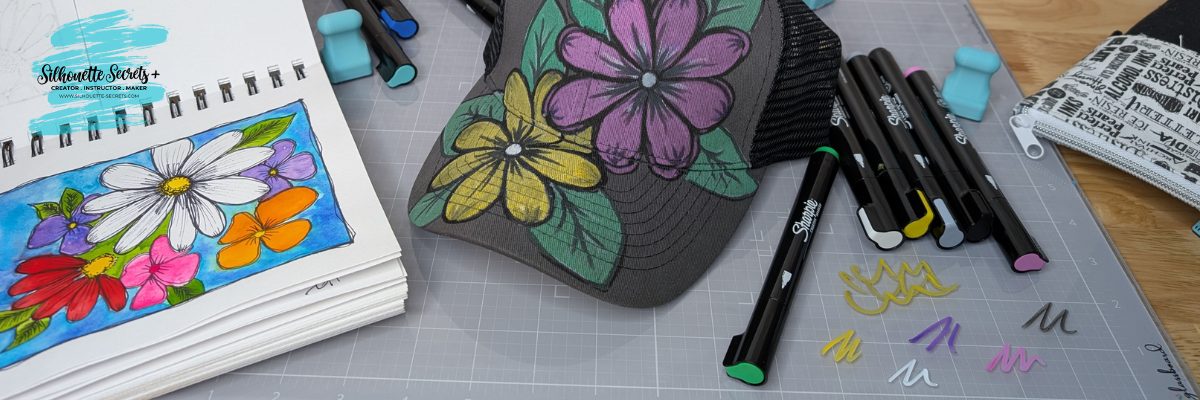
And while I had the Sharpie Creative Markers out, I really stepped outside my comfort zone and did a little doodling on a hat. Before I used each marker on the hat, I would scribble to make sure it was flowing well on the glass mat. A wet paper towel will make this easy clean up.
I took a watercolor class from Tracy Weinzafel earlier this year and ever since have been experimenting with different mediums and drawing the flowers taught at the event over and over for multiple projects.
I love new tools and craft supplies! Check out other supplies I use to create with HERE.
Watch for new patterns released and I’d love to hear your favorite below, even if you are just window shopping and dreaming. That’s how it all started for me!
Save this for future reference by pinning the image below.
Enjoy !
THANK YOU for your support! How can you help? Click HERE & buy a coffee. Every little bit helps with the cost of running the site.
Silhouette Classes
Never stop learning! Let me help you take the anxiety out of learning with Silhouette and get to creating faster! My Silhouette classes are heavily focused on software, so you can take the skills & techniques taught and apply them to many future projects!
**This post may contain affiliate links. What that means is that I may receive compensation if you purchase through the links I have provided. The price you pay for the product or service is not higher but I may get compensated for sharing.
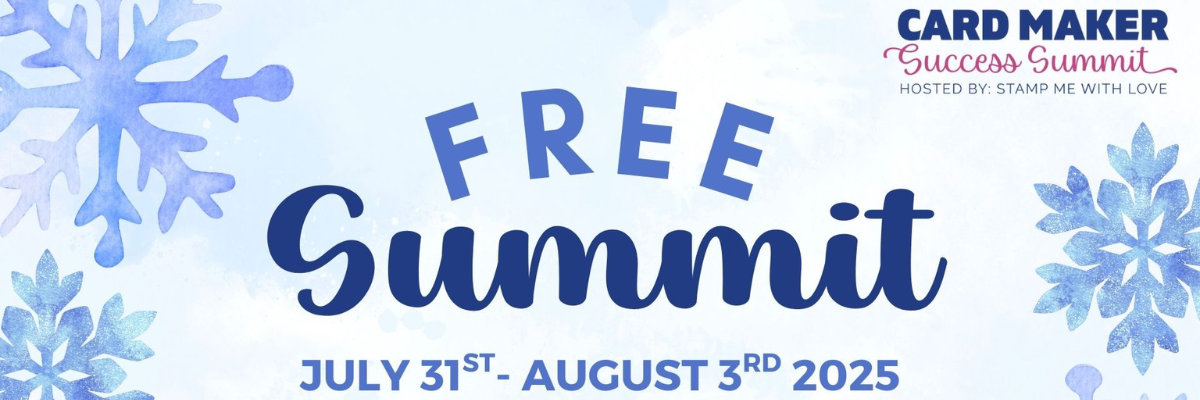
What if I told you the secret to creating truly meaningful holiday cards isn’t in the hustle and bustle of December—but in the calm, creative space of summer? That’s exactly what the Card Maker Success Summit – Holiday Edition is all about—and I’m thrilled to be part of it again!
Affiliate links may be present in the following blog post and as an Amazon Associate, I earn from qualifying purchases.
🗓️ Mark your calendar: July 31–August 3, 2025 📬 And yes—it’s completely FREE to attend!
I’ll be teaching a fun fold card class during the summit, and you won’t want to miss it.
Here is a look at my class called – Flying Into the Holidays: Seagull Fun Fold Card Class. This card style can be customized in many different ways and can double as home decor too!
Whether you’re new to card making or have a craft room full of paper and stamps, this summit is designed to inspire, support, and spark your creativity.
Why Attend the Holiday Edition of the Card Maker Success Summit?
This special 4-day online event is packed with presentations from card makers and instructors who get how important handmade cards are—especially during the holiday season. It’s perfect for crafters who want to:
✅ Create holiday cards that come from the heart ✅ Learn techniques that make card making feel joyful, not stressful ✅ Build confidence in trying something new (like my fun fold project!) ✅ Connect with a warm, welcoming community of creative friends
Here’s what one past attendee, Laurie M., had to say:
“I’ve been stamping for over 30 years. I learned new techniques in almost all of the classes. I have never attended a card summit before, but I’m totally enjoying these videos!”
That’s the magic of this summit—it’s not just about techniques, it’s about connection. Every holiday card you create becomes more meaningful when made with intention, creativity, and support from a community that shares your passion.
Your free ticket gives you access to all the presentations during the summit window, including my fun fold card class designed to add that special touch to your holiday greetings.
Here’s a sneak peek that I shared at the end of my class of an alternative way to decorate this Seagull fun fold card that I created using the FQB Nutcracker Navy kit by Nitwit Collections using print and cut.
This card style can be used with many different papers, patterns, and even digital kits too! Make it your own unique creation that will wow!
Let’s make this your most inspired and stress-free holiday season yet—starting now!
Enjoy !
THANK YOU for your support! How can you help? Click HERE & buy a coffee. Every little bit helps with the cost of running the site.
Silhouette Classes
Never stop learning! Let me help you take the anxiety out of learning with Silhouette and get to creating faster! My Silhouette classes are heavily focused on software, so you can take the skills & techniques taught and apply them to many future projects!
**This post may contain affiliate links. What that means is that I may receive compensation if you purchase through the links I have provided. The price you pay for the product or service is not higher but I may get compensated for sharing.
Are you curious about sublimation, DTF, white toner, and more creative ways to bring your designs to life? You’re in for a treat! 🎨
Affiliate links may be present in the following blog post and as an Amazon Associate, I earn from qualifying purchases.
Sublimation + Beyond Camp 2025 is back—and it’s bigger than ever! This incredible 3-day virtual event is completely FREE and packed with classes for every level of crafter. Whether you’re just getting started or looking to expand your skills, there’s something here for everyone.
🗓️ Event Dates: July 17–19, 2025 💻 Where: Online – join from anywhere (yes, even in your PJs!) 🎟️ Tickets: Free for a limited time! CLICK HERE to register
And I’m so excited to share that I’ll be teaching, too!
🎉 My Class: Draw It. Press It. Love It! Sublimation with Any Cutting Machine
In this class, I’ll show you how to take a simple design, sketch it with pens in your cutting machine, and press it onto your sublimation blanks for a custom creation you’ll love.
One of the best parts? You don’t need a specific machine. This project works with any cutting machine that can use pens to sketch—whether you’re using a Silhouette, Cricut, Siser Juliet, Brother ScanNCut, or another model. If your machine can draw with a pen, you’re good to go!
I even created the design in Silhouette Studio and saved it as an SVG, so you can easily bring it into your preferred software. You’ll get the SVG file included as part of the class!
What You’ll Get with Your Free Ticket:
16 foundational classes to help you build confidence
25 beginner and intermediate classes for sublimation, DTF, white toner, and more
Access to 40+ sessions from 17 content creators + 6 amazing brands
Free 24-hour viewing access to each day’s classes
A chance to win over $4,000 in giveaways!
Want to learn at your own pace? The All Access Pass gives you one full year of access to all sessions, plus $240+ in exclusive bonuses like cheat sheets, digital files, and templates. Once you register for the FREE ticket, you’ll see the All Access Pass offer pop up.
If you’re ready to get inspired, explore new techniques, and have fun creating something awesome, join me at Sublimation + Beyond Camp 2025!
Check out the supplies I used for this class HERE.
Want to learn more about sublimation without a printer right now? Click HERE
Enjoy !
THANK YOU for your support! How can you help? Click HERE & buy a coffee. Every little bit helps with the cost of running the site.
Silhouette Classes
Never stop learning! Let me help you take the anxiety out of learning with Silhouette and get to creating faster! My Silhouette classes are heavily focused on software, so you can take the skills & techniques taught and apply them to many future projects!
**This post may contain affiliate links. What that means is that I may receive compensation if you purchase through the links I have provided. The price you pay for the product or service is not higher but I may get compensated for sharing.
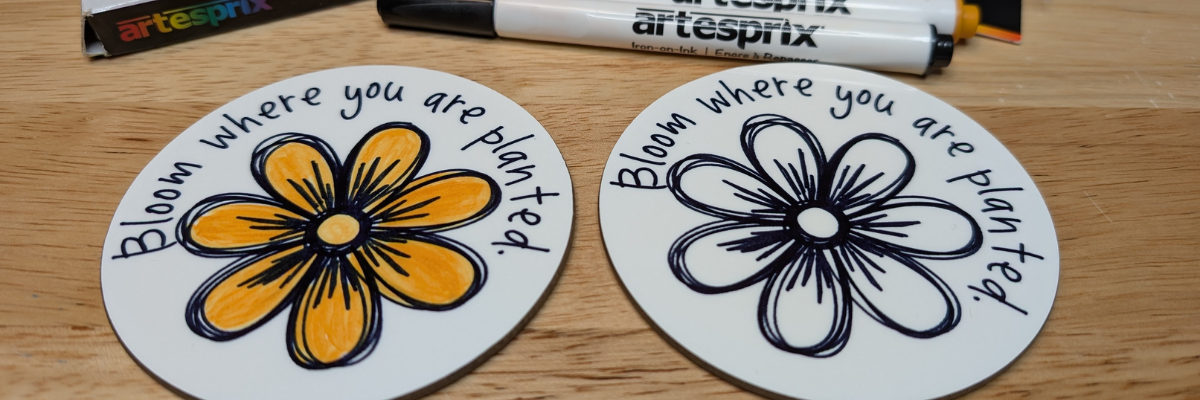
Looking for a fun and easy sublimation project you can make at home? These custom magnets made with Artesprix Sublimation Ink Pads are the perfect DIY craft! Using your favorite stamp set, you can create unique designs, add color to the design, or play with ink backgrounds for a bold look. Whether you’re making personalized gifts or adding a pop of personality to your fridge or workspace, this project is a great way to explore sublimation with vibrant, professional-quality results. I’ll share how you can make your own custom sublimation magnets today!
Affiliate links may be present in the following blog post and as an Amazon Associate I earn from qualifying purchases.
Artesprix Sublimation products make it so easy to create many different projects. In the current line up of products Artesprix has sublimation markers, paints, ink pads, and ink refills. The possibilities are endless in what can be created with them and the only thing you have to do is GET STARTED!
You don’t even need a plan. Just start creating and see what happens. One of the great things about the Artesprix Sublimation products is that they only need copy paper to work. Yes! Copy paper! So if you decide you are not “feeling” what you’ve created, set it aside and try again.
I have been itching to use some new Arden Creative Studio stamp sets that I had ordered. These are designed by Katie Pertiet, who I recently met again at Creativation 2025 in Seattle. I love seeing the designer work with their products and I do wish I’d recorded more of that. On my list for next year!
Supplies for Custom Magnets with Sublimation Inks:
THANK YOU for your support! How can you help? Click HERE & buy a coffee. Every little bit helps with the cost of running the site.
Silhouette Classes
Never stop learning! Let me help you take the anxiety out of learning with Silhouette and get to creating faster! My Silhouette classes are heavily focused on software, so you can take the skills & techniques taught and apply them to many future projects!
**This post may contain affiliate links. What that means is that I may receive compensation if you purchase through the links I have provided. The price you pay for the product or service is not higher but I may get compensated for sharing.
Looking for a fast and easy way to jump into designing with Silhouette Studio? In this quick tutorial, I’ll show you how to create a custom design in under 1 minute! Whether you are brand new to Silhouette or just short on time, this step-by-step guide is perfect for beginners and seasoned crafters alike. From shape tools to compound paths, you’ll learn how to make a project-ready design in no time—ideal for faux leather, fabric, vinyl, HTV, paper crafts, and more. Let’s get designing in 60 seconds or less!
Quick Design in Silhouette Studio
Open Silhouette Studio and grab the teardrop shape from the Flexishapes menu on the left side of Silhouette Studio.
Left click on the design mat and drag down to create the teardrop shape to create approximately a 2″ tall shape. It does not have to be perfect. Then right click and choose Convert to Path.
With the tear drop selected, in the top QAT (Quick Access Toolbar), highlight the numbers in the H box and change it to 2″. Press Enter.
Double click on the tear drop shape to activate the Edit Points. Click on the edit point at the top of the tear drop and 2 blue nodes will appear.
Grab the blue node on the left and drag it out so it is even with the red cut line on the left side.
Grab the blue node on the right side and move it to the right so it’s even with the red cut line.
Ta-da! Ok. It probably took longer than a minute to read the steps and follow them, but you can do this again and could design this shape in less than a minute. But you don’t have to! It’s not a speed test.
If you want to create the hole for the top of the earrings. Grab the Draw Ellipse tool on the left side, hold the Shift key down to draw a perfect circle. Let the mouse button go before you let the Shift key up and you will have a perfect circle. Decide what size you would like and adjust as needed. Place the circle at the top, select both the circle and the tear drop and Align Center.
With both the circle and the tear drop selected, right click and choose Make Compound Path. Fill the design with color and you will see the hole is “punched out” of the tear drop shape.
Save this for future reference by pinning the image below.
Enjoy !
THANK YOU for your support! How can you help? Click HERE & buy a coffee. Every little bit helps with the cost of running the site.
Silhouette Classes
Never stop learning! Let me help you take the anxiety out of learning with Silhouette and get to creating faster! My Silhouette classes are heavily focused on software, so you can take the skills & techniques taught and apply them to many future projects!
**This post may contain affiliate links. What that means is that I may receive compensation if you purchase through the links I have provided. The price you pay for the product or service is not higher but I may get compensated for sharing.
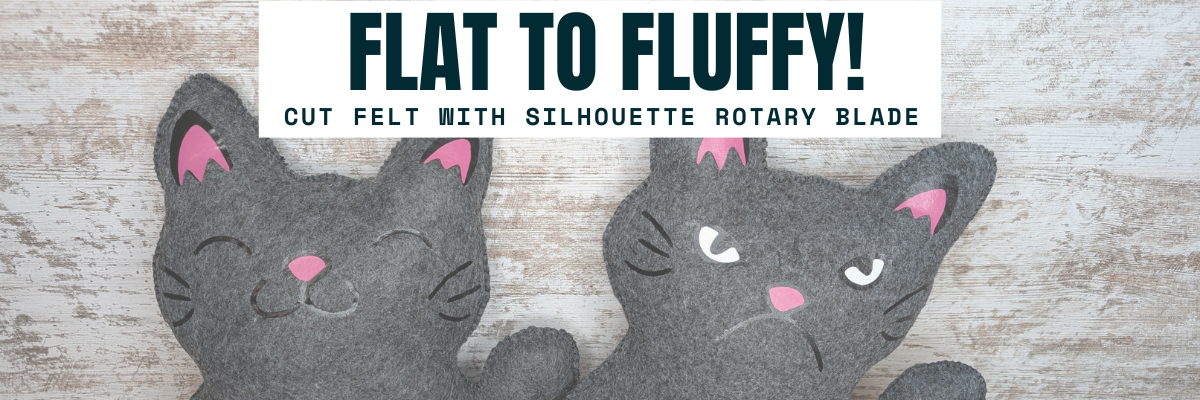
Have you ever looked at a flat cut file design and wondered if it could become something more—like a soft, squishy 3D felt stuffy? With the Silhouette Cameo and Rotary Blade, you can easily cut felt and bring your designs to life in a whole new way! I’m sharing tips in this blog post for cutting felt and how I turned a 2D digital file into a custom 3D plush using felt, a Silhouette machine, and a little creativity. Whether you’re crafting gifts, keepsakes, or fun decor, this is a must-try technique for any felt lover or Silhouette enthusiast!
Affiliate links may be present in the following blog post and as an Amazon Associate, I earn from qualifying purchases.
These designs are by Sarah Hurley and the entire project is inspired by her cat Bosh. I have followed him since his adoption and my daughter has recently been following along too. So I asked if she wanted a Bosh stuffy, even though I already knew the answer. Anyone else have projects that jump in front of the line? Fun projects seem to do that!
I brought the design into Silhouette and scaled it up for the size I wanted to create with. When working with the Silhouette Rotary blade, size does matter! Well, let’s face it – size matters for a lot of things.
I opened both designs on the same design mat and then determined the size I wanted to make it based on my machines cut width capabilities and the felt sheet size. I used a 12″ x 24″ Silhouette cutting mat so I could make it as large as I could. For this project, I selected both designs and scaled them up at the same time, so they would be similar in size and I could make a double sided Bosh for myself.
On the Send tab, select the design and choose No Cut under Tool 1 and then click on Tool 2 and choose Cut. I used the Fabric, Wool setting to cut with.
See those little blue lines that appear around the design? Those are called hooks and loops and it is how the Silhouette Rotary blade works. It has to have some way to turn the blade to get going in the next direction. It does this by either cutting a loop to turn or lifting up and making a hook to turn the blade and start a new direction.
The hooks and loops will change depending on the design and where you have things placed on the cutting mat. You can watch this in action by following the steps above to turn the Rotary action on and then moving the design around on the Send screen. The hooks and loops change based on the design, placement of the design, and what exactly is on the design mat.
I did cut the pink and black felt for the cat face, but I ended up going a different direction after cutting the felt bits. Some of them were just too small for the felt and it just pulled apart. This was a combination of the design and the actual felt itself. Even though these were the same exact brands of felt purchased from Michaels, the larger sheets were thicker than the smaller sheets. So the pink and black were different than the gray felt sheets. That makes a difference in the success of the project. Not all felt is created equal and there are different compositions.
Here is a look at what the Send tab looked like for the Pink felt pieces.
This shows the loops that the Silhouette Rotary blade uses to turn and it just depends on the design. The Silhouette software determines what is the best method for the Rotary Action. This is based on the shape of the design, placement on the design mat, and proximity to other designs on the design mat.
The pink felt designs were successful.
And then I cut the black felt for the facial features and that just didn’t work as well as there were some pretty small bits for the whiskers, eyes, and grumpy face.
Look at those hooks and loops!
It did cut, but some of the pieces were so thin that they just easily pulled apart. So I switched directions and cut black and pink Siser Easyweed HTV and used my heat press to apply it before I stitched it together.
Now, I’ll admit that I didn’t think it would work just based on my previous experience, the material, and how this specialty blade works. In the end HTV was less work for this project. You could always hand embroider the facial features on too.
I grabbed some embroidery floss and used a basic blanket stitch to stitch the sides together. I had 2 of these to stitch together, so I kicked up my feet and turned on a tv show and started stitching away.
And don’t forget to add Poly-Fil before surgically closing the stuffy up.
My daughter chose to have a single sided Bosh stuffy and I made myself a double sided Bosh stuffy. Would you choose Happy Bosh or Grumpy Bosh? Or both depending on the day?
Tips for Cutting Felt or Fabric with Silhouette
Use transfer tape on the Silhouette cutting mat to protect the mat from fibers.
Change the transfer tape after the cut because it does cut through and shifting after can cause cut issues.
Use a sharp pair of scissors to snip any fibers and bits from fabric that didn’t cut through completely.
The design matters! Small designs or interior cuts may not work well.
Hooks and Loops matter! It’s how the blade turns and changes direction.
Complex designs can crash the software if it’s too much for the rotary action. If this happens, try having less on the design mat and cutting pieces one at a time.
Here are a couple more felt projects that I’ve cut with the Silhouette Rotary blade in the past.
This Red Panda was cut with the Silhouette Cameo 4 Pro using the Rotary blade and a Strong Tack Cutting Mat. Here is a look at all the pieces before I assembled him.
And I think this might have been my first felt stuffy I created using the Rotary Blade. I know I shared photos on Facebook when I made these, but I don’t think they ever made it to the blog.
Save this for future reference by pinning the image below.
Enjoy !
THANK YOU for your support! How can you help? Click HERE & buy a coffee. Every little bit helps with the cost of running the site.
Silhouette Classes
Never stop learning! Let me help you take the anxiety out of learning with Silhouette and get to creating faster! My Silhouette classes are heavily focused on software, so you can take the skills & techniques taught and apply them to many future projects!
**This post may contain affiliate links. What that means is that I may receive compensation if you purchase through the links I have provided. The price you pay for the product or service is not higher but I may get compensated for sharing.
Looking for a creative way to level up your handmade jewelry packaging? In this DIY tutorial, I’ll show you how to create custom earring cards using Silhouette Sketching and vibrant Sakura Gelly Roll pens. These unique earring display cards not only showcase your earrings beautifully but also add a professional, artistic touch to your small business or handmade gifts. Using Silhouette Studio software and your Silhouette cutting machine, you can sketch intricate designs, logos, or text with ease. Whether you’re selling on Etsy, prepping for a craft fair, or making gifts for friends, these handmade earring cards are the perfect finishing touch!
Affiliate links may be present in the following blog post and as an Amazon Associate, I earn from qualifying purchases.
Have you ever made custom earring cards with Silhouette? How about sketched with your Silhouette machine? Why not combine the two and create custom earring cards? I created the projects shown in this post to send with a gift to a friend.
Customize your designs for your specific project, a gift, or just because!
Keep in mind the software and machines are designed as cutting machines, so the red “cut” lines on the screen are exactly how a sketch pen will sketch out. It will sketch the outer lines of a “cut” file. If a design or font is not filled in, the sketch pen will not magically fill things in unless it’s told to.
If you want a design or font to be filled in by a pen, you can use the Sketch Panel/Line Effects Panel to add a fill. Keep in mind that the sketch fill pattern will affect the time to sketch the design. When a design or font is filled in with a small sketch fill pattern, that pen is going over and over an area just like if you were filling in a design or font by hand with a pen. That can mean that it cements the paper to the cutting mat, so be careful removing the materials from the mat.
Sketch designs, fonts, or single line fonts can work better for sketching without having to do much to alter the designs.
However, not all sketch designs or fonts are truly designed for sketching. The file name may simply include sketch, so it’s always good to click on the Send tab and take a closer look to see where the pen may travel to get an idea of what it will turn out like.
Install the pen in the Silhouette machine and test.
The Silhouette pen holders allow for a wide variety of pens to be used in the machines. The installation process is the same no matter if using the Silhouette Type A, Type B, or Type C Pen Holders. Find the collar that fits the best for the size pen you are using and make sure it’s secure.
Did you know that the cap on the Silhouette pen holder has a purpose? Keep the cap! Place the cap on the pen holder when you install the pen and when the tip of the pen touches the cap, that is your pen depth. This should work for most pen types and all Silhouette pen holders.
If needed, you can also use a popsicle or craft stick placed underneath the pen tip when you insert the pen holder in the machine. This will show you if the pen is too far down in the adapter or installed at the correct height. Pens installed too low in the adapter have a greater chance of drawing drag marks.
Silhouette Cameo 3 with Type A Pen Holder
If the pen is too low, simply remove it and lift it up in the pen holder a bit before tightening the collars. Proper setup and testing will save you frustration and drag lines across your project.
If you are working on a project with specific materials such as envelopes, etc. Test on cardstock first to save your more expensive materials.
Sketching a Designwith Silhouette
If sketching and cutting a project, set up the design to Cut by Line Color. I use red lines for the cut lines and blue lines for sketch lines.
I recommend sketching first and then cutting, so there is less chance that the design will move. Do NOT unload the cutting mat after the design has sketched.
Uncheck the sketch lines and check the box next to the cut color, install a blade, and send the job to cut.
Just get started! Set it up to sketch and just start selecting designs and sketching. It is so much fun to just play around with it, even if you do not have a specific project or purpose in mind. Grab some cardstock and set up the machine to sketch and just play!
Save this for future reference by pinning the image below.
Enjoy !
THANK YOU for your support! How can you help? Click HERE & buy a coffee. Every little bit helps with the cost of running the site.
Silhouette Classes
Never stop learning! Let me help you take the anxiety out of learning with Silhouette and get to creating faster! My Silhouette classes are heavily focused on software, so you can take the skills & techniques taught and apply them to many future projects!
**This post may contain affiliate links. What that means is that I may receive compensation if you purchase through the links I have provided. The price you pay for the product or service is not higher but I may get compensated for sharing.
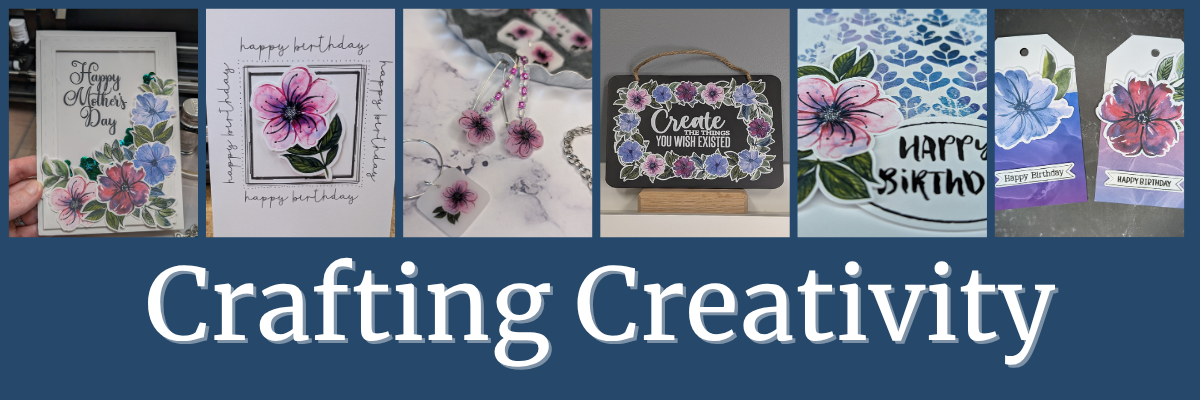
Welcome to this edition of Crafting Creativity, featuring the bold and beautiful abstract floral designs by Clikchic Designs! These eye-catching patterns are the centerpiece of a wide range of creative projects that highlight the versatility of digital designs. From a custom shaker card and sketch-style greeting cards to shrink plastic tool charms, bracelet charms, earrings, wine charms, and a personalized chalkboard sign—these florals bring a fresh and modern flair to every creation. You’ll also see them used in card backgrounds and oversized tags, offering endless possibilities for crafters of all kinds. Get ready to be inspired by how one design collection can do so much!
Affiliate links may be present in the following blog post and as an Amazon Associate, I earn from qualifying purchases.
Crafting Creativity with Clikchic Abstract Florals
Project #1 – Custom Shaker Card
I set this up to print on a 12″ x 12″ sheet of cardstock. The only thing that did not fit on one sheet was the frame. It could easily be cut using letter size cardstock too.
I added a bit of sparkle on top of the flowers with a shimmer pen and love it. The hardest part is getting that to show up well on photos.
My mom loved it!
Don’t forget to add your shaker bits before you adhere the acetate & frame down. I got excited and forgot, so I had to peel up a corner and add them in. Nothing like making a project harder than it needs to be.
I drew out 2 rectangles and applied different Sketch Effects to them to create the sketched squares, then added a sketch sentiment around the outer edge of the border using a font called Flannel Shirt Sketch.
I then added some foam tape on the back of the Abstract Floral designs and added those to the center of the sketched frame to give it some dimension.
Next, I sketched a couple more with a premade frame called Dot Frame Sketched.
I think this one is my favorite of them all, but I think I’m drawn to this pink flower for some reason.
They are all gorgeous when paired with the Abstract Floral designs by Clikchic Designs.
I added the random dots around the edge of the square frames by hand after the card was sketched. I could have set it up in the software and had the machine do it perfectly, but it might have also smooshed the tip of my pen. This gives each card a randomness to it as well and makes it unique.
I used the default settings in the Silhouette Studio software to start with. Here is a look at the Send tab when I sent this page to cut.
Larger shrink plastic designs can be interesting when they shrink and you just have to keep going to get them to flatten out. Sometimes, they will also not be a uniform shape at the end. I think that adds to their uniqueness and can be fun to see what happens.
Custom tool charms are a great way to mark your scissors either for a specific purpose or to identify them when you go craft with friends. They are also handy to help you locate them on your craft table if they like to hide in a “safe” place often.
Any type of plastic will dull the blade quicker than other materials, so it is not uncommon to have to increase the settings the more you cut.
There are several brands of shrink plastic out there and they can all be a bit different. I cut both Silhouette Shrink Plastic and Grafix Shrink Plastic during this process. I was using an older blade and I think it’s about done for now. It was having a hard time cutting through the Grafix Shrink Plastic in clear.
Test cuts are really the only way to know what is going to work with your blade and materials.
Two “secrets” of mine are:
I’ll take a blade that isn’t cutting other materials such as cardstock or HTV well and move it to my shrink plastic blade. I get a bit more life out of my blades this way.
Do not unload the cutting mat after the cut and check it first. If it did not cut through, you can increase the settings and send it again until it does cut.
I started by measuring out the size of this chalkboard sign and then drew a rectangle the same size in Silhouette Studio. Then I just started adding the abstract floral designs and moving them around to create a floral frame.
Did you know that vinyl goes bad? Yep! I started this project using Silhouette Printable Vinyl, which I love for the print quality. However, it must have been an old package because it would not weed properly and was separating. I ended up using Orajet 1917 that I’ve had in my craft stash for many, many years and it cut beautifully.
There is a shelf life for vinyl and other craft products such as pens, paint, string, inks, tape, etc.
What is the lifespan of vinyl? Well, there really isn’t an exact date or time as you never really know how long it’s sat on a retailers shelf or the manufacturer’s shelf, etc. And other factors play into it as well, such as temperature, humidity, etc. You will see many mention 2 years when stored properly. But, you never really know how it was treated before you bought it. I have some vinyl that I still try to cut even though I know it’s like 7 years old. Sometimes it works and sometimes it doesn’t.
How can you tell if it’s gone bad?
The 2 most obvious signs I have found is that it can separate when you try to weed it and it’s a bugger to work with no matter your troubleshooting or cut settings. These 2 things can present themselves by the adhesive can visibly be separating from the actual vinyl or the vinyl will not easily come off the backing paper.
Usually I try to push through and I always end up kicking myself for working so hard to try to salvage it.
However, the final way I know the vinyl has gone bad is when I get a new good piece and it weeds so smoothly. And that’s when I end up kicking myself.
For this project, I lost a few letters of the text in the middle, so I just ended up cutting the text from a scrap of Oracal 651 in white and adding that on to the project. A great use of scraps!
When I do a print and cut page, I will fill the page with extra designs and this month I had a good bunch of the florals left over to create with. So I set about brainstorming what I could do with the left overs.
I was browsing Pinterest and found an idea where they created custom backgrounds with a stencil and inks. Why not do that with a stencil design & digital patterns?
Here is a look at the first ones I created.
The next set, I started playing around with the orientation and mixed it up a bit.
I had so much fun playing around and creating backgrounds with different pattern papers.
Whether you need a design 2″ or 6″, you can do it with your cutting machine. You can create things whatever size you want.
These tags are 3.5″ wide and 6.125″ tall. I used the Project Wizard in Silhouette Studio to create the basic tag design and cut from 110 lb Neenah cardstock.
I used up the last 2 flowers and bits of greenery I had printed on cardstock and combined that with a patterned paper I designed and printed when I shared the tutorial on Creating Custom Background Patterns in Silhouette.
Follow Clikchic Designs for more inspiration on her website, Facebook, and Instagram. I love watching the videos of how the designs are created. I love how she takes something that she has physically painted and turns it into a digital file so we can all enjoy and create with her amazing artwork!
From handmade cards to custom jewelry and home décor, the possibilities with these abstract floral designs by Clikchic Designs are truly endless. Each project in this Crafting Creativity edition showcases how one digital collection can be transformed into a wide variety of unique creations. Whether you’re crafting with paper, shrink plastic, or chalkboard materials, these versatile florals add a bold, artistic touch to every piece. We hope you’re inspired to explore new techniques and think outside the box with your next project.
Save this for future reference by pinning the image below.
Enjoy !
THANK YOU for your support! How can you help? Click HERE & buy a coffee. Every little bit helps with the cost of running the site.
Silhouette Classes
Never stop learning! Let me help you take the anxiety out of learning with Silhouette and get to creating faster! My Silhouette classes are heavily focused on software, so you can take the skills & techniques taught and apply them to many future projects!
**This post may contain affiliate links. What that means is that I may receive compensation if you purchase through the links I have provided. The price you pay for the product or service is not higher but I may get compensated for sharing.
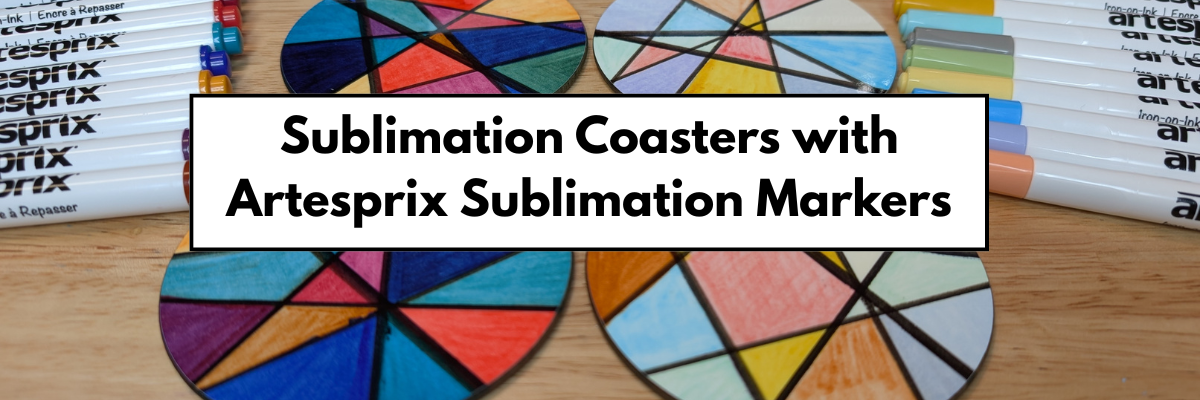
If you’ve been curious about trying sublimation, this is the perfect place to start! I’m sharing a beginner-friendly project —DIY abstract coasters using Artesprix Sublimation Markers. The Artesprix Sublimation markers make it so easy to play with color and design, no matter your skill level. Whether you’re brand new to sublimation or just looking for a quick, creative project, these coasters are a fun way to jump in. Grab your heat press and let’s create something bold, vibrant, and totally unique—no perfection required!
Affiliate links may be present in the following blog post and as an Amazon Associate I earn from qualifying purchases.
This is a project that anyone, even little ones, could do! There is no wrong way to do it.
This is a great way to see what all the colors in the marker sets will look like when heat pressed. With sublimation inks, they will appear duller until the high heat and pressure is applied and that is when the colors really pop.
Here is a closer look at the finished Artesprix polished sublimation coasters.
I would recommend letting the copy paper dry completely after adding in the colors. Mine was still a bit damp in areas from my coloring and you can see a few spots where the black bled a little bit. But, that’s what also makes it unique! It does not have to be perfect or match anyone else’s design.
THANK YOU for your support! How can you help? Click HERE & buy a coffee. Every little bit helps with the cost of running the site.
Silhouette Classes
Never stop learning! Let me help you take the anxiety out of learning with Silhouette and get to creating faster! My Silhouette classes are heavily focused on software, so you can take the skills & techniques taught and apply them to many future projects!
**This post may contain affiliate links. What that means is that I may receive compensation if you purchase through the links I have provided. The price you pay for the product or service is not higher but I may get compensated for sharing.
THANK YOU for your support! How can you help? Click the link to buy a coffee. Every little bit helps in the cost of running the site.